Reformatting an SSD to completely erase existing data is done using native Windows/macOS methods such as File Explorer or Disk Management in Windows and Disk Utility in macOS. To quickly format a drive on Windows, simply right-click on the drive in File Explorer and select Format from the context menu. For direct access to the operating system without any graphical interface, the terminal is the best option. In this expert-reviewed article, we will look at every method for how to reformat SSD with step-by-step processes. Just make sure that you check off the following checklist before trying to reformat the SSD:
You have an up-to-date backup of the drive data.
Confirm you selected the right drive.
Choose the right file system.
Quick Answer: Reformat SSD quickly on Windows using File Explorer. Simply select the drive in File Explorer, right-click it, and select Format. To reformat a drive on macOS, open Disk Utility, select the drive, and click the Erase button. Now, configure the format and click OK.
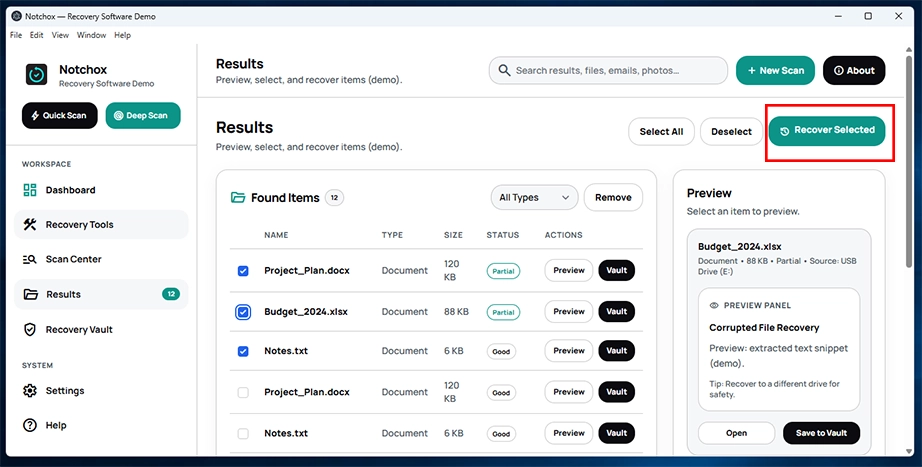
Make sure to recover the data before reformatting the drive using reliable data recovery software such as Notchox.
How to Reformat SSD on Windows 10 and 11?
Windows provides several methods to reformat an SSD. Choose the right tools based on the drive’s current status. Formatting prepares your drive for fresh data storage. This section covers the 4 most effective methods to format SSD drive along with special-case scenarios, explaining what to do when Windows is unable to complete the format.
First, we will use File Explorer for a standard quick format of an active drive. Second, we will use Disk Management to initialise and format the SSD. Finally, we will see how to reformat the SSD using the Command Prompt (DiskPart). Lastly, we will cover formatting your primary drive directly within the Windows Setup media tool during a fresh OS installation.
Method 1: Quick Formatting an SSD Using File Explorer
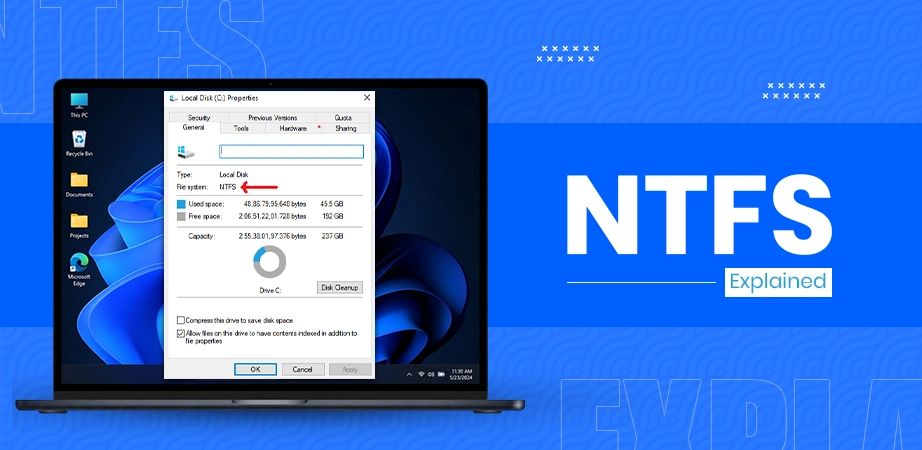
The quickest method for formatting Solid State Drive on Windows 10 and 11 is using File Explorer. This is ideal for working with secondary drives that already have a designated drive letter. It wipes the file directory to free up space and optimizes performance by choosing the correct file system. You can choose NTFSfor exclusive Windows use or exFAT if you need cross-compatibility with macOS systems.
How to format a Solid State Drive using File Explorer:
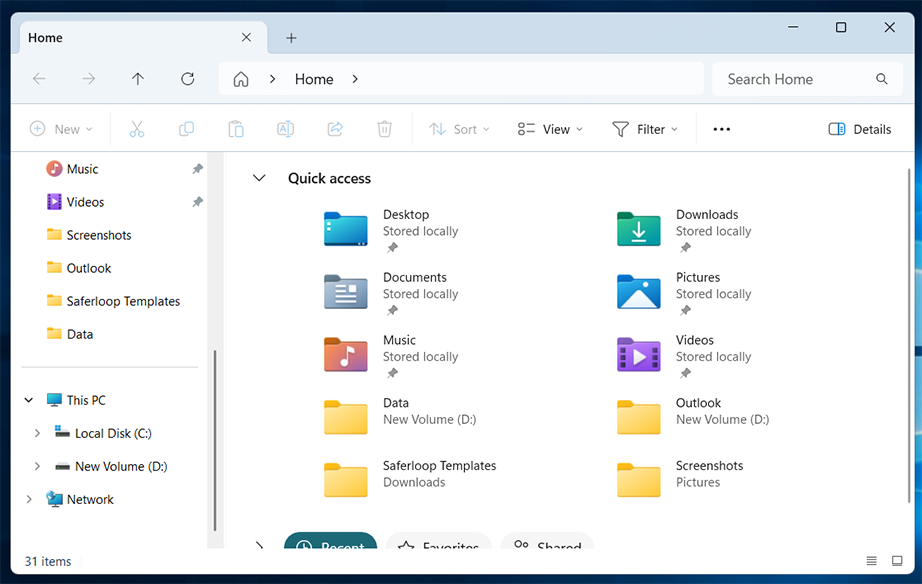
Press the Win + E keys simultaneously on your keyboard to open File Explorer.
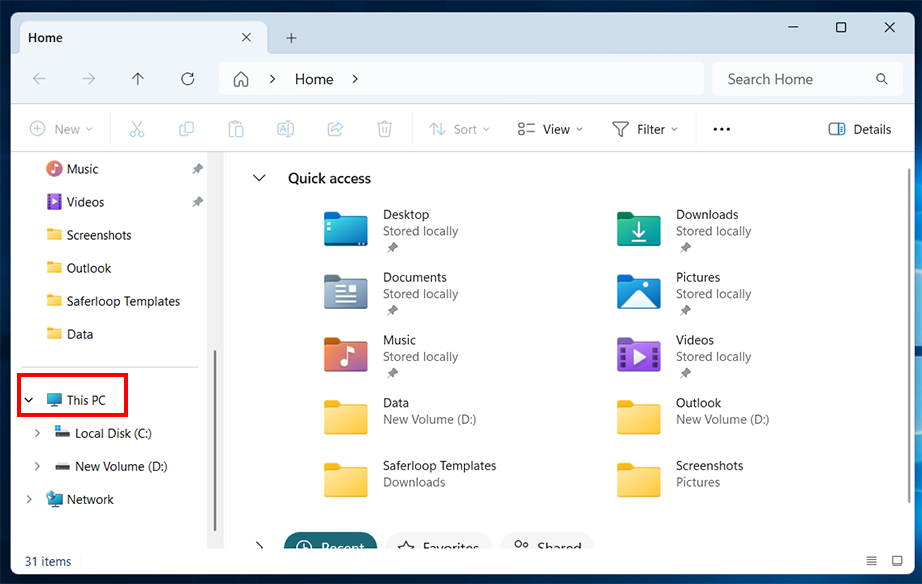
Click This PC from the left-side navigation.
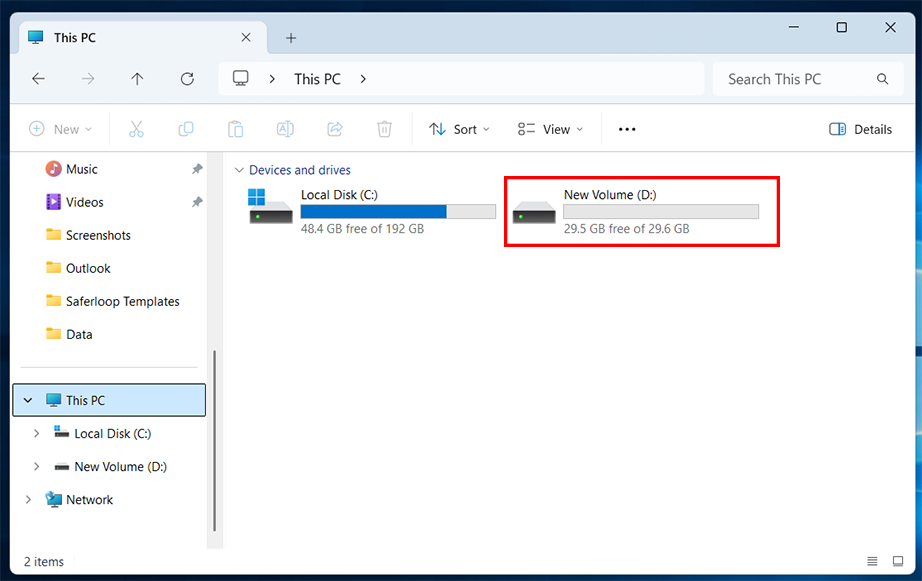
Find your target solid-state drive under the Devices and drives section.
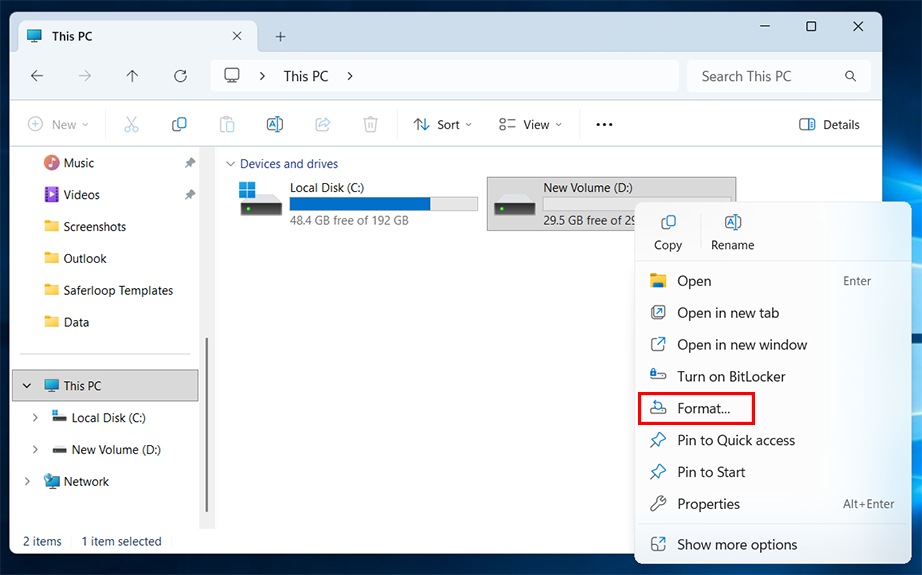
Right-click on the SSD icon and select Format… from the contextual drop-down menu.
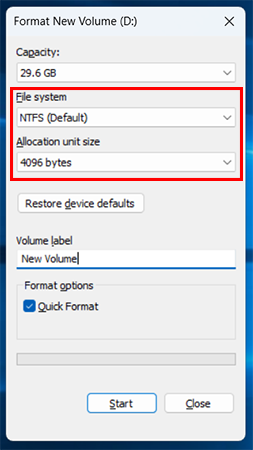
Click thefile system drop-down menu and select NTFS or exFAT. Leave the Allocation Unit Size at its default setting.
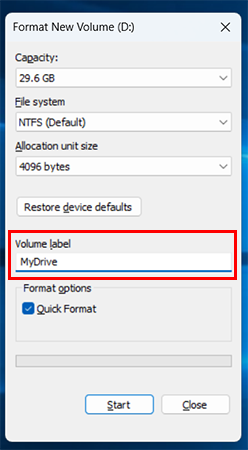
Enter a preferred name for your SSD in the Volume label text box so you can easily identify it later.
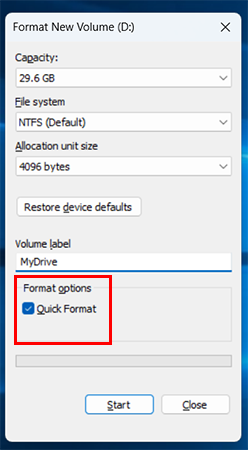
Ensure that the checkbox next to Quick Format is checked.
Note: Leaving this checkbox unchecked triggers a full format that causes unnecessary write wear on the SSD.
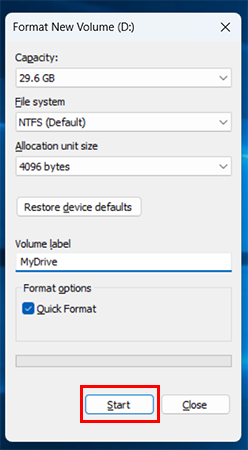
Click the Start button at the bottom of the window.
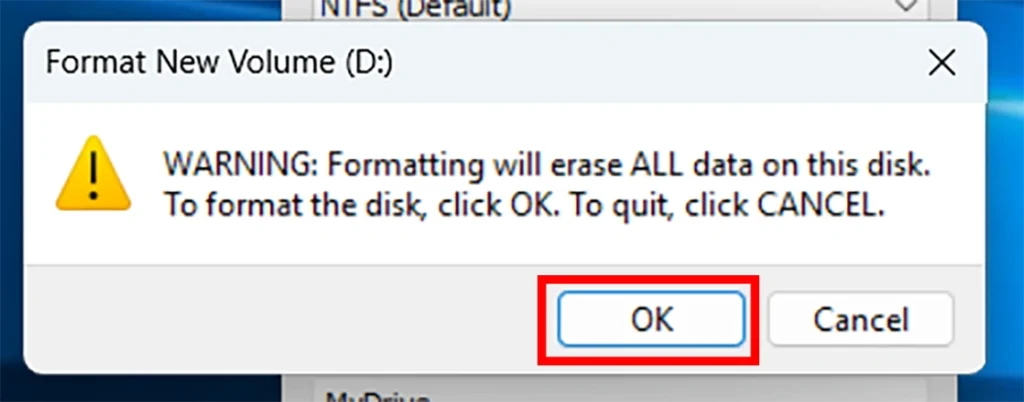
Click OK on the warning pop-up box to confirm that you want to erase all data on that drive.
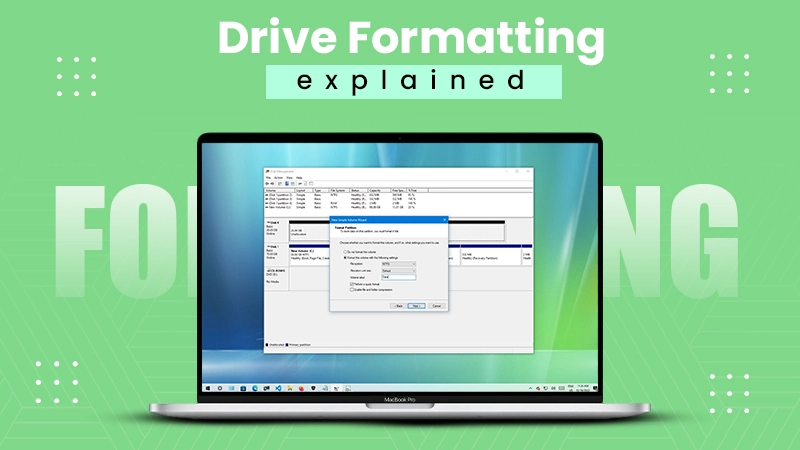
Method 2: Using Disk Management for New or Unallocated SSDs
A brand new or unallocated SSD that doesn’t appear in File Explorer can be formatted using Disk Management. This Windows utility lets you initialise the drive, partition it, and assign a drive letter. This way, your operating system recognizes the storage hardware properly.
Steps to format new SSD using Disk Management:
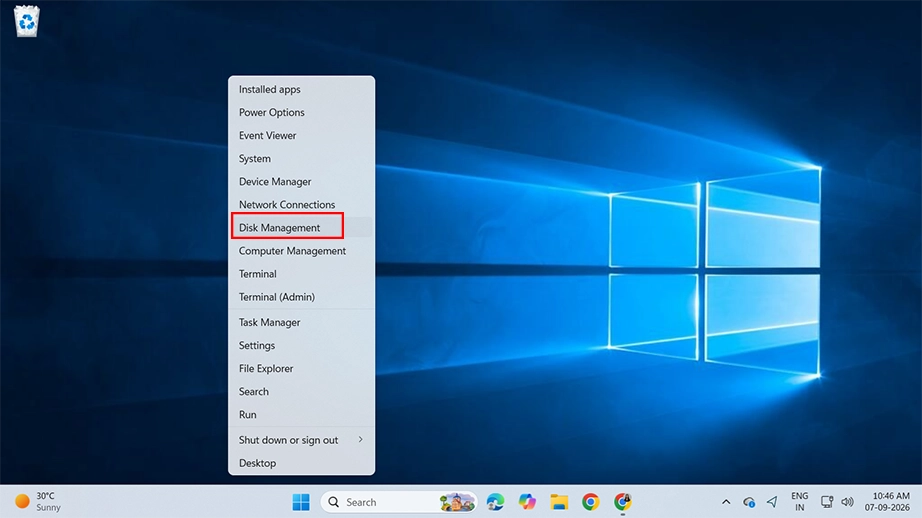
Right-click the Windows button in the taskbar and select Disk Management.
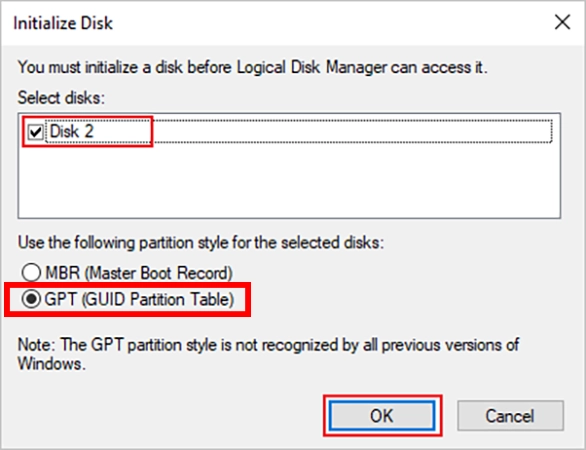
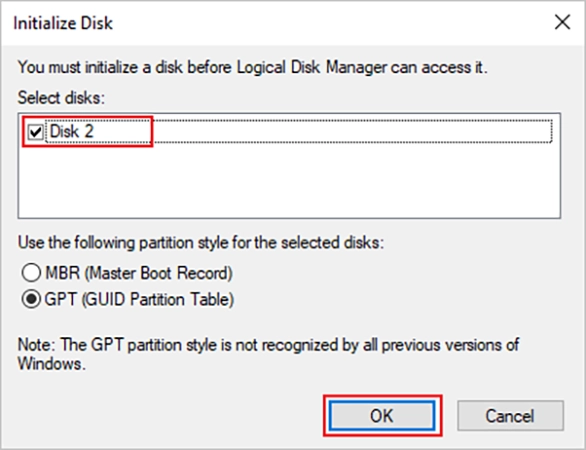
If the drive is new, a pop-up window will automatically appear asking you to initialize the disk. Select GPT (GUID Partition Table), which is required for modern systems and Windows 11 compatibility.
Click OK to apply the changes.
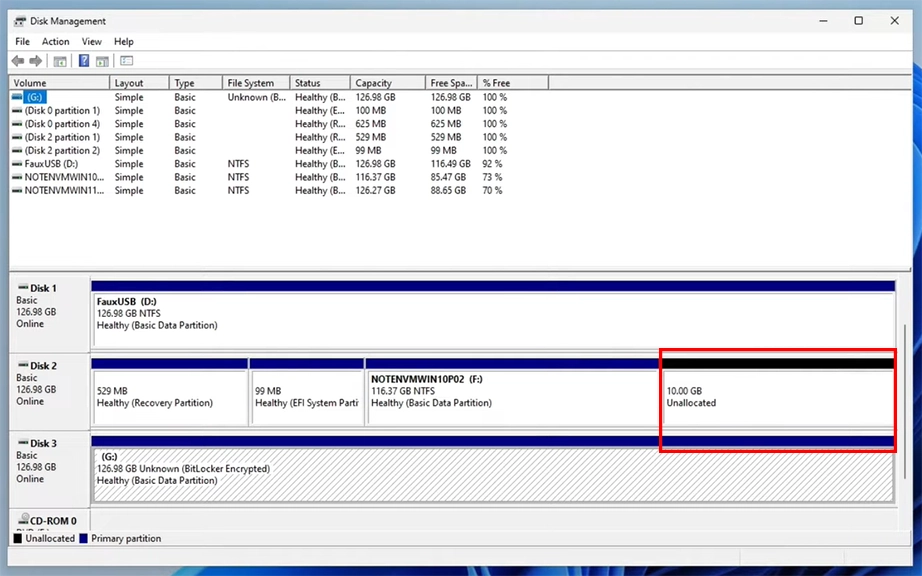
Scroll down and find your SSD. If not yet labeled, it will be marked as Unallocated.
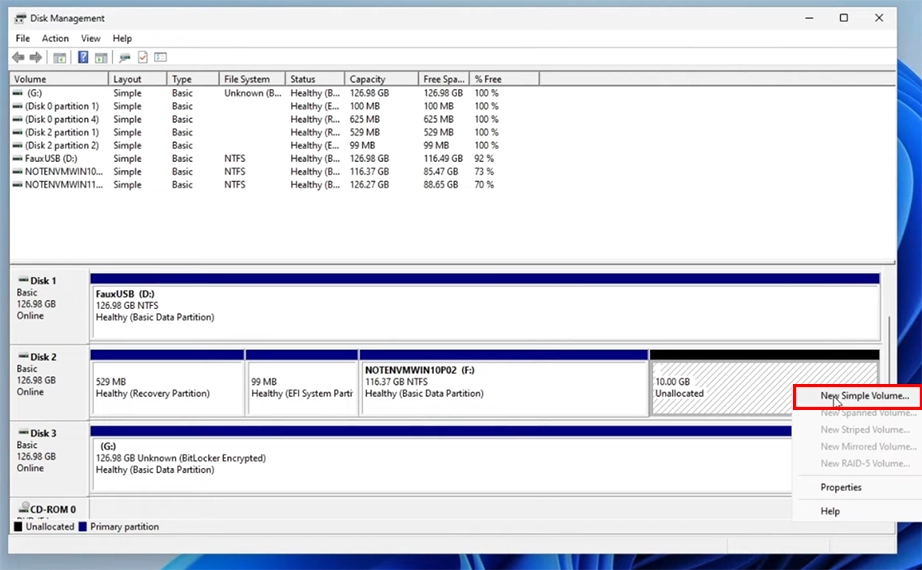
Right-click the black Unallocated space and select New Simple Volume… from the menu.
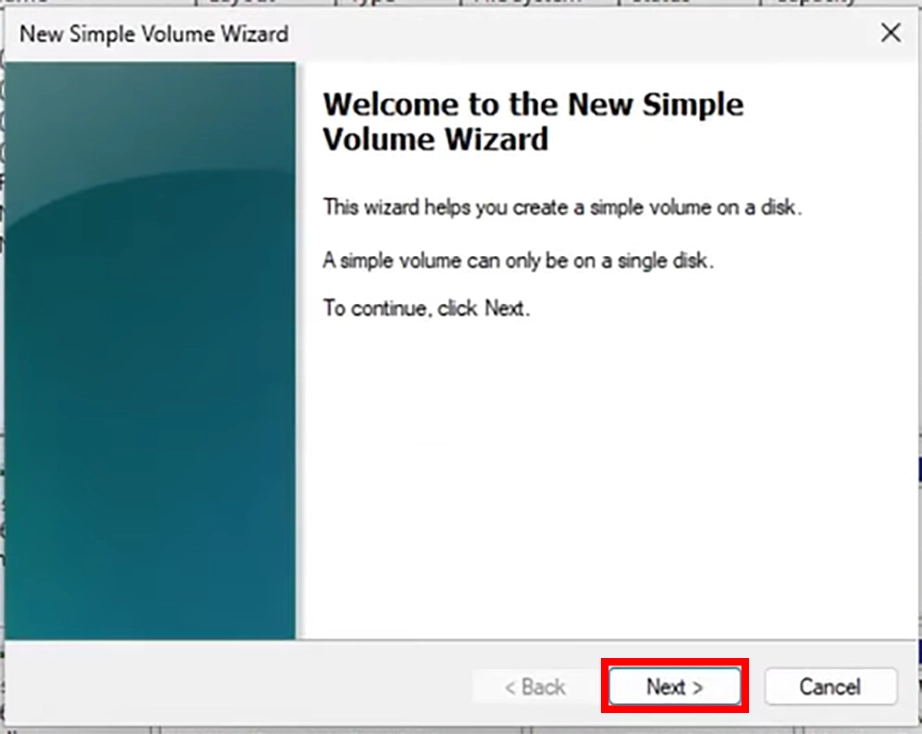
Click Next on the welcome screen.
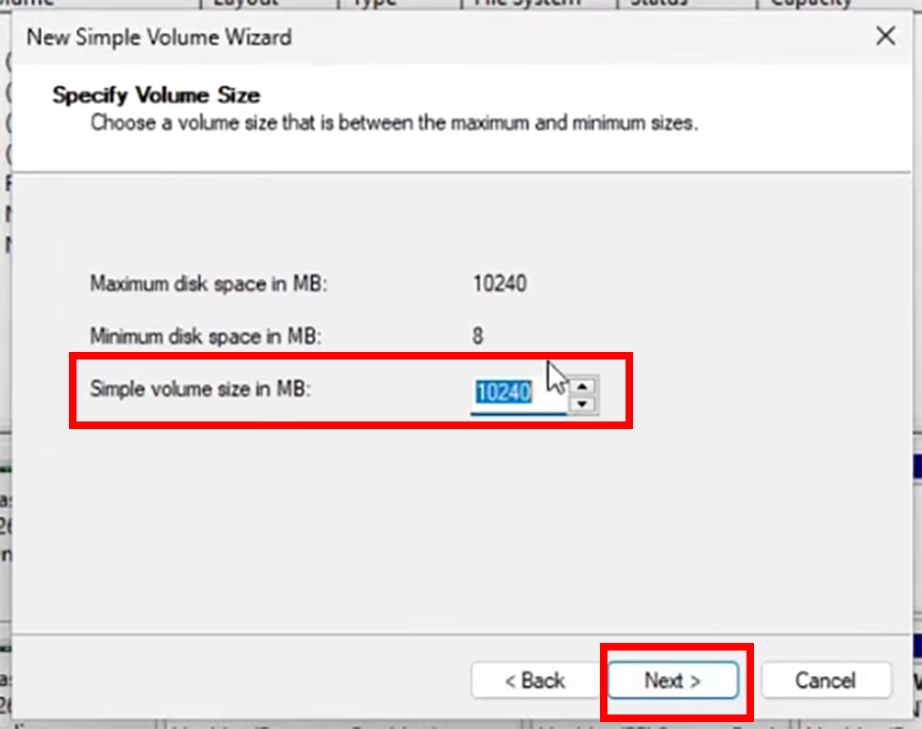
On the next screen, leave the volume size at its maximum default number to use the entire drive space, then click Next.
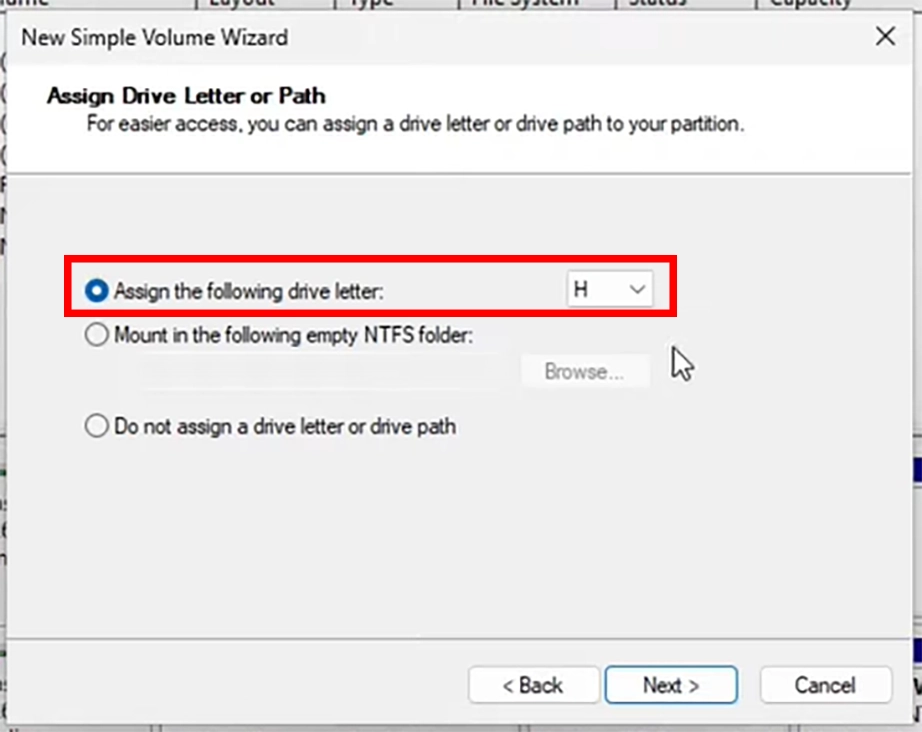
Choose an available drive letter from the drop-down menu and click Next.
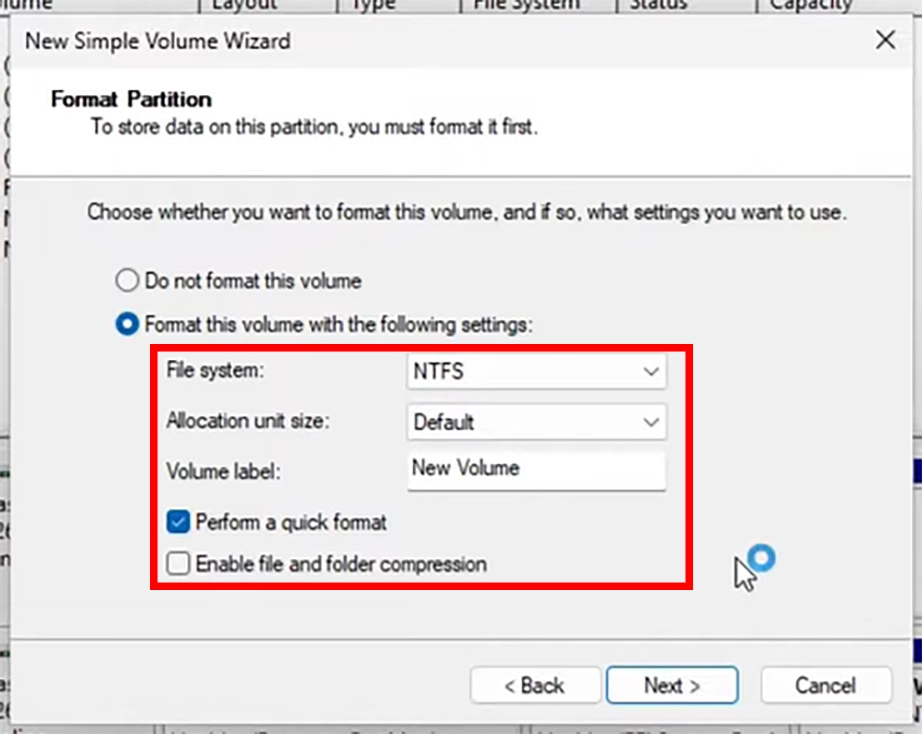
Configure the File System Settings:
Set File System to NTFS or exFAT.
Leave Allocation unit size at Default.
Type a preferred name in the Volume label field.
Check the box for Perform a quick format.
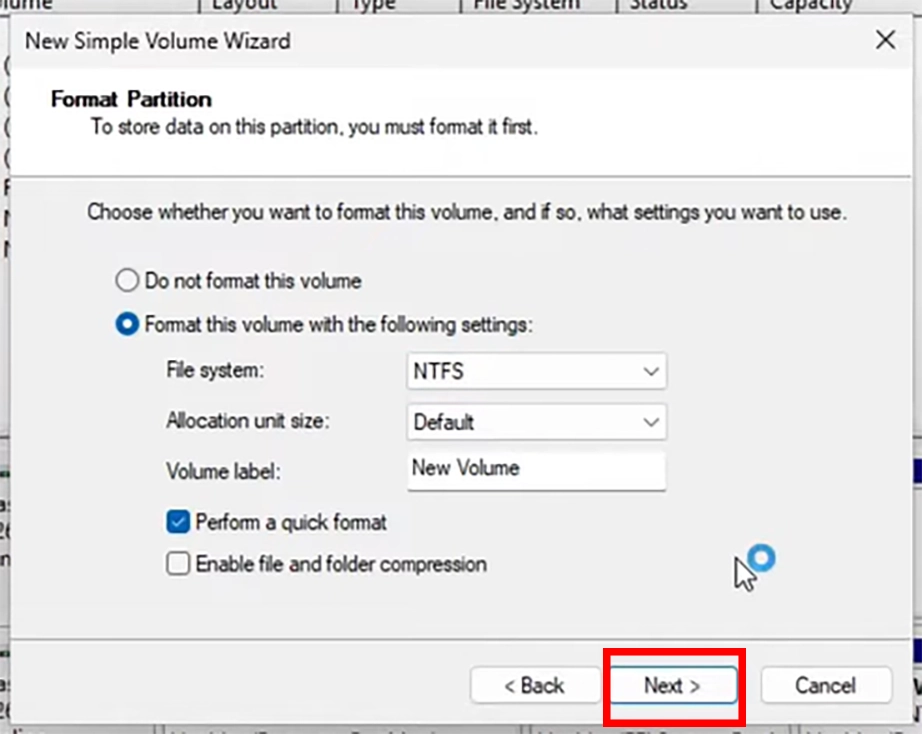
Click Next to review your chosen settings.
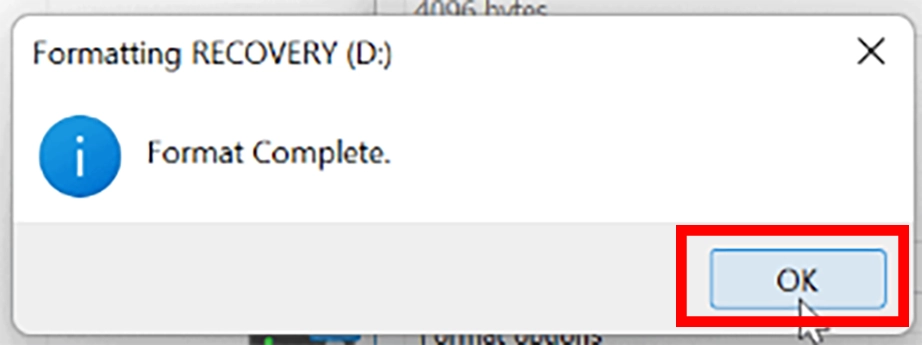
Click OK once the process is completed. The black bar will turn blue, and your SSD is now ready for use.
Method 3: Reformat SSD Using Command-Line DiskPart
The next direct, non-chaotic method to reformat SSD is using Command Prompt. This can be used if your SSD becomes unresponsive, corrupted, or when it shows errors during a standard format because it bypasses the standard Windows interface to clear the drive at the system level.
How to reformat SSD drive using Command Prompt (DiskPart):
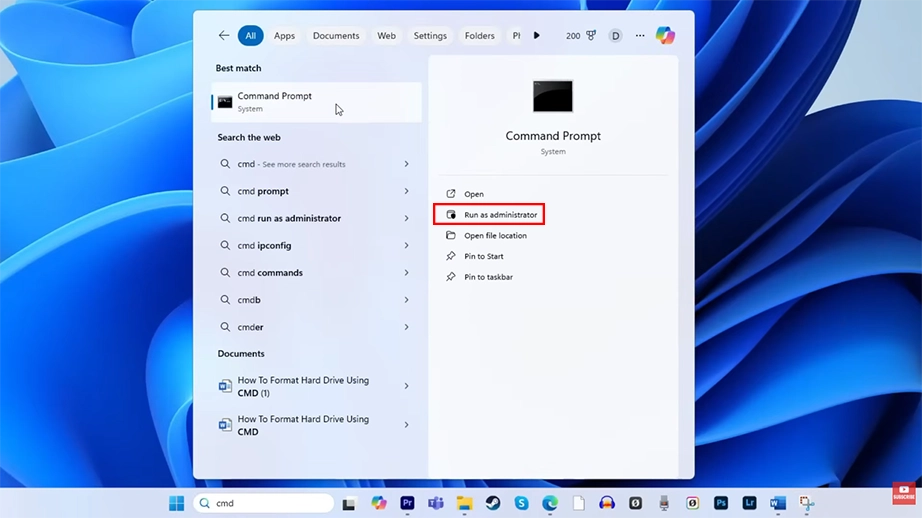
Click the Windows Start menu, type cmd into the search bar, and select Run as Administrator next to Command Prompt.
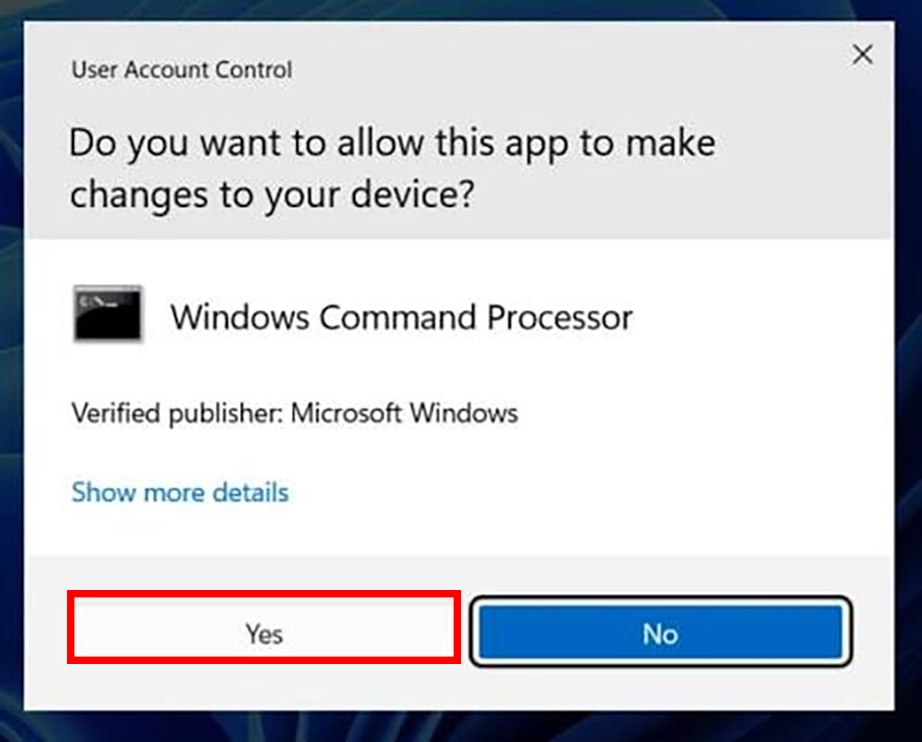
Click Yes if a confirmation prompt appears.
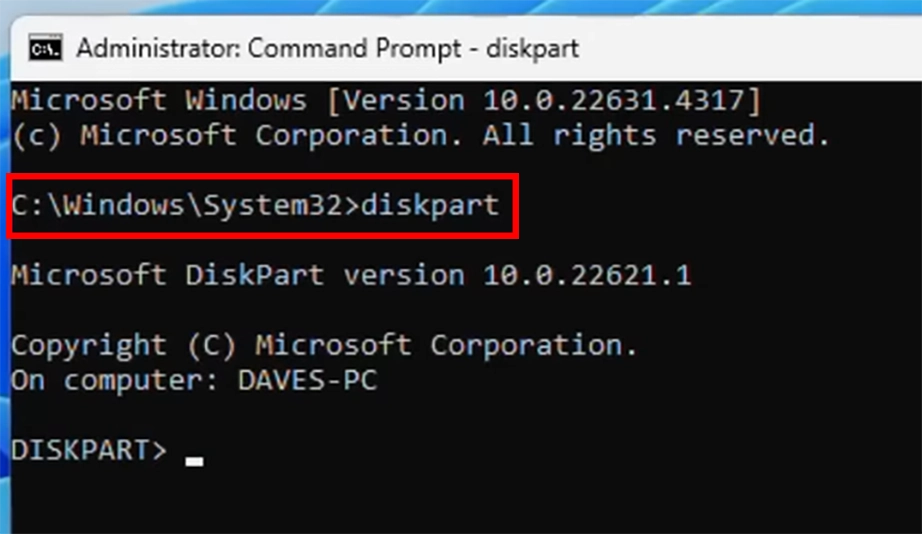
Type the following command to enter DiskPart, and press Enter:
diskpart
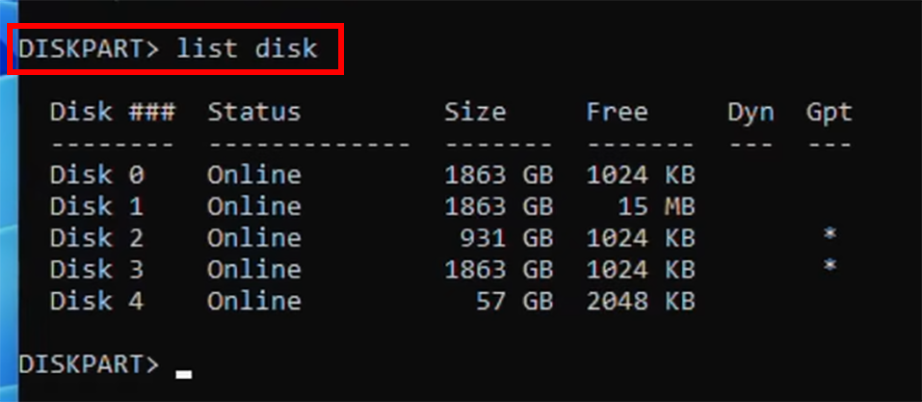
Now that the command line changes to show DISKPART>, type this command to display a list of all storage attached to your computer and press Enter:
list disk
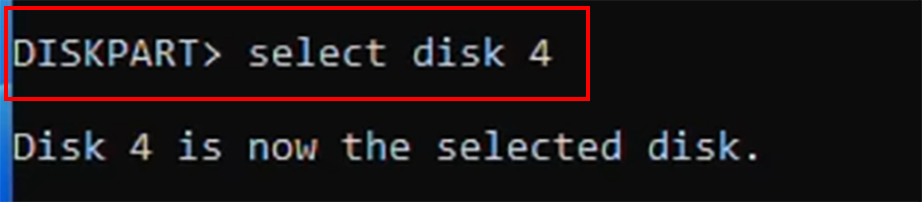
Identify your SSD by its storage size, then type this command and press Enter:
select disk X
Next, clean the drive, i.e., erase all existing partitions, hidden files, etc. Type the following command:
clean
Enter this command to build a fresh and healthy data foundation on the drive:
create partition primary
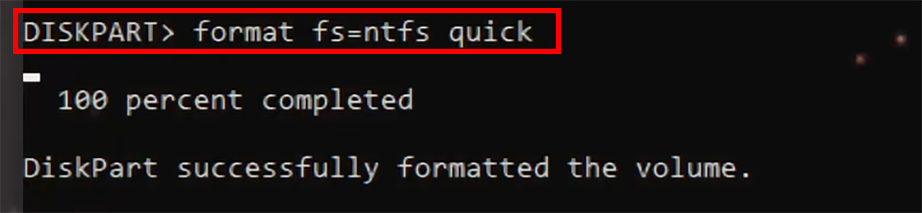
Command to apply a Windows file system to the drive:
format fs=ntfs primary
Lastly, to assign an accessible drive letter in File Explorer, type the following command in the command prompt and press Enter:
assign
or
assign letter=x
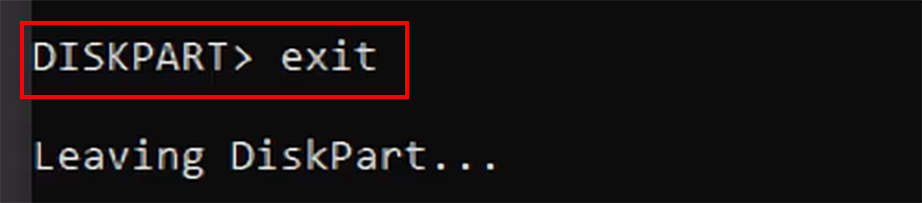
Your drive is successfully formatted and assigned a new drive letter. Enter this command to exit DiskPart:
exit
Troubleshooting the Drive Errors
Troubleshooting
What to do?
Drive is not visible in File Manager
Access the drive using Disk Management
Drive is write-protected
Use the DiskPart terminal command
Disk is online but not stable
Recreate the volume using Disk Management
Drive capacity looks wrong
Access the drive using Disk Management
Windows was unable to complete the format
Format the drive using Command Prompt
Method 4: Format SSD After Windows Install
Formatting an SSD during a clean Windows installation is necessary when upgrading your primary drive or completely reinstalling your operating system. This method relies on bootable Windows installation media to wipe the storage hardware before any files are loaded.
If you are looking for how to reformat a SSD from BIOS, this is the alternative method because BIOS lacks operating system tools.
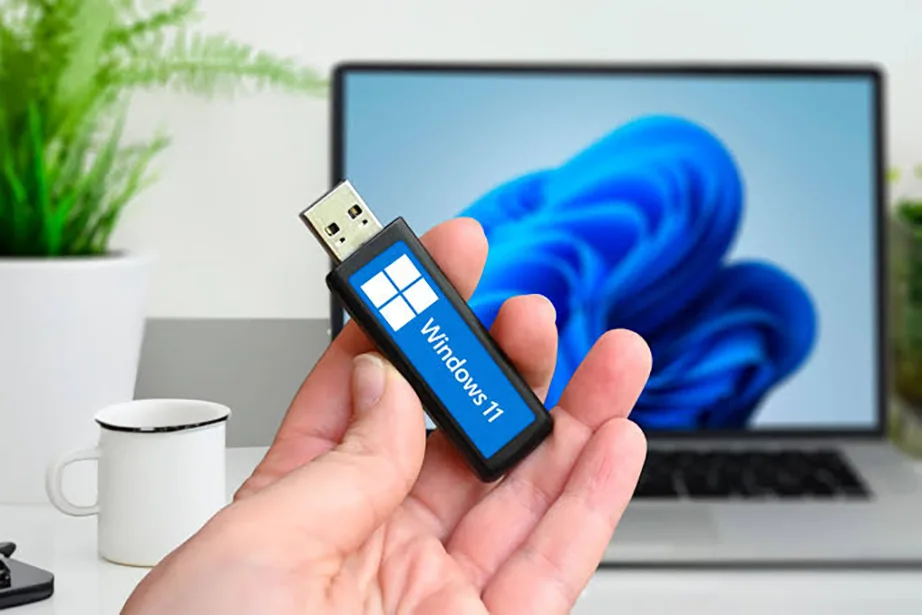
Insert your Windows 11 bootable USB drive, restart your PC, and press your system’s boot key (usually F8, F11, or F12) to boot from the USB.
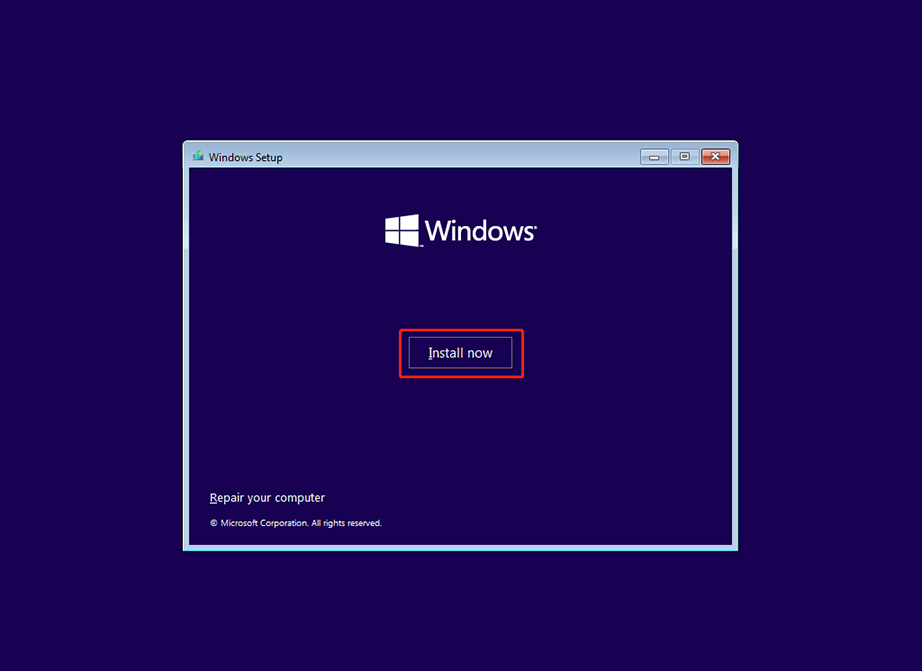
Select your language and keyboard layout, then click Install Now.
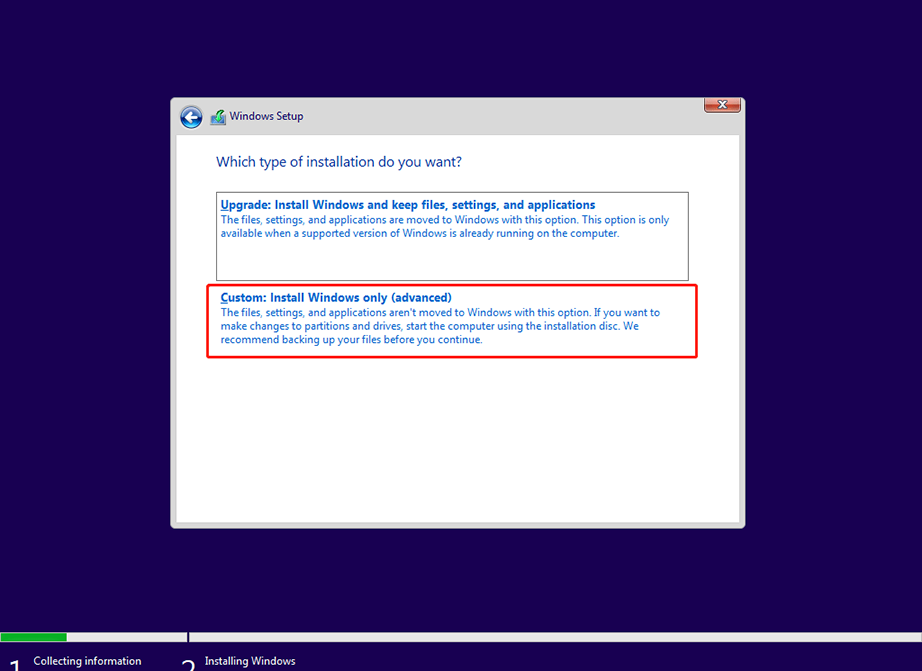
Enter your product key and choose Custom: Install Windows only (advanced).
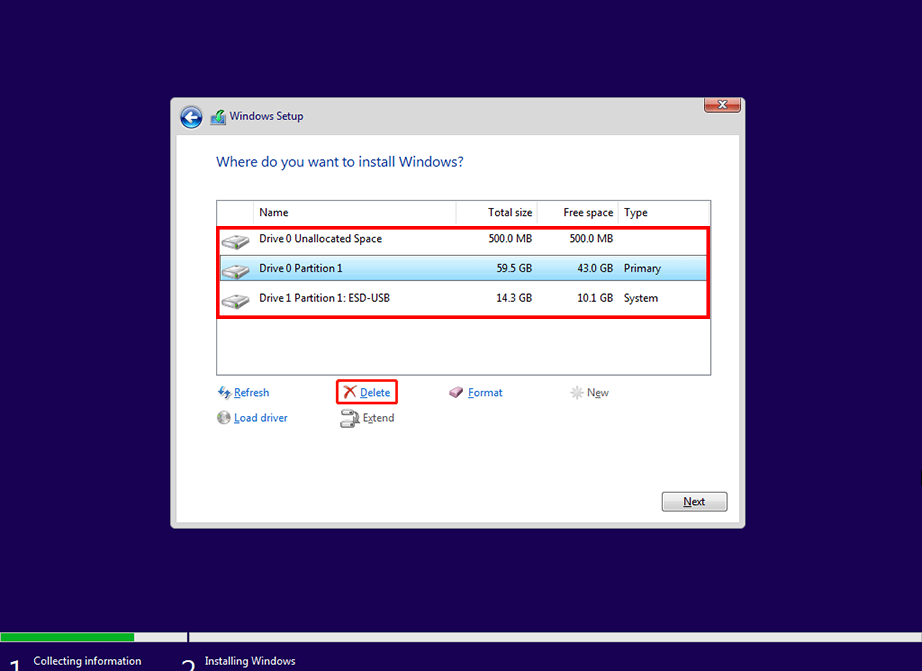
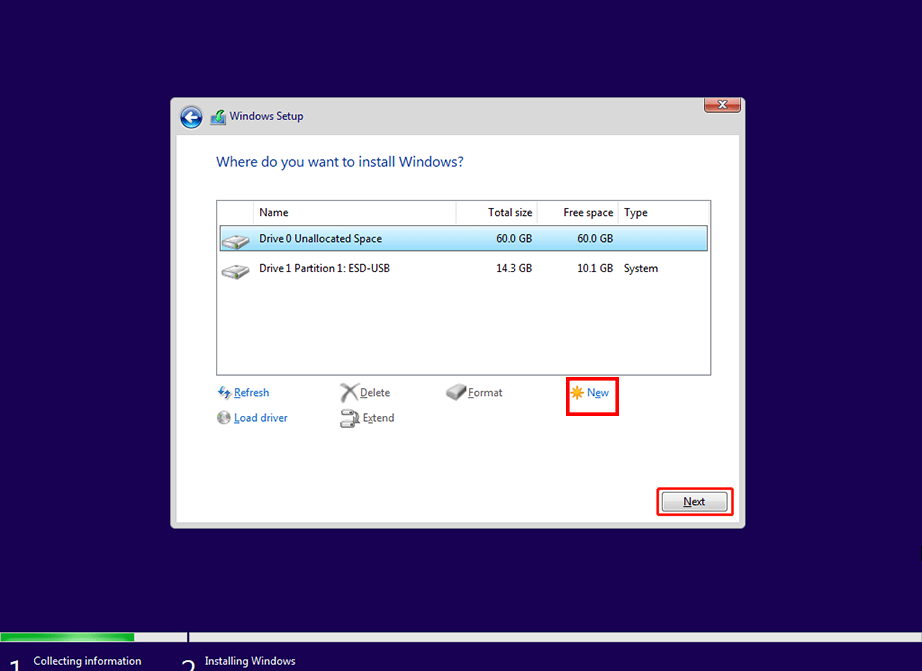
Look at the list of drives and partitions displayed on the screen.
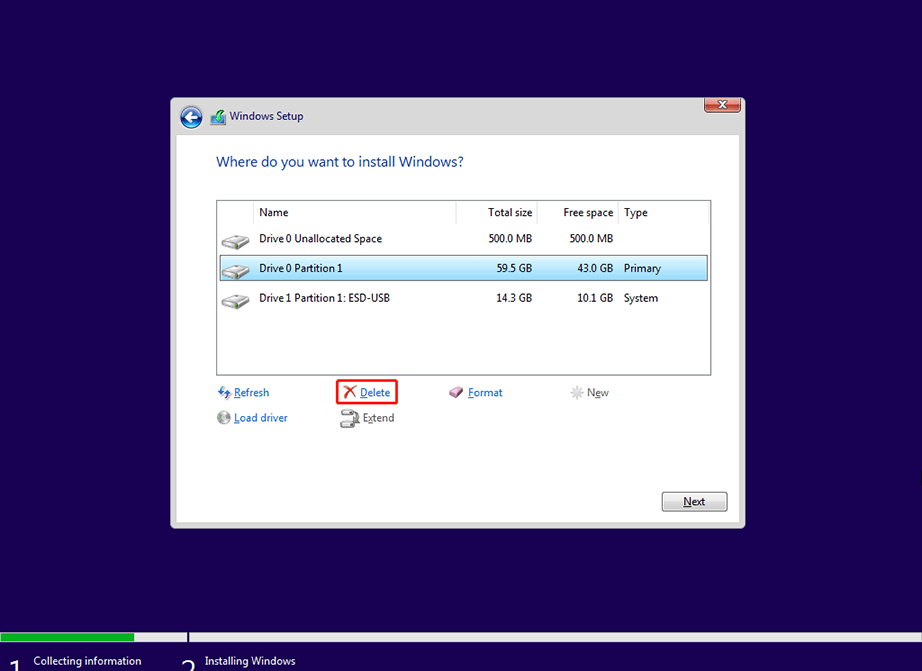
Select each partition on your target SSD one by one and click the Delete button. Repeat this until the drive shows a single item labeledDrive X Unallocated Space.
Click on the Unallocated Space, click the New button, and click Apply to automatically create the required system partitions.
Select the largest newly created partition, then click the Format button to reformat the SSD safely.
How to Format SSD on macOS?
Formatting/ reformatting SSD on macOS is a straightforward process, whether you’re making an external backup drive or an internal drive. Apple provides two native tools to handle this. The primary method is using Disk Utility, which is a visual application good for quick partition management and drive erasing. The next is the Terminal command-line interface, which is more of a technical and system-level method. When you format an SSD on macOS, the system performs three quick steps:
Unmounting the drive to safely disconnect active files,
Wipes the old data index, and
Creates a fresh GUID Partition Map.
Let’s look at how to reformat SSD using these methods one by one:
Method 1: Formatting a Mac SSD Using Disk Utility
For users running modern operating systems like macOS Tahoe, Disk Utility is the most reliable visual tool to reformat SSD. It manages both internal and external storage drives. You can erase existing data volumes and partitions. Being a built-in graphical interface, it is the safest approach to prepare storage hardware without any complex code.
How to reformat SSD drive on Mac using Disk Utility:
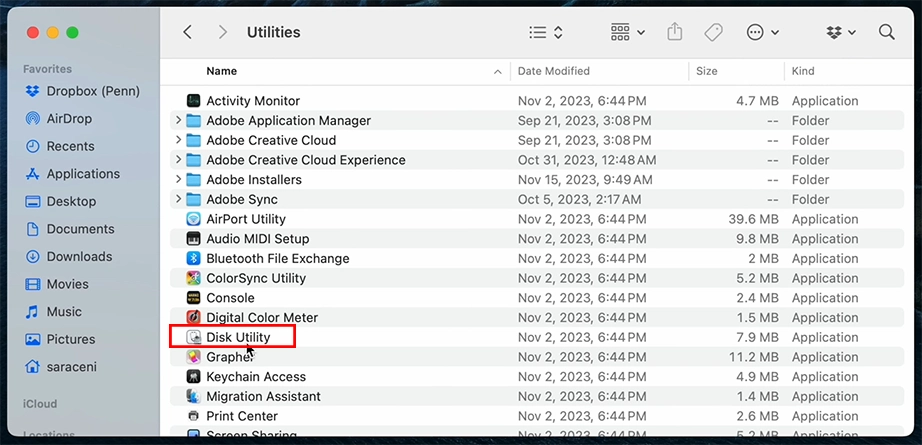
Press Cmd (⌘) + Space to open Spotlight, type Disk Utility, and press Return (Applications > Utilities > Disk Utility).
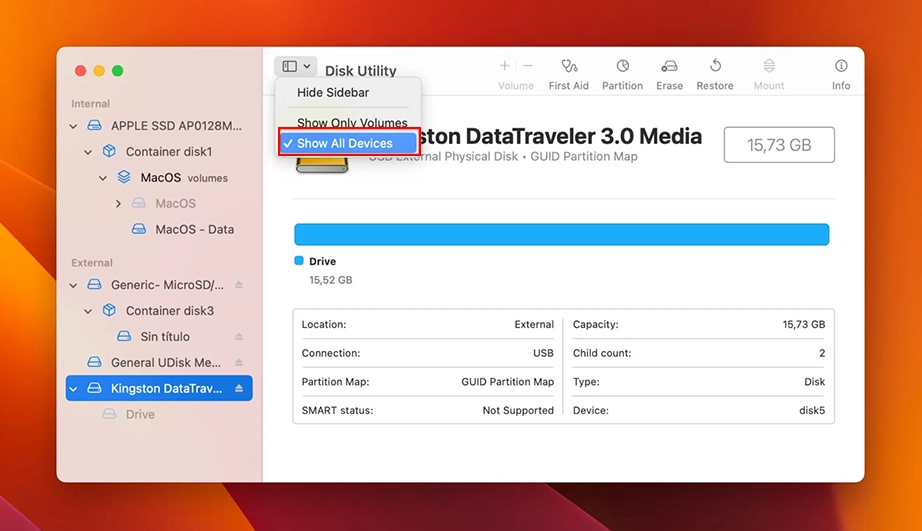
Click the View dropdown menu in the top-left corner of the window and select Show All Devices.
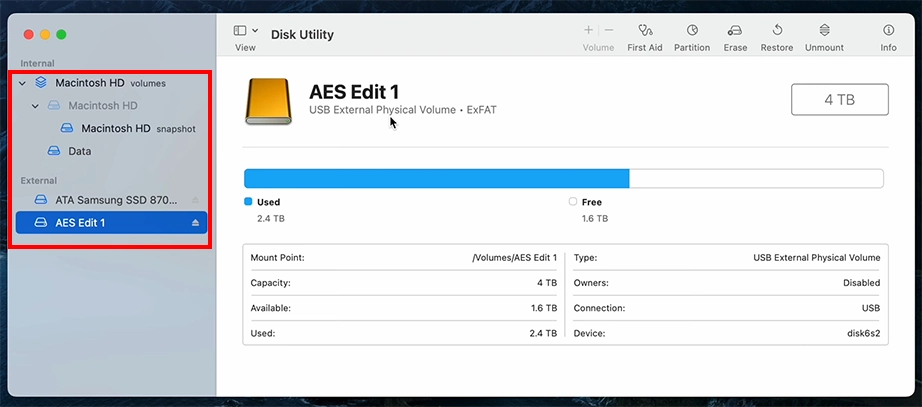
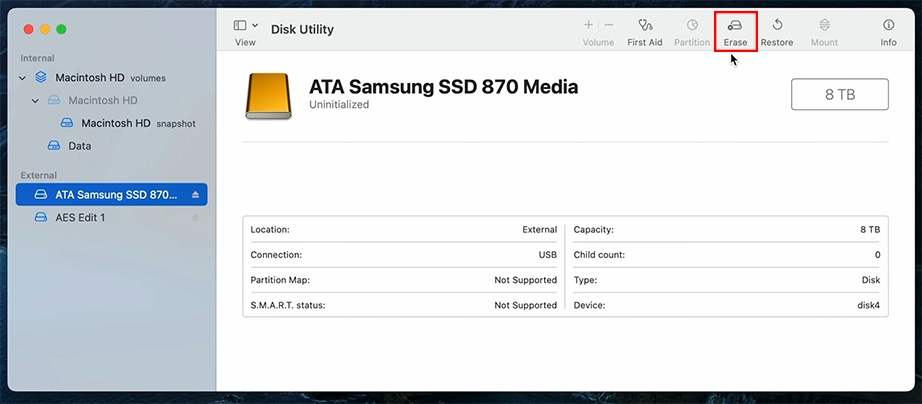
Look at the left sidebar under the “External” or “Internal” section. Click on the root name of your target physical SSD.
From the top toolbar, click the Erase button. A settings window will pop up.
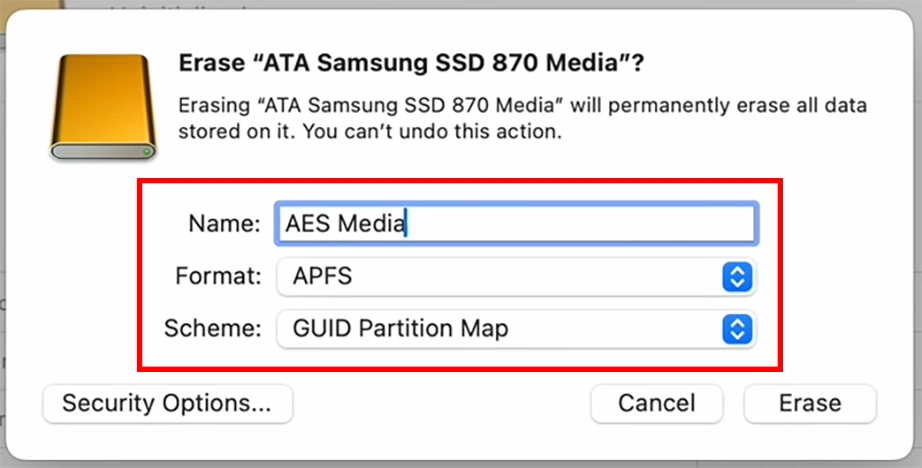
Type a name for your SSD in the Name field, choose the format (either APFS or exFAT), and select the Scheme as GUID Partition Map.
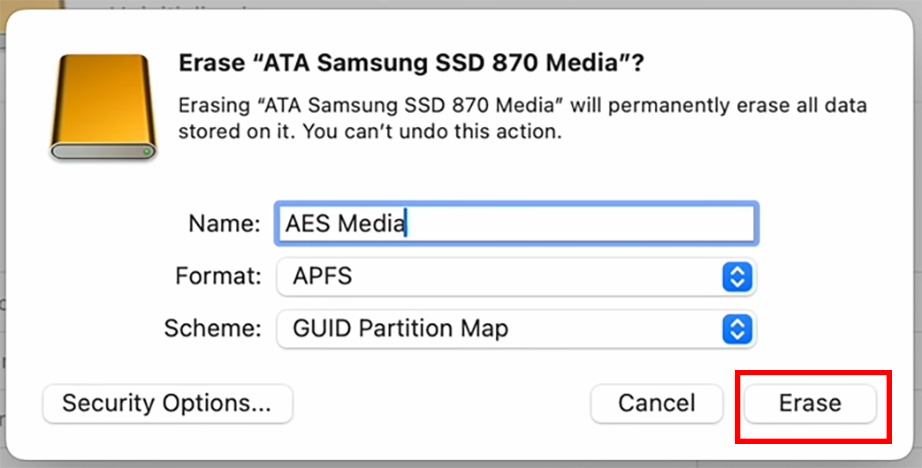
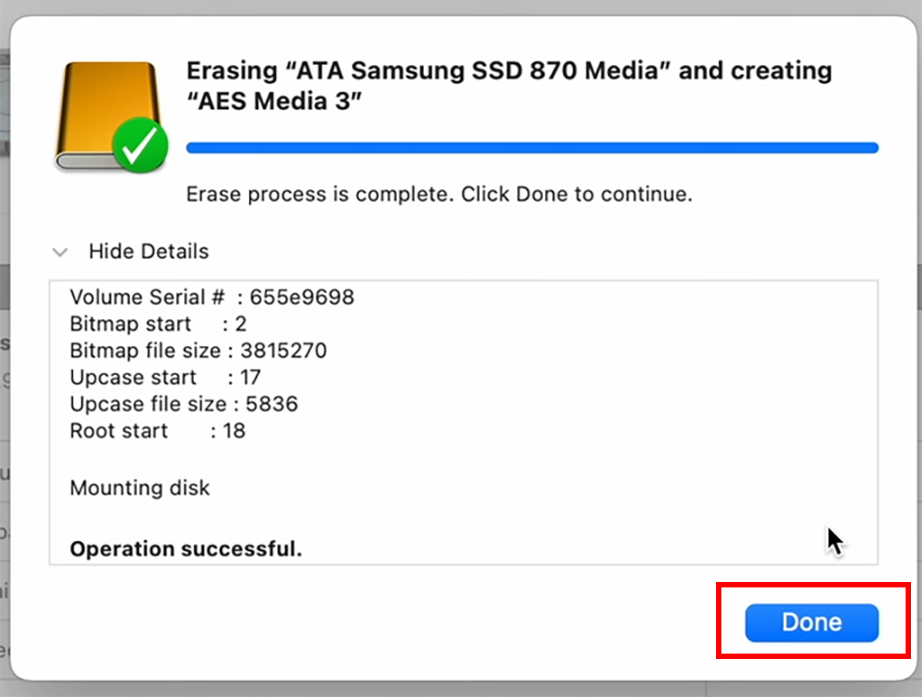
Click the Erase button at the bottom right. Disk Utility will unmount the disk, wipe the data, apply a new file system, and remount it.
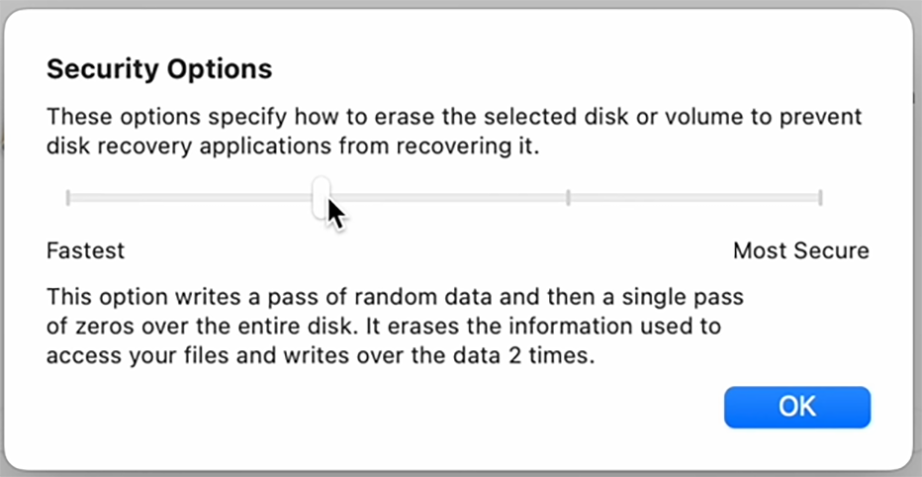
Note: Mac provides Security Options… to choose basically how and to what extent the drive is erased when being formatted.
Click Done when finished.
Method 2: Format SSD Via Mac Terminal
The macOS Terminal is an advanced command-line tool that lets you format an SSD when the standard desktop interface freezes or encounters errors. It works by sending text commands directly to Mac’s core operating system. This text-based message is highly effective because it gives your Mac direct authorization to force-format a drive.
How to reformat an SSD on macOS Via Terminal:
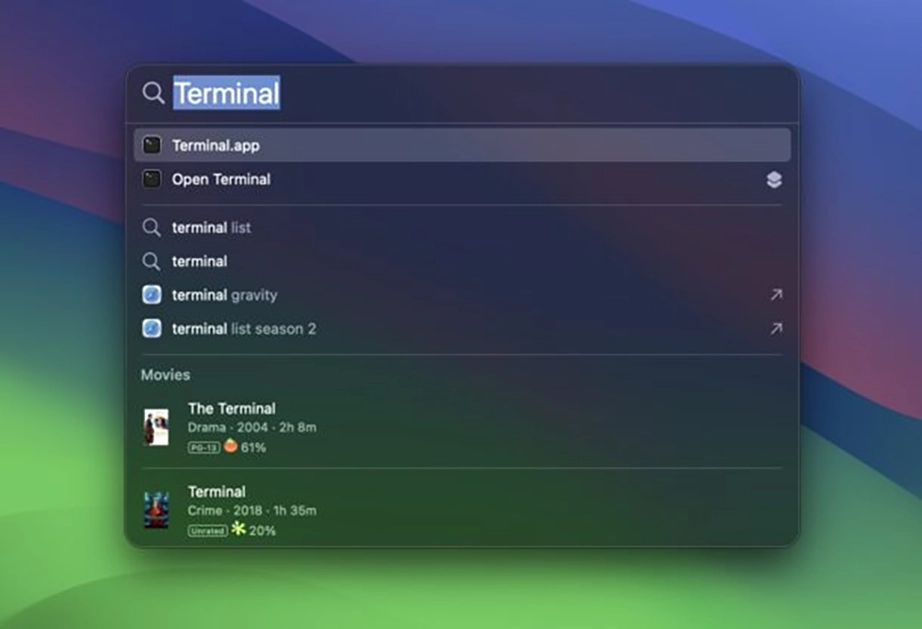
Press Cmd (⌘) + Space to open Spotlight search, type Terminal, and press Return.
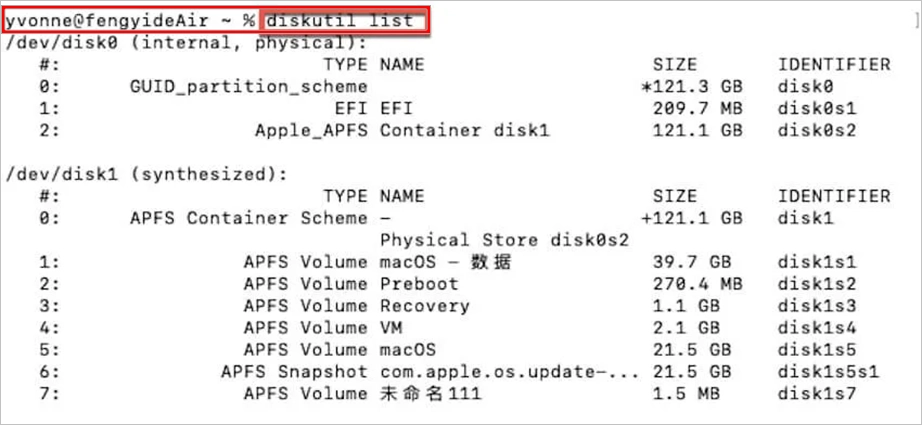
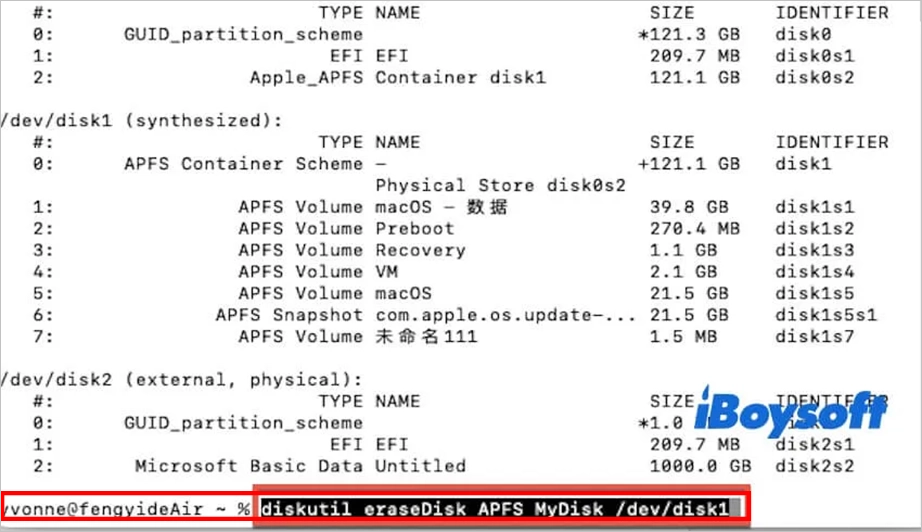
Type the following command to get all internal and external drives attached to your Mac, and press Return:
diskutil list
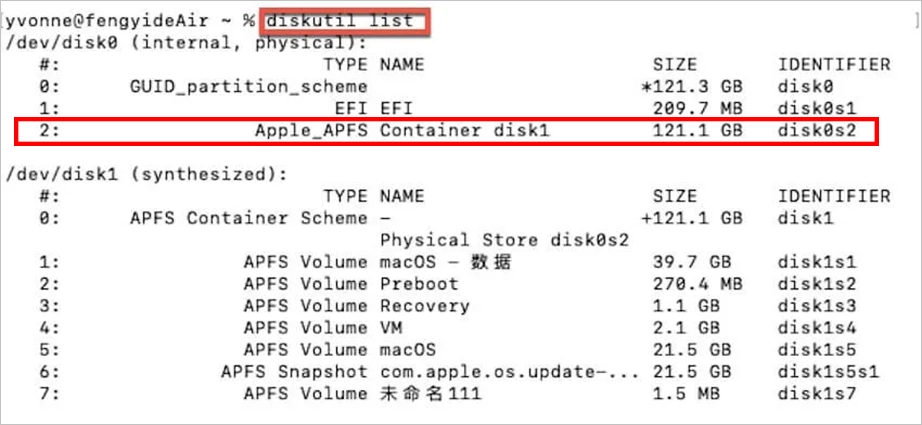
Find the SSD that needs to be formatted and note its identifier name, which will look like /dev/disk2, /dev/disk3, etc.
Warning: Confirm that you have the correct disk number. Choosing the wrong identifier will wipe the wrong drive.
Type the following command and press Return to erase and reformat the SSD:
diskutil eraseDisk APFS MySSD /dev/diskX
The terminal will unmount the disk and complete the formatting process. You will get a progress report. Once you see the message “Finished erase on disk”, type exit and close the application.
Download and Install: Visit Notchox’s official website to download the Notchox Data Recovery Software for corrupted file recovery. Install the software on a separate drive.
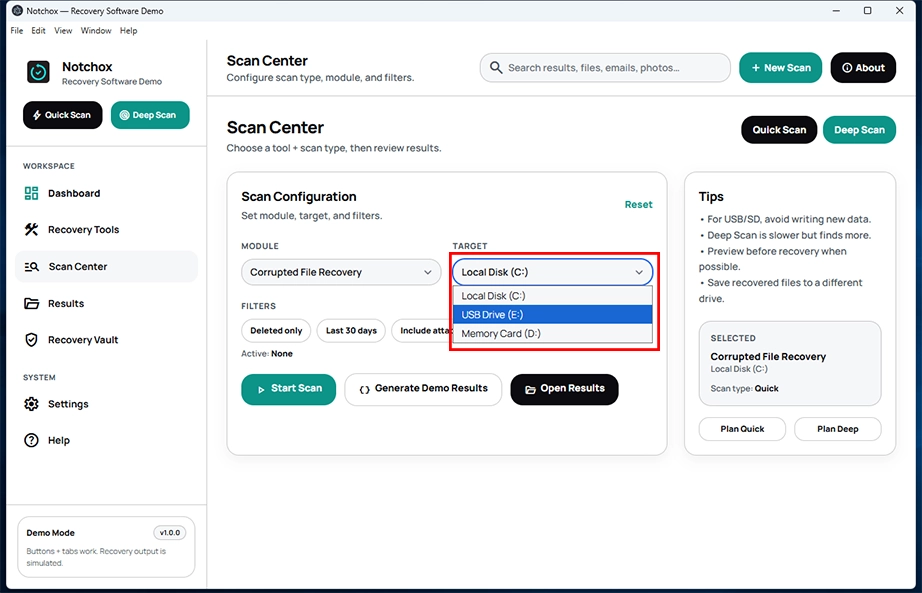
Select the Target Drive: From the dashboard, select the target drive (the corrupted SSD you want to format later).
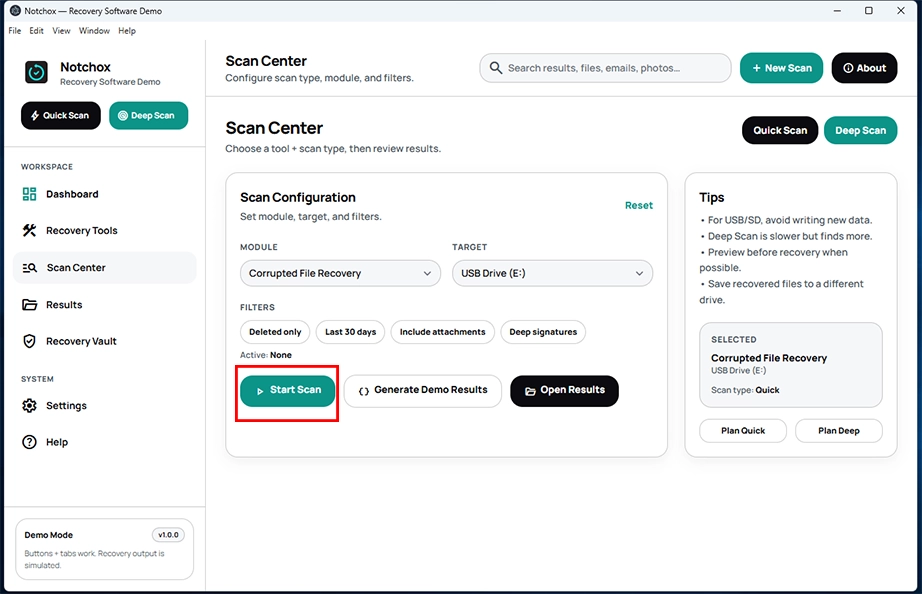
Start Scan: Begin the deep scan by clicking the Start Scan button to recover every possible file from the SSD.
Preview and Restore: Click the Preview button to check the file integrity before confirming the restoration. Once previewed, select the files you want to restore and click the Recover Selected button at the top.
Summarising SSD Reformat
Format a drive using File Manager and Disk Management (Windows) or Disk Utility (macOS) for an easy graphical interface. For advanced users, terminal commands provide direct access for fast formatting without an operating system interface or its limitations. Remember to choose the right file system during the formatting process for drive accessibility on the required system.
Frequently Asked Questions
How to reformat SSD?
To reformat SSD on Windows:
Using File Explorer: Open File Explorer> Select the drive > Right-click and select Format.
Using Disk Management: Open Disk Management > Right-click and select Format.
Using Command Line: Open Command Prompt as Administrator > diskpart > list disk command > select disk > create partition primary > format fs=ntfs primary.
To reformat SSD on macOS:
Using Disk Utility: Open Disk Utility > Select drive > Erase button.
Using Terminal: Open Mac Terminal > diskutil list > diskutil eraseDisk APFS MySSD /dev/diskX.
How to format an SSD using DiskPart?
To format SSD using DiskPart on Windows:
Open Command Prompt as administrator.
Enter the diskpart command.
List all the currently connected disks using list disk command.
Now, enter select disk X to select the disk. (Replace X with your drive number)
Clear the drive using the clean command.
Enter create partition primary to create a new partition.
Finally, enter format fs=ntfs primary to format the drive.
How to format a SSD on Mac?
To format SSD on macOS:
Using Disk Utility: Open Disk Utility > Select the drive > Erase button.
Using Terminal: Open Mac Terminal > diskutil list > diskutil eraseDisk APFS MySSD /dev/diskX.
How to format SSD drive using Mac Terminal?
Follow these steps to format SSD drive using Mac Terminal:
Open Mac Terminal.
Enter diskutil list to list all the connected drives to the Mac.
Enter diskutil eraseDisk APFS MySSD /dev/diskX to format the drive (replace X with your drive number).
How do you format a SSD not accessible in File Explorer?
If your SSD is not accessible in File Explorer, you can access the drive from Disk Management.
Right-click on Start and select Disk Management.
Select your drive, right-click on it, and select Format.
Now apply the changes if needed, and click OK.
How to format a new SSD?
You can easily format a new SSD from File Explorer. Simply open File Explorer, go to This PC, and select the drive you want to format. Right-click on the drive and select Format.
What is the quickest way for formatting a new SSD?
The quickest way to format a drive is using File Explorer.
Press Win + E to open File Explorer on Windows.
Click on This PC to view all the drives connected to the PC.
Deeksha Arora is a Data Protection & Recovery Writer focusing on writing accurate, informative, and easy-to-understand technical articles for Notchox’s readers. Her content on the prevention of data loss, understanding risks of device failures, and guides to fix problems helps readers make the right decisions and understand the technical terms easily. She works closely with Subject Matter Experts to ensure high usability and accuracy of her writing.