Deeksha Arora May 25, 2026
Ans: To recover accidentally deleted files on Mac, immediately check the Trash and select “Put Back”, or use Cmd (⌘) + Z to undo.
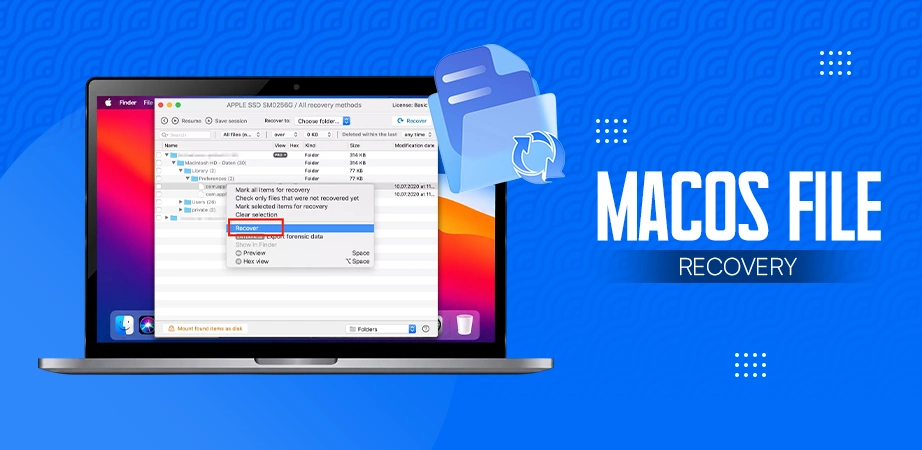
Did you just delete your files and don’t know what to do next?
Accidental file deletion is the most common occurrence on Mac. Whether it’s an emptied trash bin or a system crash, macOS offers several built-in mechanisms to restore data, along with powerful third-party tools. In this article, we’ll see 7 practical solutions for how to recover deleted files on macOS , even the files emptied from the Trash.
So, if you are wondering if deleted files can be recovered? The answer is yes!
Quick Answer: Deleted files from Mac can generally be recovered immediately, stopping drive usage to prevent data overwriting and following data recovery. The top 7 data recovery methods include:
- “Put Back” from the Trash
- Using the Undo command
- iCloud backup
- Mac Terminal
- Time Machine Backups
- APFS Snapshots
- Mac Data Recovery Software – Notchox
Restore your lost files instantly with Notchox’s fast and reliable Mac data recovery software. Your trusted solution for seamless recovery!
- Lightning Fast Recovery
- Deep Scan Technology
- 1000+ File Support
- Certified Safe & Encrypted
- Drive Friendly Retrieval
- Preview Before Restoring

Before getting into the best ways to recover your lost data, let’s go through the simplest methods first that don’t involve installing any software. This section focuses on the most effective, zero-cost, non-software methods to restore deleted files on macOS. We will cover the essentials: checking the Trash Bin, undoing the action immediately, restoring from iCloud, Time Machine backups, and APFS snapshots. By the end, you will be able to successfully recover your deleted files, saving both money and time.
The first method to recover deleted files on a Mac is very simple, and it is also very obvious. So, if you recently accidentally deleted files from your Mac, you gotta check the trash bin, because it could be in there, as all the deleted files first go to the recycle bin and stay there until manually emptied.
If your trash bin is not emptied, here’s how you can recover deleted files from MacTrash.
Step 1: Click on the Trash icon on your Mac’s Dock.

Step 2: Look for the deleted files. Choose the files to restore.

Step 3: Right-click the selected files. Select Put Back to restore deleted files to their original location.

This was the simplest and easiest way to restore recently deleted files on macOS. But if your deleted files are not in your Trash, let’s proceed to the next method.
The second method is recovering files on Mac using the Undo option. If you accidentally deleted important files, you can easily restore them on Mac by using this method, only if you don’t do any other actions after deleting them. Here’s the simple way to do it.
Step 1: Click Edit on the top left of the App Menu.

Step 2: Select Undo Move of X Items to recover deleted files on macOS.

This undo moves your recently deleted files from the trash to their original locations.
Or you can just straight away use the Command (⌘) + Z to undo the deletion operation.
Note: This method only works successfully to restore the deleted files if no other action has been taken after deletion.
Next, let’s suppose you emptied your Trash bin, and now it might look like your files are gone forever. Well, there are some other methods! The next method we’re going to use is iCloud Drive, which could be set up with syncing your desktop or other folders on your Mac, and let’s say something you deleted off your Mac, and it was also deleted off your iCloud drive as well, which seems like a nightmare scenario, but there is actually a solution.
Step 1: Go to iCloud.com and Sign In using your Apple account.

Step 2: Go to your profile in the top-right corner and go to Account Settings.

Step 3: Go down to the bottom of the list and under the Advanced section, click on Restore Files.

Step 4: It’ll search for recoverable files, and if there are any files, they’ll appear here.

Step 5: Select the file you want to restore, and click Restore.

If your file is deleted from iCloud, too, you can recover it from the iCloud Recently Deleted folder.
Step 1: Go to Apple’s iCloud Drive and Sign In using your Apple Account.

Step 2: Click Recently Deleted in the sidebar.

Step 3: Select the items to recover and click Recover.

Step 4: To recover all the items, click Recover All at the top.


If you are familiar with command lines, you may prefer to recover deleted files on macOS using the terminal. Terminal can recover recently deleted files, but if you are thinking you can recover permanently deleted files using Mac Terminal, you can’t. It only recovers trashed files.
Terminal can not recover files in these cases:
- Deleted files by emptying the trash
- Deleted files by right-clicking delete immediately
- Deleted files by pressing: Option + Command (⌘) + Shift + Delete keys
- Deleted files by running Mac terminal commands: rm, rm -f, rm -R
Let’s begin with the terminal commands.
Step 1: Press Command (⌘) + Spacebar, type Terminal, and press Return.
Or
In the Finder, open the /Applications/Utilities folder, then double-click Terminal.
Step 2: Input the following command and press Return.
cd ~/.Trash
Or
cd. Trash
Step 3: To see what is in your Trash, type:
ls -al
Step 4: Use the mv (move) command to send the file back to your Home folder or Desktop.
To Home Folder: mv filename.ext ../
To Desktop Folder: mv filename.ext ~/Desktop/
Note: Replace “filename” with the actual name of the file. If the file name contains a space, put it in “ “.
If you regularly back up your files using Time Machine, you can easily recover deleted, lost, or corrupted files. Time Machine lets you browse through all the versions of your files, even deleted ones. So, you can find and restore what you are looking for.
Steps to use Time Machine on Mac.
Step 1: Click the Time Machine Icon on the Menu Bar at the top right of your screen.

Step 2: Select Enter Time Machine from the drop-down menu.

Step 3: Go to the folder where your deleted file was last saved.

Step 4: From the timeline shown on the right side of the screen, select the specific date and time when you remember the file was last there.

Step 5: When you find what you are looking for, Select it.

Step 6: Press the space bar to preview and confirm if you want to recover.
Step 7: Click Restore to recover it. The item will be brought back to its original location.


APFS Snapshots on Mac are read-only, point-in-time instances of the Mac, a foundational feature that “freezes” the filesystem at a specific moment, where the system can revert to the same state if needed.
APFS Snapshots are used by the Time Machine to restore previous versions of data once you have the Time Machine backup. Once we enable Time Machine, we can also have access to APFS snapshots.
Here’s how to access APFS Snapshots for recovery.
Step 1: Press Command (⌘) + Spacebar and search for Terminal. Click on it to Open Terminal.
Step 2: Run the following command to list all the available snapshots.
tmutil listlocalsnapshots /
Copy and keep the name of the snapshot you want to recover.
Step 3: Make a folder to mount the snapshots to using the command:
mkdir -p /tmp/snapshot
Step 4: Run the command to mount:
mount_apfs -s [local snapshot name] / /tmp/snapshot
Step 5: Now open it using the command:
Open /tmp/snapshot
Go to the snapshot and recover the deleted file.
Step 6: Once done, unmount the snapshot using:
Unmount /tmp/snapshot

If Time Machine backups are unavailable or the immediate first aid fails to repair, then Notchox data recovery software has your back, which does an amazing job recovering lost, deleted, or corrupted data.
Quick Note: While Apple’s iCloud offers convenient syncing for macOS, relying on it for shared documents can lead to permanent data loss. A notable TidBITS analysis highlighted that file-sharing participants can delete data that cannot be recovered via standard methods.
Recover deleted files on macOS using Notchox’s specialised data recovery tool for macOS. Whether you accidentally emptied your recycle bin or lost data from the system. Fully optimized for macOS Monterey (12), Ventura (13), Sonoma (14), or newer, it serves deep scan technology to recover files with maximum efficiency.
Whether you are using Apple Silicon (M1, M2, M3, M4) or Intel multi-core processors, Notchox delivers rapid recovery methods, making it the most reliable tool when other methods fail.
Apart from deep-scan technology, using Notchox to recover deleted files on macOS offers several advantages over other recovery tools and methods. Let’s have a look at what makes the tool the best data recovery software.

Recovering your deleted files on Mac doesn’t have to be complicated; you just have to set a few safety nets before that happens. Let’s look at super-easy ways to lock your data, make backups, and ensure you never lose a file again.
Here are the best ways to protect your Mac data to prevent file deletion:
Locking files adds a security layer to actions performed on the files. To lock files: Right-click the file > Get Info > Check Locked. So, in case someone tries to delete the file or accidentally attempts to delete it, it’ll show the notification that the file is locked and can’t be deleted.
Time Machine creates daily, weekly, and hourly snapshots of your files. So keep your Time Machine on Mac enabled to keep an automatic backup system that prevents data loss.
Delete the files securely, even while emptying the Trash. Double-check before permanently deleting the files.
Create a reliable backup strategy using Apple’s Time Machine to automatically back up files every hour. Additionally, enable iCloud sync to back up files, documents, images, videos, etc., for off-site security.
To avoid viruses and other issues, keep your macOS up to date by downloading the latest update as soon as it is available. To check for available updates, choose Apple menu > System Settings > General > Software Update.
Limit unwanted access to your information. If multiple users use your Mac, set up a user account for each person so that they can’t modify each other’s files. Additionally, use secure passwords and prevent unauthorised access to your data.
Recovering deleted files from Mac often involves built-in methods like Trash, iCloud, Time Machine, and advanced options include Terminal, APFS Snapshots. For permanent deletion scenarios where native options fail, Notchox data recovery provides a user-friendly solution to restore data loss. Download Notchox today to permanently recover deleted files on macOS.
Ans: To recover accidentally deleted files on Mac, immediately check the Trash and select “Put Back”, or use Cmd (⌘) + Z to undo.
Ans: To recover permanently deleted files on Mac, use Time Machine Backups, check iCloud storage, or use data recovery software for Mac like Notchox.
Ans: To recover deleted files from the Trash
Ans: Yes, you can recover deleted files on Mac without software, using Trash, Time Machine, iCloud, or the Terminal command.
Ans: You can recover deleted files using the Mac Terminal mv command.
Ans: The free ways to recover deleted files on macOS:
Ans: If the recovered files are corrupted, use a well-known, user-friendly corrupted file recovery tool.
Ans: You can find the recently deleted files in the Trash folder on a Mac.
Ans: Yes, you can still recover deleted files that are not in the Trash using Time Machine, iCloud, APFD Snapshots, and a data recovery tool for Mac.
Ans: To undo an action, click the edit tab on the menu bar and select Undo move of XYZ item, or simply use Cmd (⌘) + Z.

Deeksha Arora is a Data Protection & Recovery Writer focusing on writing accurate, informative, and easy-to-understand technical articles for Notchox’s readers. Her content on the prevention of data loss, understanding risks of device failures, and guides to fix problems helps readers make the right decisions and understand the technical terms easily. She works closely with Subject Matter Experts to ensure high usability and accuracy of her writing.