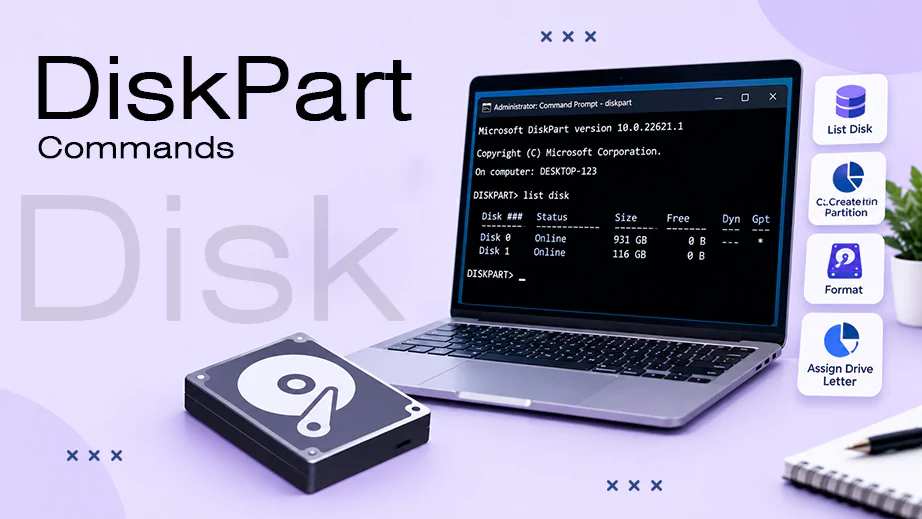
DiskPart is a Windows disk management command line utility that manages disks, partitions, and volumes. Using DiskPart commands, you can create, delete, format, and resize partitions, assign letters, and manage storage devices. To use DiskPart commands, you need to open Command Prompt as an administrator on Windows. Once open, you can perform various operations on disks and volumes directly with administrator access, without any GUI application.
This diskpart usage guide explains the most useful DiskPart commands, including how to list, select, format, clean, partition, resize, and manage disks safely.
Quick Answer: To use DiskPart commands, run Command Prompt as an administrator, type diskpart, and press Enter.
Always use a workflow of listing your options and selecting your target first (example, list disk then select disk 1). Once the system focus is on your target, you can run modification commands.
How Do DiskPart Commands Work?
Built directly into Windows, the DiskPart utility is a command line disk management tool used to organize storage devices, partitions, and volumes. Unlike the graphical Disk Management tool, the DiskPart utility gives you control over advanced tasks like wiping hidden recovery partitions and clearing write protection errors.
Because the DiskPart command line operates directly on the storage system without safety confirmation prompts, understanding how it functions is important to prevent accidental data loss.
Initialize DiskPart Utility: Launching the diskpart tool using Command Prompt with full administrative rights to grant deep access to the system.
Identification of Disks and Volumes: Scanning and viewing a complete layout of all physical and logical drives connected to the computer.
User Query: Typing specific commands into the terminal and targeting a chosen drive or configuration change.
Command Execution: The diskpart tool processes the user commands. Applies the modifications directly to the storage system without confirmation.
Validation: DiskPart cross-references your target layout structure to make sure the hardware can safely handle the requested command.
Completion and Output: Displays a final success text message or table update. This confirms your storage changes are officially done.
How to Access DiskPart?
DiskPart modifies your core hardware layouts, so Windows will block you from opening it unless you have full administrative rights. If you try to run it in a standard Command Prompt, you will get an “Access Denied” error message.
Here is how to access DiskPart on Windows:
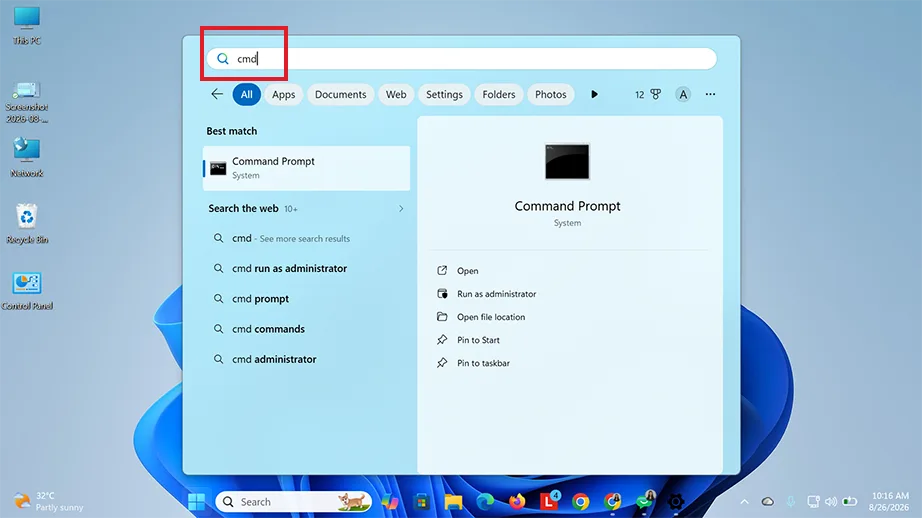
Press the Windows key and type “cmd”into the search box.
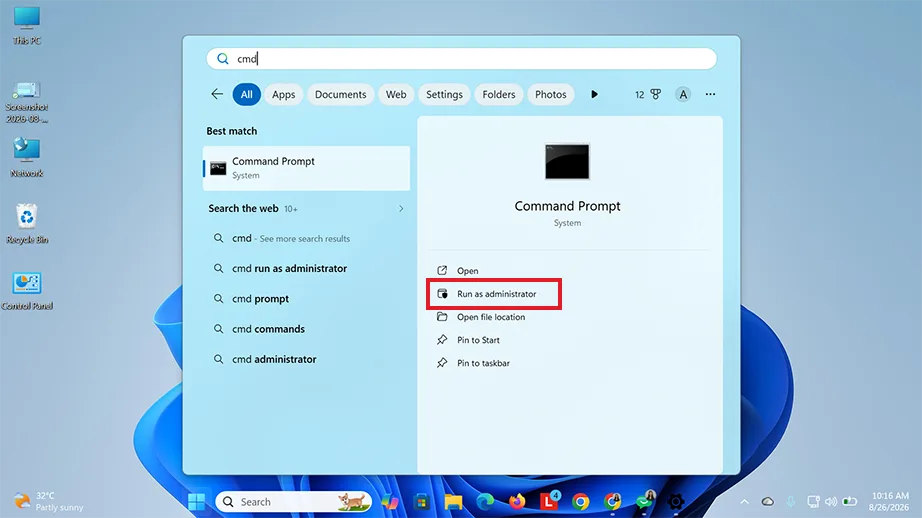
Select Command Prompt and click Run as administrator.
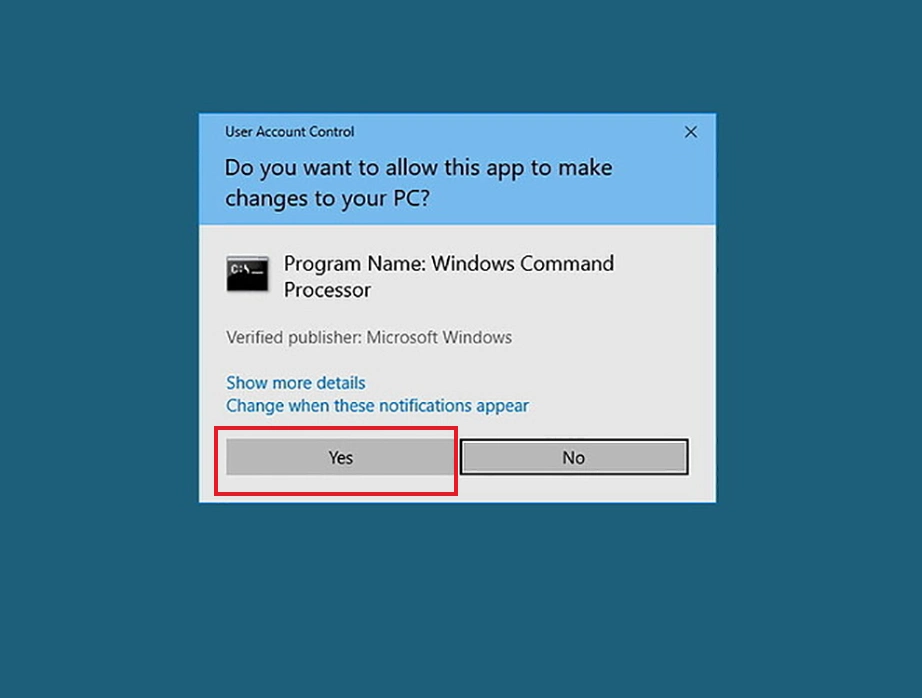
Click Yes when the User Account Control (UAC) safety pop-up asks for permission.
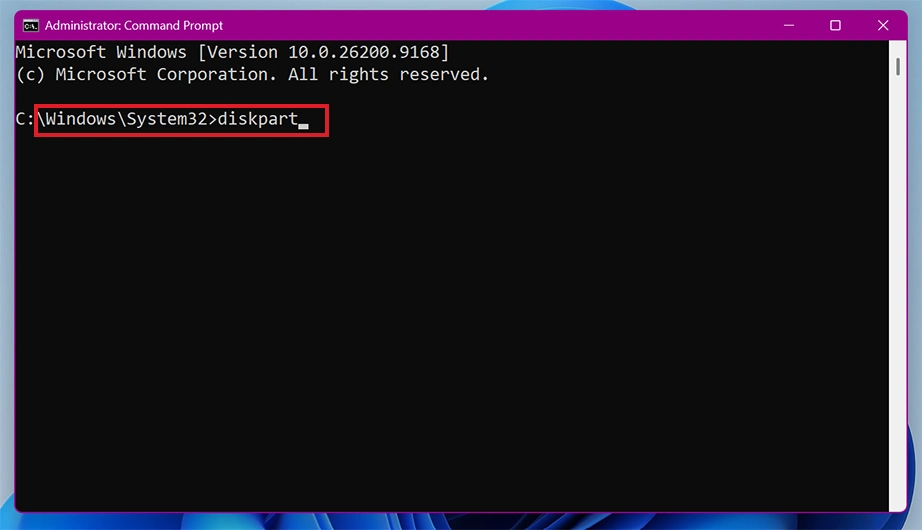
To access DiskPart, type the following command and press Enter:
diskpart
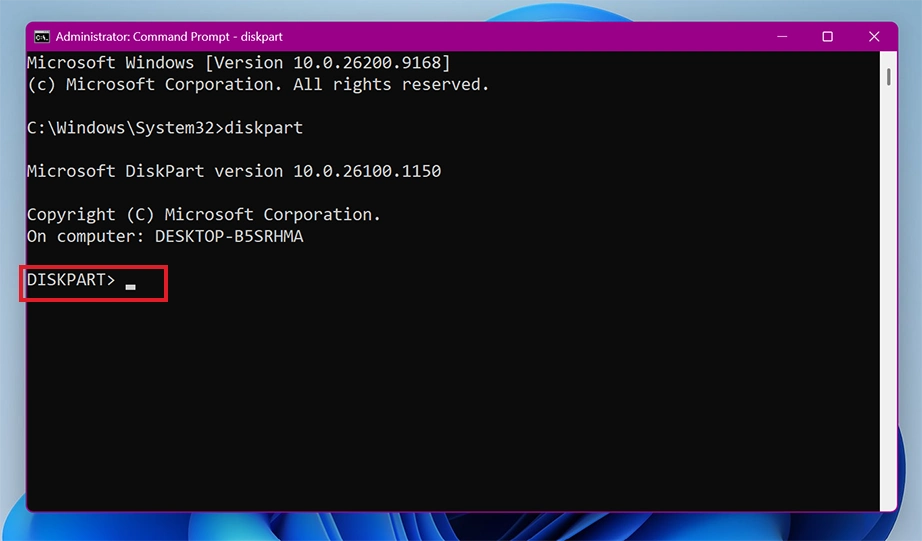
You can see diskpart. This means you have officially entered DiskPart, and Windows is ready to perform DiskPart commands directly on the disks and volumes of the device.
DiskPart Syntax Table
DiskPart uses a very direct language structure. Every instruction you give it follows a basic formula: [Command] + [Object] + [Parameter]. For example, in the command create partition primary size=51200, create is your action command, partition primary is the object you want to build, and size=51200 is the specific parameter telling how big to make it.
The best part is DiskPart utility is completely case-insensitive, so typing SELECT DISK works exactly the same as select disk. Here is a quick Windows DiskPart commands syntax table.
Command Name
Command Syntax
Description
DiskPart
diskpart
Launches the interactive command-line storage management utility environment.
List Disk
list disk
Scans and displays all physical storage drives connected to the system.
Select Disk
select disk <disk_number>
Shifts system focus to a specific physical drive number.
List Partition
list partition
Displays all logical slices and partitions inside the currently selected physical disk.
Select Partition
select partition <partition_number>
Shifts focus onto an isolated partition within the chosen standard drive.
List Volume
list volume
Shows a system-wide summary of every logical folder path and active drive letter across all connected disks.
Select Volume
select volume <volume_number>
Focuses directly on a specific drive letter volume index number.
Detail
detail [disk/ partition/ volume]
Pulls up deep technical information about the focused item.
Clean
clean
Instantly wipes all partition tables and sector layout data.
Clean All
clean all
Performs a secure erasure by overwriting every physical sector on the focused drive with zeros.
Convert GPT
convert gpt
Creates a GUID Partition Table layout style on an empty drive.
Convert MBR
convert mbr
Creates a Master Boot Record partition layout style on an empty drive.
Create Partition
create partition primary [size=<MB>]
Separates a primary storage container out of unallocated free space.
Format
format fs=<ntfs/exfat/fat32> quick
Installs a clean file system architecture onto a raw partition so Windows can read and write files.
Assign
Assign letter=<X>
Mounts and links a specific alphabetical drive letter identifier to your active volume.
Shrink
shrink desired=<MB>
Trims unallocated space off the end of your partition layout.
Extend
extend
Extend your volume into any empty unallocated space.
Exit
exit
Safely closes down the active interpreter session.
How to Manage Drives Using DiskPart?
Before you can use DiskPart cmd commands, you must first list and then select an object to perform on it. Once the object is selected, the commands you enter will focus on it. Using these commands, you can interact with your disks and volumes directly, giving flexibility and control over disk configurations without needing an interface.
Below, we will see how to perform different operations using DiskPart commands.
Essential Navigation and Identification DiskPart Commands
Before modifying any storage drive on your computer, you must be able to view and isolate your hardware targets safely. DiskPart, the disk management cmd relies on mapping the system using these three main structural layers: Disks, Partitions, and Volumes.
List Disk
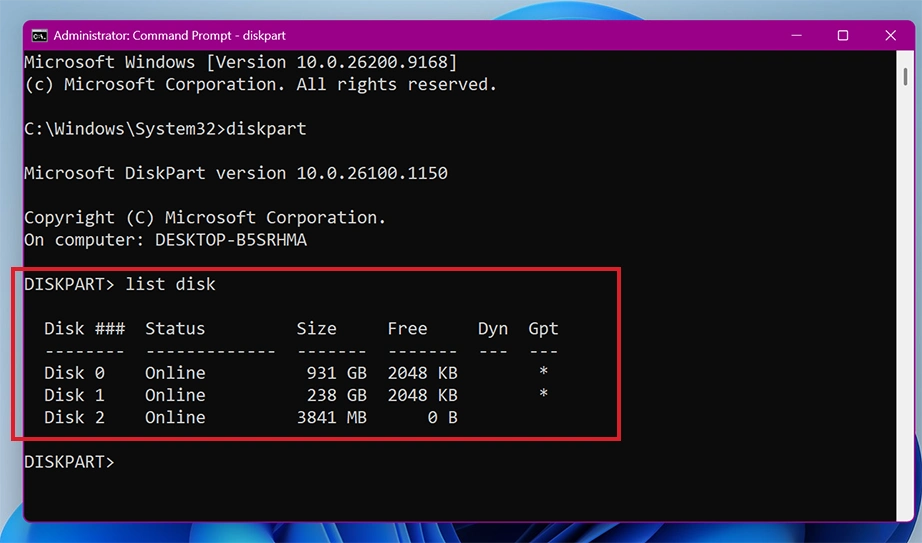
The diskpart list disk cmd scans your computer’s motherboard connections to display every physical hard drive, SSD, or external USB currently connected. Along with the disk name, it provides details such as Disk Status, Size, Free Space, and Partition Scheme. Reviewing this list, you do not mistake a large internal backup drive for a small removable thumb drive.
Command:-
list disk
Select Disk
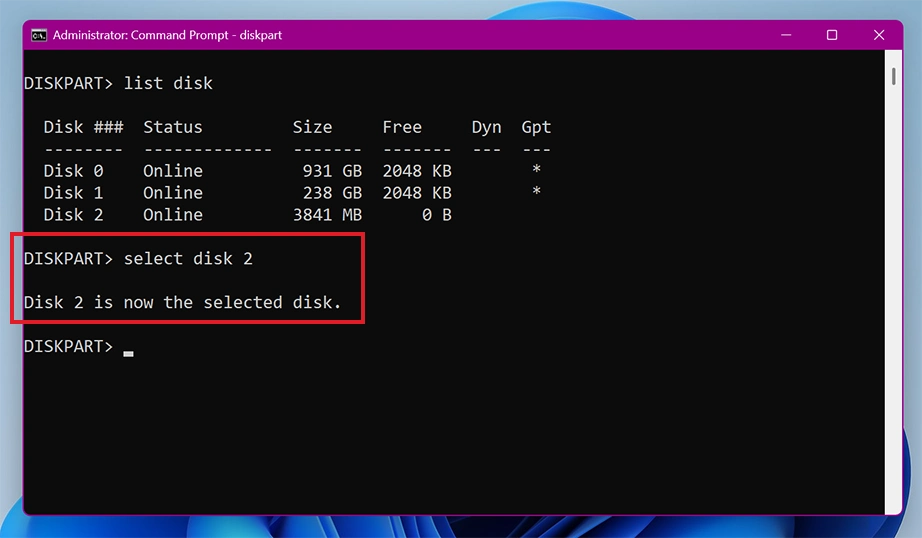
The select disk command selects the specified disk. It locks the focus of DiskPart onto one specific drive number. Once selected, all the subsequent commands will act on the selected disk/volume. It’s useful when you have multiple disks on your system.
Command:-
Select disk 2
This will show that Disk X is now the selected disk. This means that all future commands will be performed on the disk you selected.
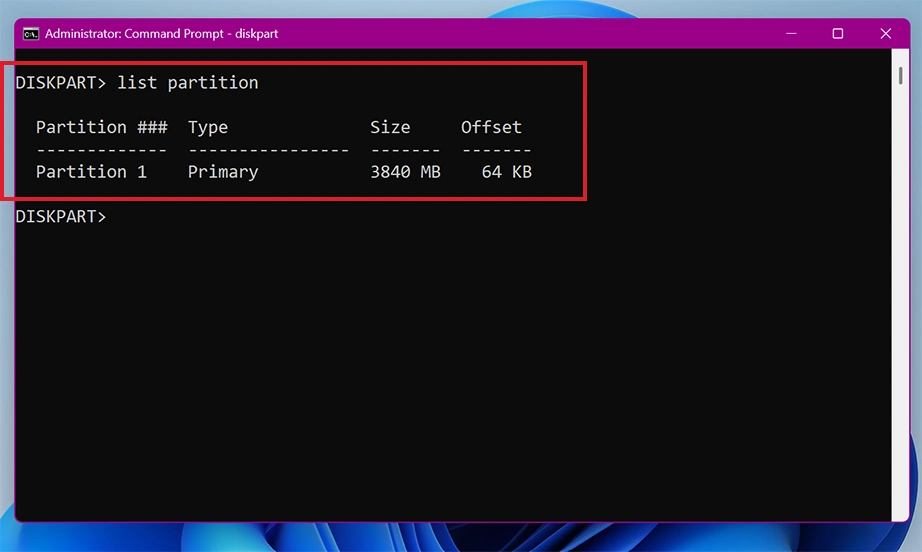
List Partitions
The list partition command breaks down the internal physical structure of your selected disk into logical data parts. Drives cannot hold files until they are divided. A single physical drive can be divided into multiple partitions (such as a separate boot partition, a recovery partition, a main storage partition, etc.).
This command shows the partition numbers, types (like Primary or Recovery), sizes, etc.
Command:-
list partition
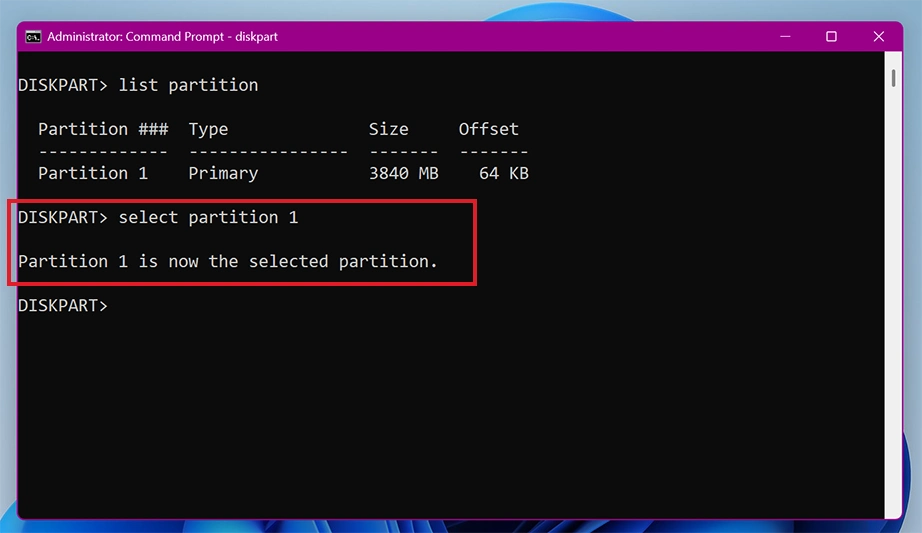
Select Partition
The select partition command targets a single data slice inside your chosen hard drive. Moving your system focus to an isolated partition index number is a mandatory safety requirement. It directs the subsequent actions, such as shrinking or extending, to that specific block while leaving others untouched.
Command:-
select partition 1
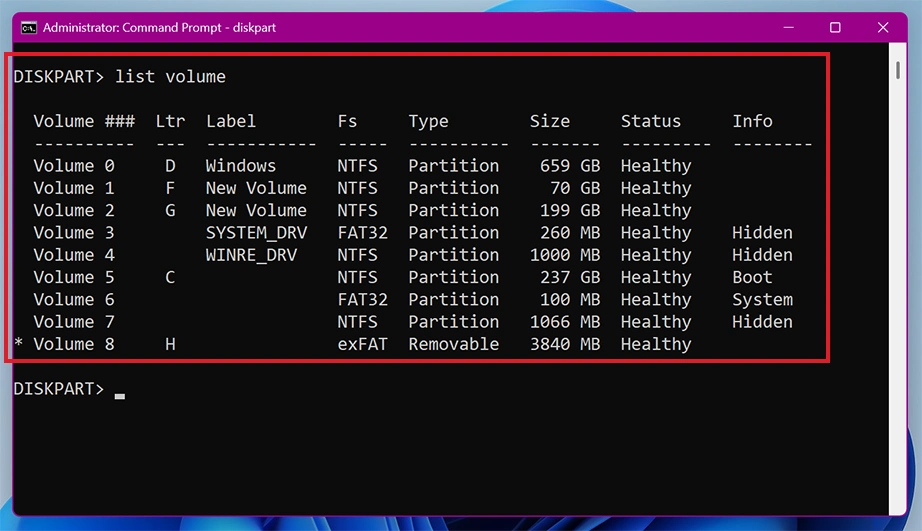
List Volume
The list volume command displays a system-wide overview of every logical drive letter and storage volume available across all connected hard drives. It links what you see in DiskPart with your standard File Explorer mapping.
Command:-
list volume
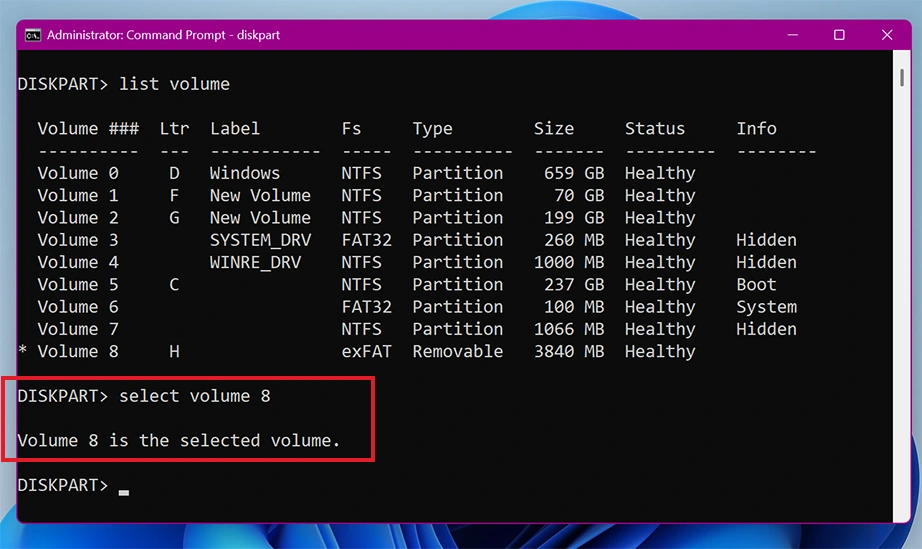
Select Volume
The select volume command assigns system focus to a specific drive letter using its unique system-wide index number. Selecting a volume is highly efficient. It automatically targets the volume, underlying partition, and the parent disk all at once, saving you multiple navigation steps.
Command:-
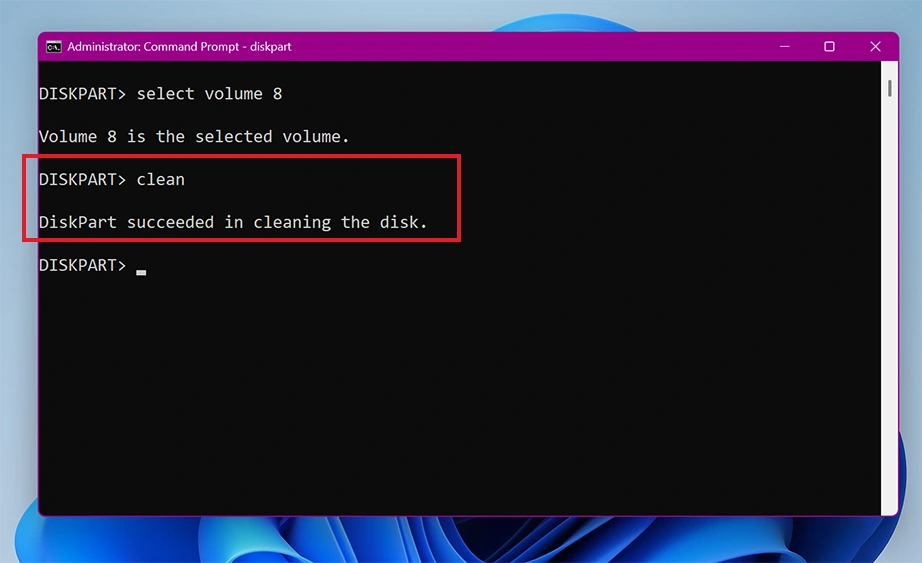
select volume 8
Note: The diskpart help command or typing help <command> acts as a built-in safety manual. It displays syntax rules and instructions directly inside DiskPart.
Advanced drive management and modification commands
Once you understand how to navigate and safely target your devices using the select command, you can begin modifying them.
Wiping a drive safely (clean vs clean all)
This command removes all partitions or volume formatting from the disk currently in focus. It is primarily used to completely reset an unstable, corrupted, or unallocated drive back to a blank slate.
Type the clean or clean all command in the DiskPart window.
This will wipe your targeted drive’s partition table. The standard clean command quickly marks the data as deleted, while the clean all command does a secure wipe by writing zeros to every sector, preventing future data recovery.
Initialize a disk
This command lays the foundational partition layout style for an entirely blank or freshly cleaned storage drive. It dictates how the drive handles partitions.
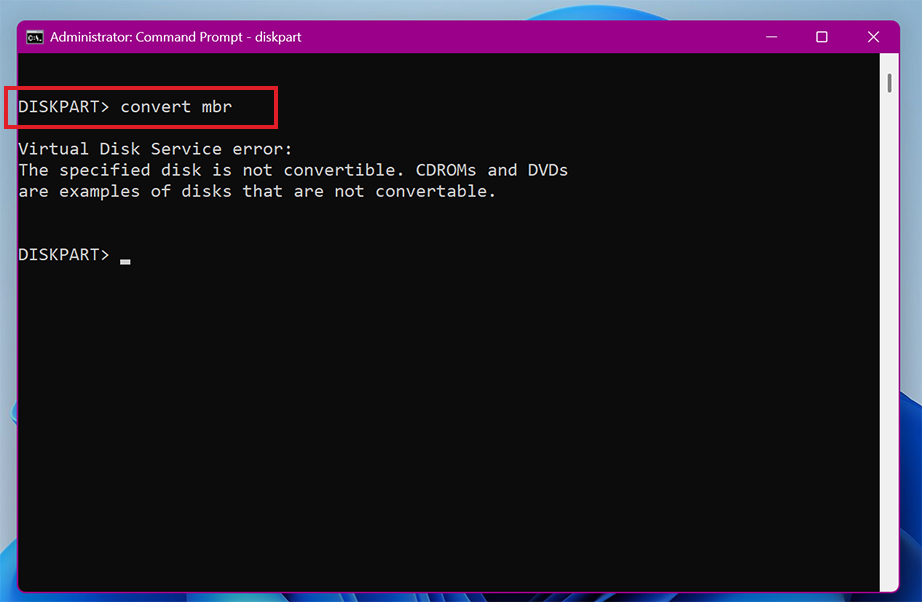
Type the convert gtp or convert mbr command in the DiskPart window.
This will change your empty disk’s structural layout.
Use convert gpt for modern computers and drives larger than 2TB.
Use convert mbr if you require legacy compatibility for older systems.
Create a new partition
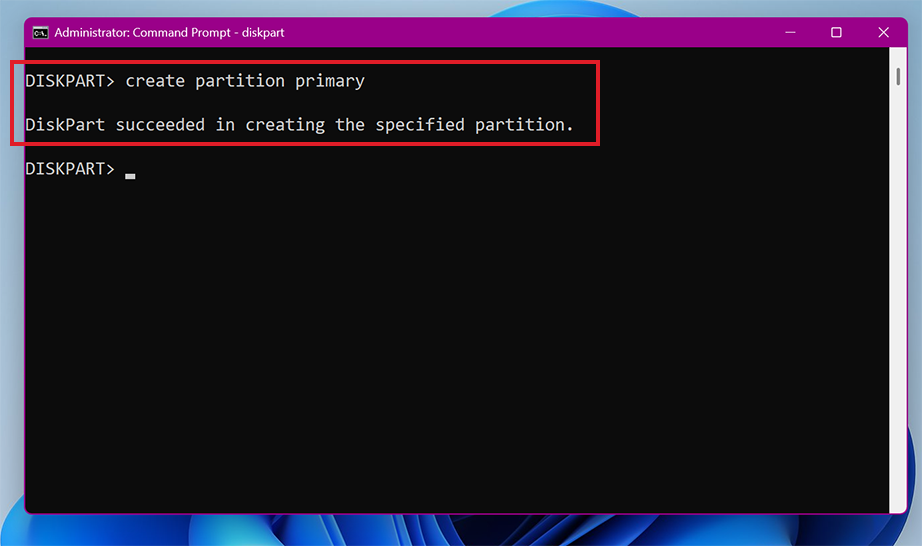
Create partition primary carves a primary bootable storage slice out of raw space on a physical drive. By default, it takes up to 100% of the available free space. You must append the size= parameter to limit its space.
This is used for dividing a single large physical drive into separate distinct drives (examples: separating an OS partition from a games partition).
Formatting a volume
Formatting a partition builds a clean file system architecture so that Windows can safely read, write, and index files. Choosing the correct file system depends on how you intend to use the drive:
Select NTFS for permanent internal Windows drives for native compression and security permissions.
Choose exFAT for external drives or USB sticks that need to read and write simultaneously across both Windows and Mac computers.
Use FAT32 for older legacy electronics.
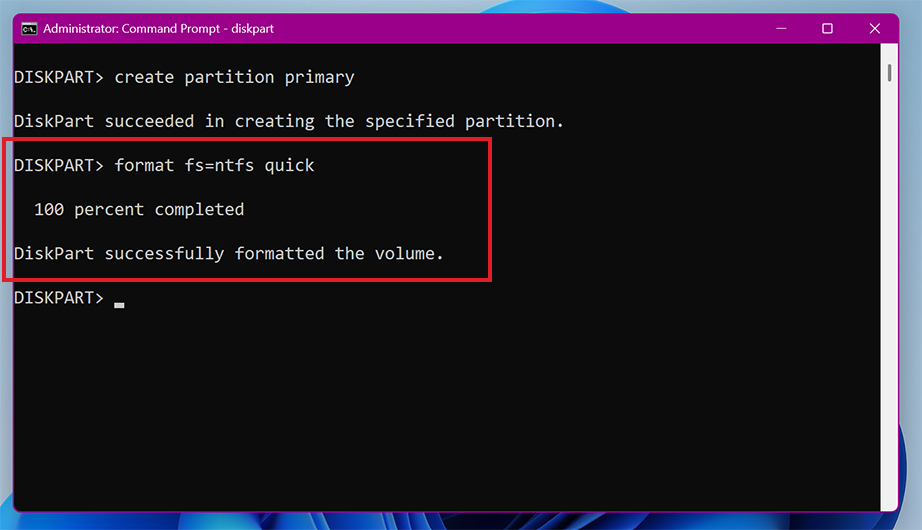
Changing the quick parameter in diskpart format command bypasses the standard multi-hour hardware assessment clean. This builds the file system in mere seconds.
select partition 1
format fs=ntfs quick
Note: Data lost during a quick format can still be retrieved. You can easily scan unallocated drive space and recover your files using professional Notchox Data Recovery Software.
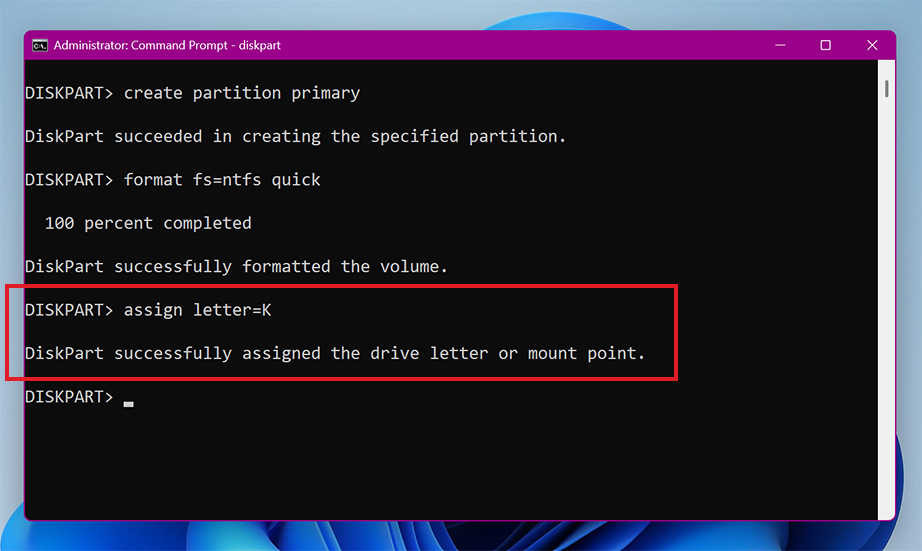
Assigning or changing a drive letter
Even after a drive is partitioned and formatted, it will remain completely invisible inside the Windows user interface until it is bound to an alphabetical identifier. Therefore, you can easily recover data after accidental quick format but not after a full format. The assign command links a specific letter to your active volume, asking Windows File Explorer to mount the drive and make it accessible for daily use. The letter you designate must not be actively used by any other internal hard drive or network location.
Note: If you run this command without choosing a specific letter, the tool will automatically detect and apply the next available letter in the alphabet.
select volume 2
assign letter=E
Modifying partition size
You can change the physical footprint of an active volume using the extends and shrink commands without data loss or corrupting the files stored within them. Running a shrink command safely trims unallocated space off the end of your partition layout. Running a shrink command stretches your active volume outward to get any empty space.
select volume 2
shrink desires=10240
select volume 2
extend
Importance of DiskPart
When standard Windows graphical tools fail, DiskPart serves as the administrative fallback for system optimization and storage recovery. The built-in Disk Management is sufficient for basic tasks like changing a drive letter. DiskPart operates before the user interface layer and communicates directly with the Virtual Disk Service (VDS).
Overrides System Restrictions
DiskPart bypasses the safety blocks in Windows graphical menus. Thus, allows you to forcefully format or modify stubborn drives.
Accesses Hidden Partitions
Unlocks and modifies hidden system containers that Windows hides from daily view, such as the EFI Boot Partition and factory Recovery Partitions.
Works Without Bootable OS
Can be launched from a Windows installation USB or recovery media console.
Advanced Scripting
Allows automation of complex partition layouts and disk configurations through external text scripts, saving time during mass enterprise deployments.
DiskPart Summary
DiskPart commands completely transform how you manage your PC’s storage architecture. Though Windows graphical interfaces are fine for simple tasks, you know exactly what does diskpart do. DiskPart gives you low-level administrative power to bypass any error or blockage. By always running a list command before a select command, you can safely execute actions on your drive. Keep the cmd DiskPart commands syntax table bookmarked, and you will have complete control over your system’s hard drives.
Frequently Asked Questions About DiskPart Commands
Q1: What is DiskPart?
Ans: DiskPart is a powerful command-line tool built into Windows that allows you to manage system storage at a low level. It operates below the standard user interface layer to configure, format, wipe, or resize physical hard drives, SSDs, partitions, or virtual disks when graphical tools like Disk Management fail to work.
Q2: Is DiskPart safe to use?
Ans: DiskPart is entirely safe if you track your system focus carefully by using listing commands before selecting targets.
Q3: What is the difference between clean and clean all DiskPart commands?
Ans: The clean command takes just a few seconds because it only deletes the partition layout maps, leaving the data there to be overwritten. The clean all command runs a deep secure erase by overwriting every sector on the drive with zeros.
Q4: Why does DiskPart say “Access is denied”?
Ans: This error happens because DiskPart modifies core computer hardware frameworks, which requires administrative access. To resolve this error, close your active window, search for cmd in your Windows search bar, and open Command Prompt as administrator before entering the diskpart launch script.
Q5: How to use diskpart to format a disk?
Ans: To format a disk:
Type list disk command and select disk X to focus on your drive.
Type clean to clear old partitions.
Enter create partition primary.
Initialize the file structure by running format fs=ntfs quick (or change ntfs to exfat for Mac cross-compatibility).
Type assign to make the drive letter appear in File Explorer.
Q6: How do I list all disks?
Ans: To look at every physical hard drive, SSD, or external storage device currently attached to your machine, type list disk into the active interpreter interface and press Enter. This gives a table layout displaying every drive index number along with its details.
Q7: How to clean a disk using diskpart?
Ans: To clean a disk using diskpart, follow these steps:
Type list disk to locate your target drive.
Select it by typing select disk X (replace X with your actual drive number).
Once the system confirms the drive is selected, type clean and hit Enter.
DiskPart will remove all existing partition tables and volume data.
Q8: How can I view the list of volumes in diskpart?
Ans: To check all your local drive layouts, type list volume into the interpreter window and hit Enter. This command scans your entire computer system to show a table of every drive letter mapping, health status, file structure, and custom volume table.
Q9: What are the basic DiskPart commands?
Ans: The basic DiskPart cmd commands you need to know are for identification and selection. Use list disk, list partition, and list volume to view your hardware. Combine these with select disk X, select partition X, or select volume X to move your system focus to a target before running any formatting scripts.
Q10: How do I know when diskpart part is all done?
Ans: Because clean all overwrites all physical storage, the blinking command prompt terminal will look frozen and won’t show a progress percentage bar while working. The process is fully finished when the command line prints a text confirmation message: “Diskpart succeeded in cleaning the disk.”
Deeksha Arora is a Data Protection & Recovery Writer focusing on writing accurate, informative, and easy-to-understand technical articles for Notchox’s readers. Her content on the prevention of data loss, understanding risks of device failures, and guides to fix problems helps readers make the right decisions and understand the technical terms easily. She works closely with Subject Matter Experts to ensure high usability and accuracy of her writing.