Check SSD health quickly with built-in Windows and macOS tools such as Storage Settings, Command Prompt or PowerShell commands. SSD health check is essential because flash memory chips wear out gradually over time based on the total data written. This can lead to silent SSD hardware failures without any warning. While common warning signs include frequent system crashes, read-only drive locks, corrupted files, and slow performance, regular internal diagnostics help you track the drive’s health before a failure occurs. We will explain step-by-step methods for checking SSD health on both Windows and Mac to help keep your data safe.
Quick Answer: To check SSD disk health, go to Windows System Settings, under Advanced Storage, select Disks and Volumes; there you will see your SSD; click the Properties button. Similarly, on macOS, to check the health of an SSD drive and fix small issues, go to Disk Utility, select the SSD, and click the First Aid button. Apart from these graphical tools, you can use Command Prompt or Terminal to directly get the SSD SMART test status.
How to Check SSD Health on Windows?
You can check your computer’s SSD health on Windows using built-in features like Windows Settings, Command Prompt, or PowerShell. These tools let you have a look at your drive’s remaining lifespan, operating status, and overall performance without any extra software. To quickly test your drive, you can use the graphical Disks and Volumes interface for a direct wear percentage or type simple commands to get the S.M.A.R.T. health reports. For deeper issues, running a standard check-disk command is highly recommended because it diagnoses and automatically fixes the errors.
Method 1: Using Windows Settings
Checking the drive’s health metrics through the main settings panel is the quickest way. This system dashboard not only displays the health status but also tracks your drive’s available spare space and alerts you to critical thresholds so that you can act before it’s too late.
How to check SSD health Windows 10/11 System Settings:
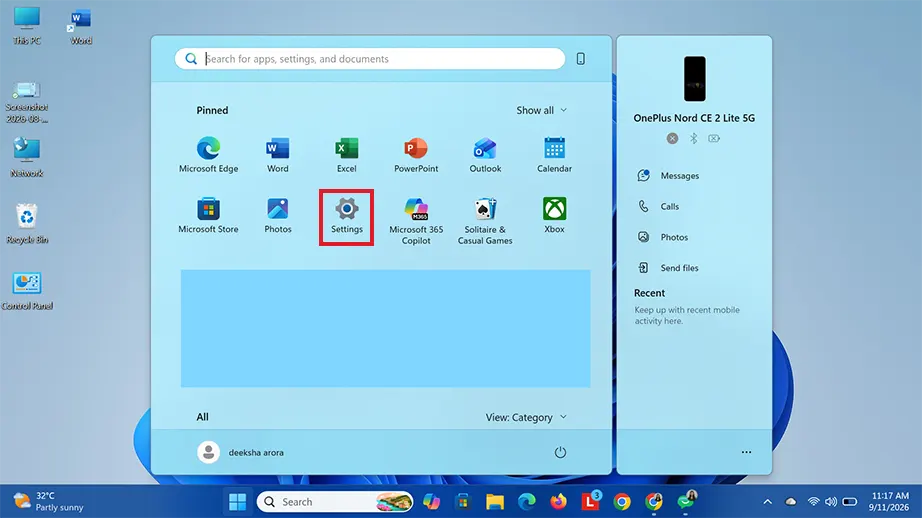
Click on the Windows Startbutton and select the Settings gear icon (or press Windows Key + I to open the Settings app).
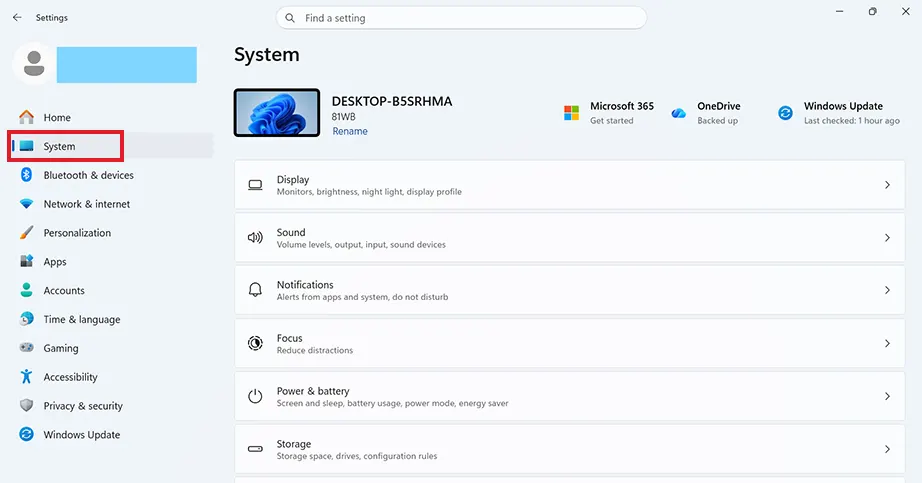
Go to System from the left menu.
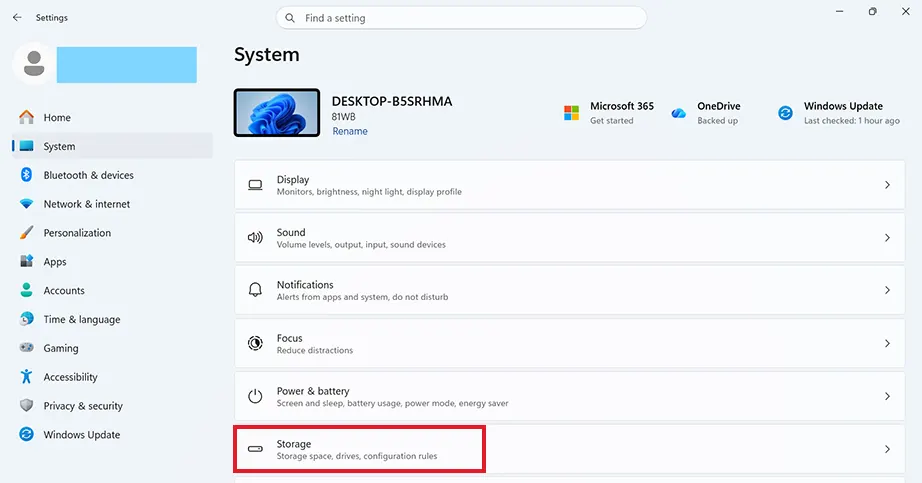
Click Storage on the right side.
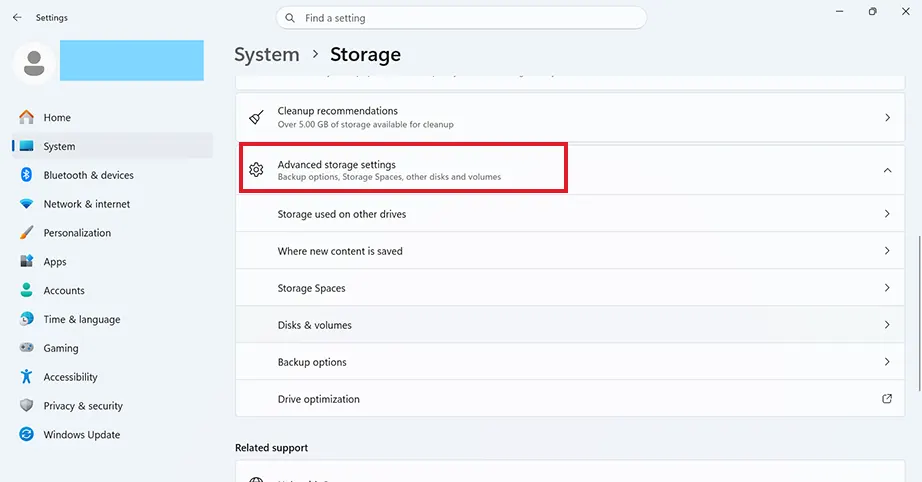
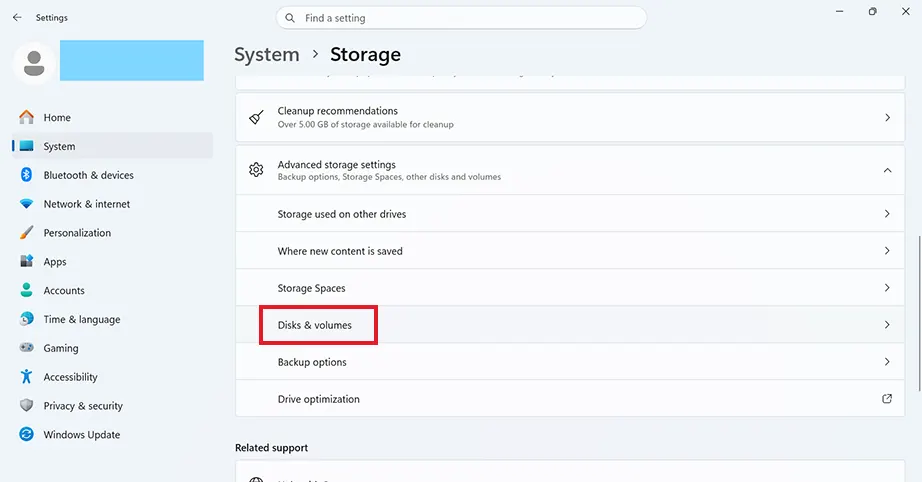
Scroll down to the bottom and click on Advanced storage settings to expand the menu.
Click on Disks & volumes to view all connected physical drives.
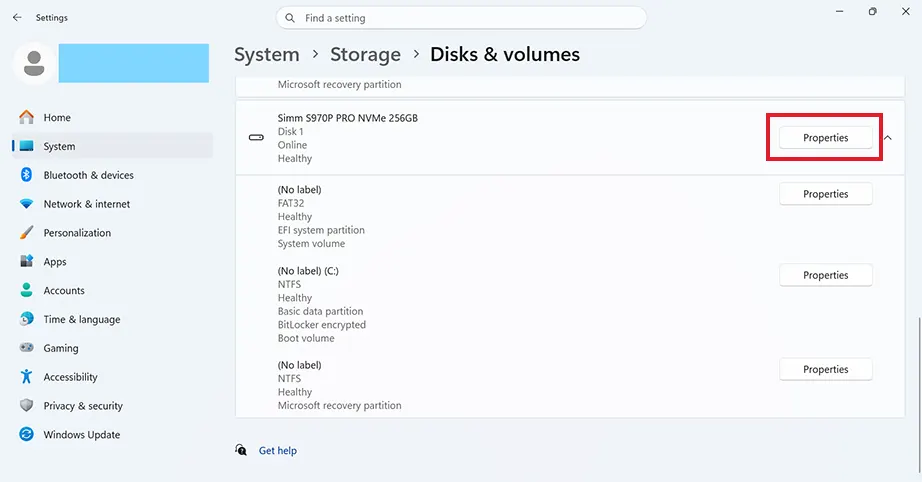
Locate your primary SSD hardware drive from the list and click the Properties button next to it.
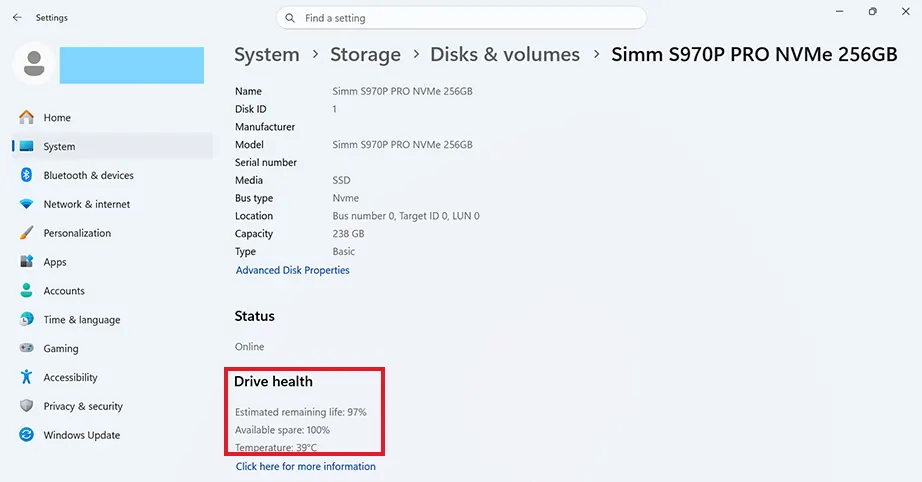
Scroll down to the Drive Health section to check your drive’s estimated remaining life, Available space, and temperature.
Quick Shortcut: You can also check basic status directly from your desktop:
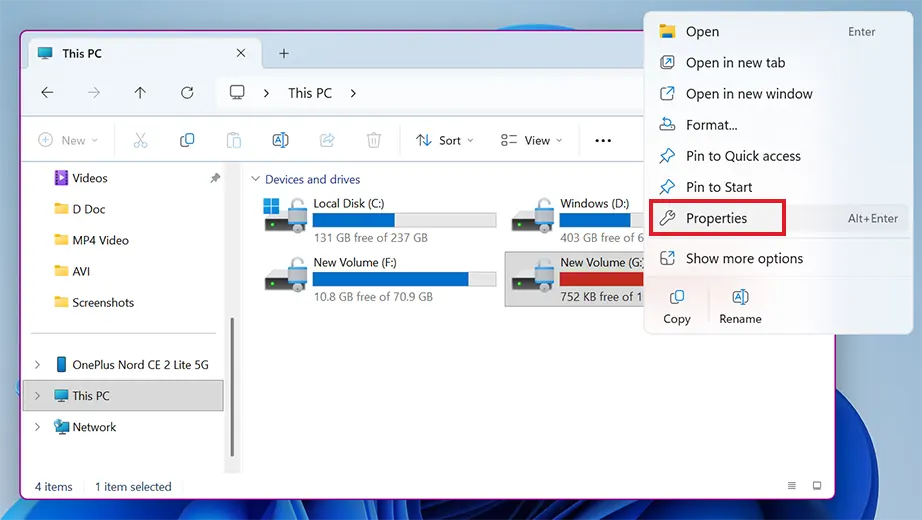
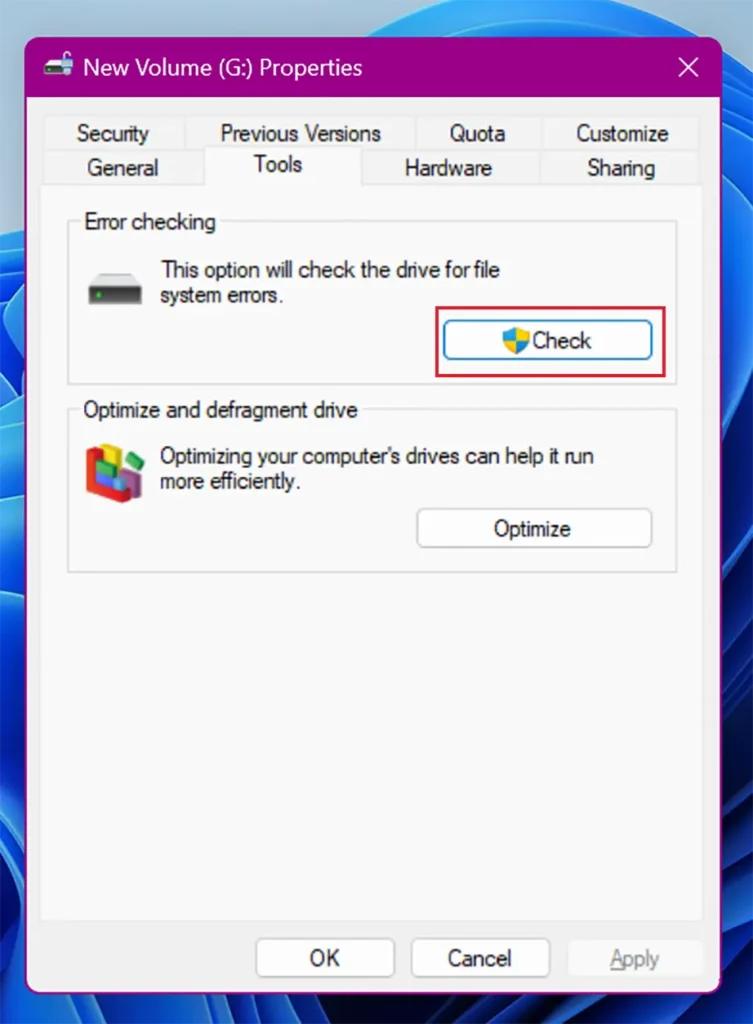
Open File Explorer, right-click your main drive, and select Properties.
Now go to the Tools tab and click the Check buttonunder the Error Checking section.
Method 2: Using Command Prompt
Windows Command Prompt is another quick way to check status of SSD. This method uses WMIC (Windows Management Instrumentation Command-line) to query the drive’s built-in S.M.A.R.T. system. It works on almost all Windows versions and does not require navigating through deep settings menus. Instead of a detailed percentage, this tool gives you a direct binary diagnostic reading of your hardware’s baseline operating condition.
How to check SSD health using Command Prompt:
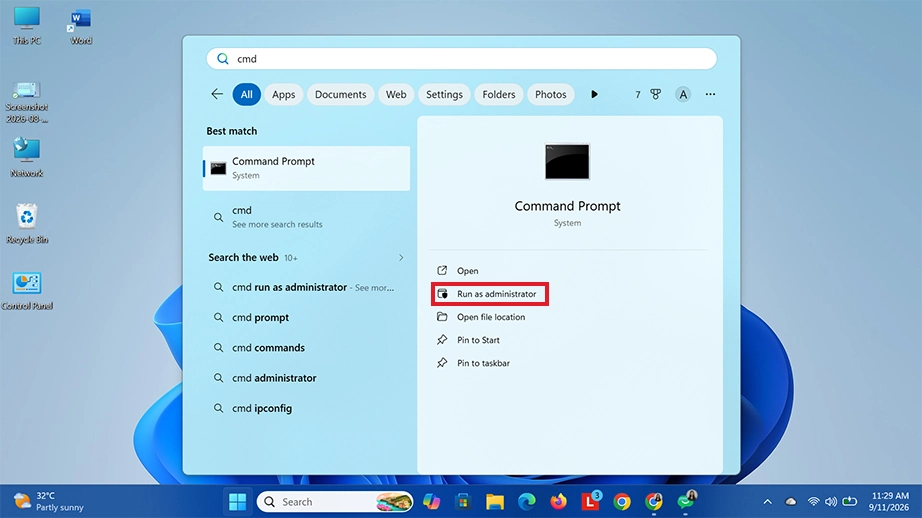
Press the Windows Key, type “cmd” into the search bar, and select Run as administrator to open Command Prompt with admin access.
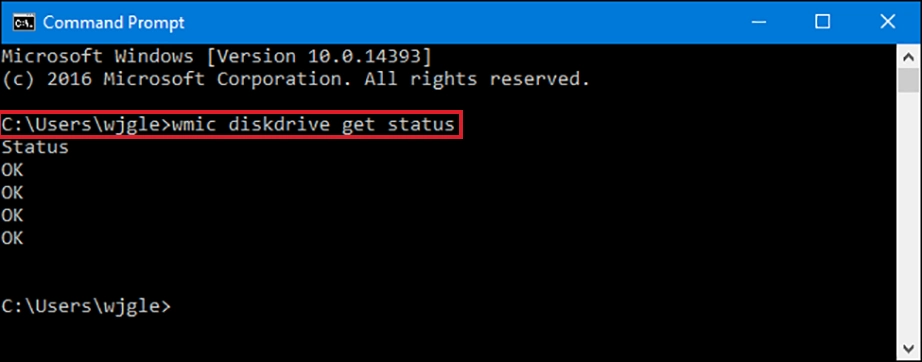
Type the following command exactly as shown and press Enter:
wmic diskdrive get status
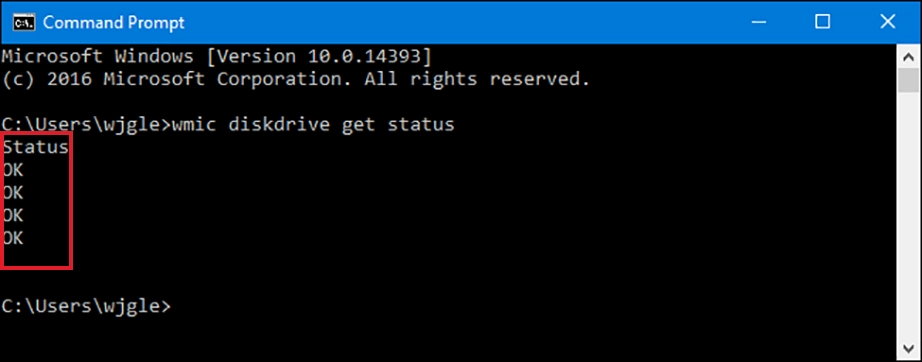
Review the output under the Status column for each connected drive:
OK: Your drive is responding normally and operating safely.
Pred Fail: The drive’s S.M.A.R.T. monitoring has detected hardware failure. Back up all data immediately and replace the storage.
Note: If you have multiple storage drives connected to your system, the Command Prompt will show a separate status line for each one.
Method 3: Using Windows PowerShell
Windows PowerShell gives a modern way to get the deep hardware details of your SSD. Unlike the older Command Prompt, PowerShell can return Drive Name, MediaType, OperationalStatus, HealthStatus, Usage, etc.
Steps to check health of SSD drive on Windows using PowerShell:
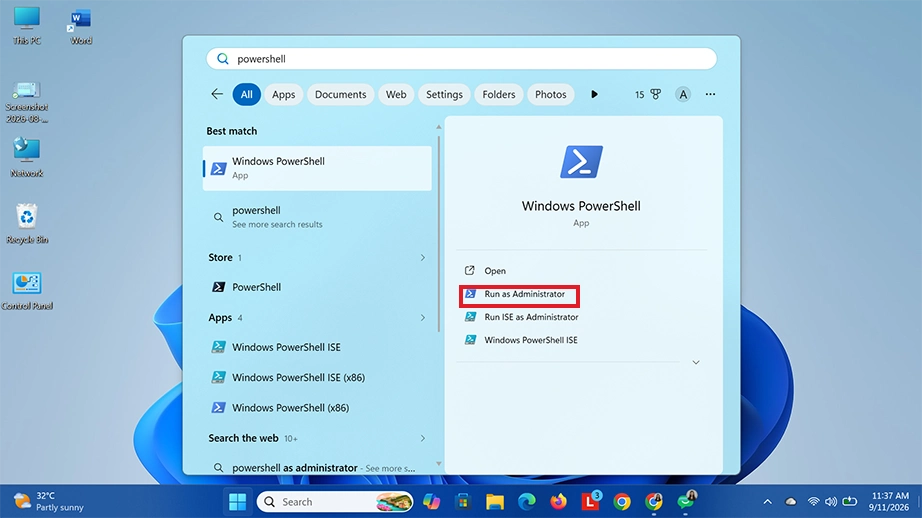
Press the Windows key, type “PowerShell”, select Windows PowerShell, and click Run as administrator.
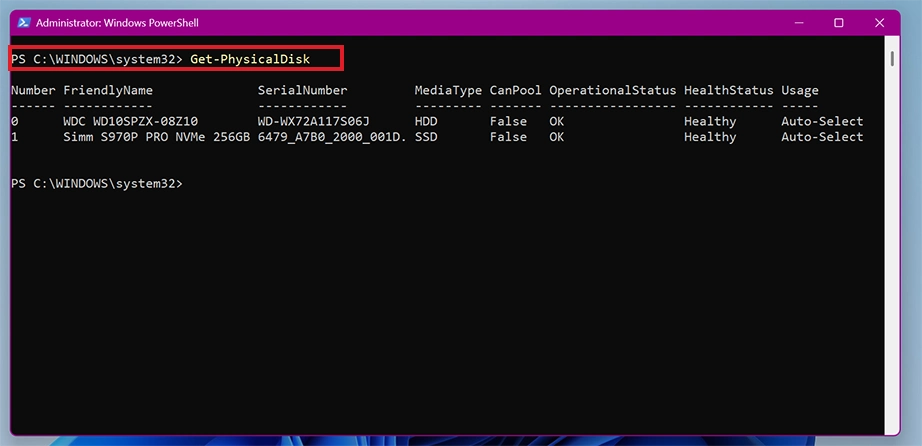
Type or paste the following command exactly as shown and press Enter:
Get-PhysicalDisk
Review the generated summary chart:
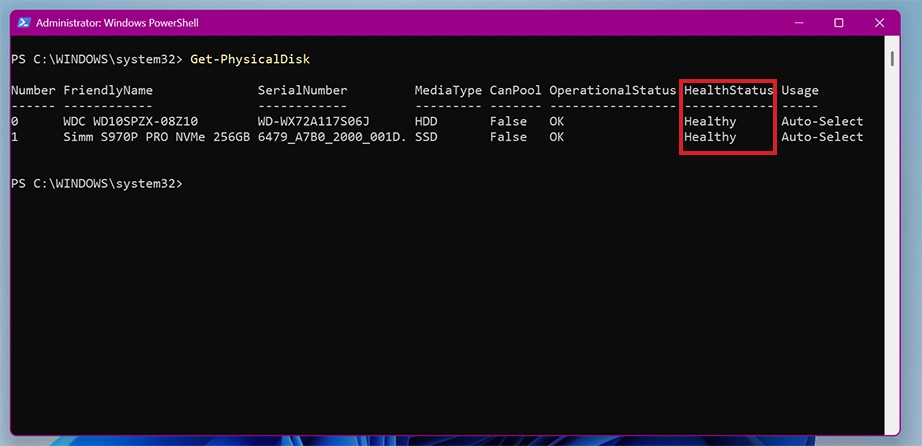
HealthStatus: A “Warning” or “Unhealthy” status shows the system has flagged system degradation or read/write verification faults. A “Healthy” status shows your drive is perfectly fine.
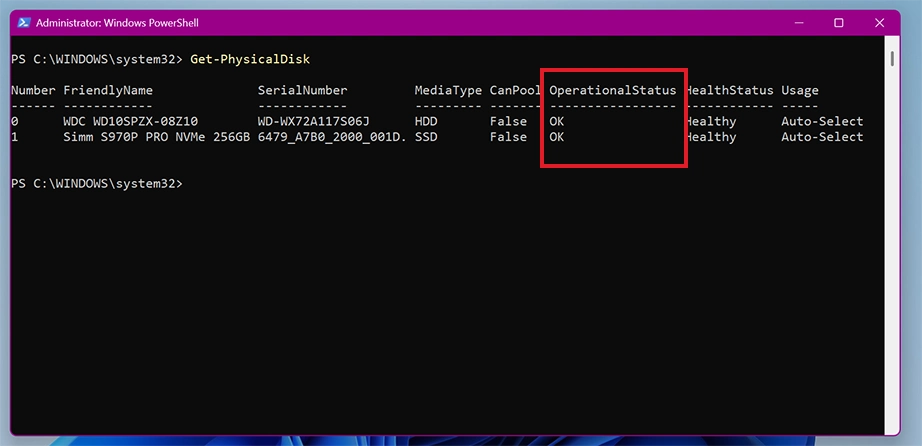
OperationalStatus: If this shows “Predictive Failure”, your SSD is failing. “OK” status shows the drive is working perfectly fine.
Method 4: Running CHKDSK (Check Disk for SSD Errors)
The Check Disk tool is an essential utility for finding and fixing structural problems on your solid-state drive. S.M.A.R.T. tests look at hardware wear and test health of SSD, but CHKDSK scans the logical file system for corrupted data blocks and any stability issues. Run this diagnostic tool to check SSD drive for errors, make sure your drive is stable, and protect files from sudden issues.
How to check SSD health using the CHKDSK tool:
Press the Windows Key, type “cmd”in the search box, and select Run as administrator.
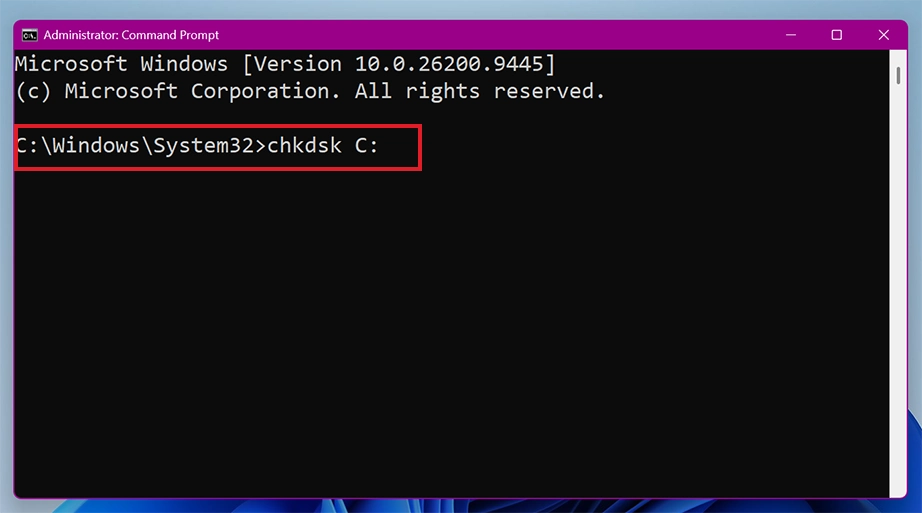
Type the following command (replaceC: with your target drive letter if checking a secondary drive) and press Enter:
chkdsk C:
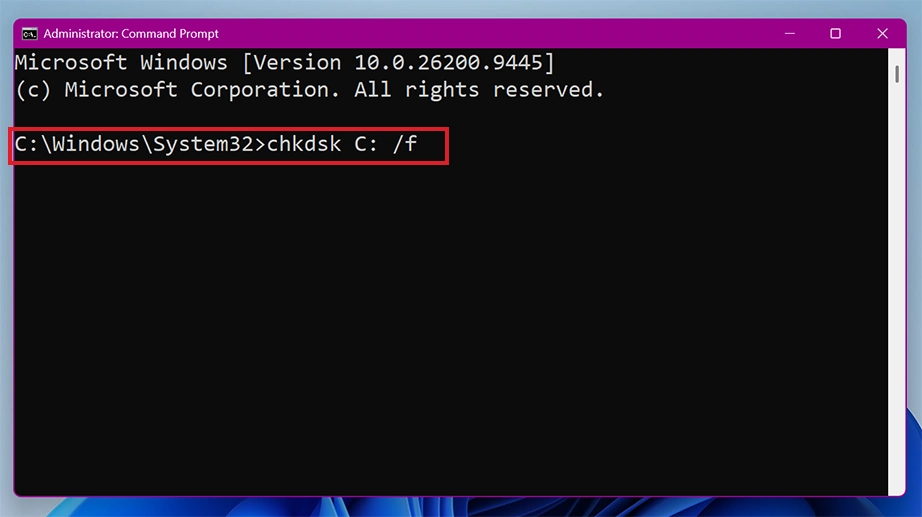
Optional Repair mode:To have the tool automatically fix found file system errors, add the /f flag to the command:
chkdsk C: /f
Warning: Never use the /r or /b repair flags on an SSD. Those parameters force the system to locate physical bad sectors by repeatedly writing data to the drive. Doing this causes unnecessary hardware wear on the SSD.
Review the summary text block. A perfectly healthy drive will show “Windows has saved the file system and found no problems.”
How to Check SSD Status on macOS?
Check SSD status on macOS by reviewing the system’s built-in S.M.A.R.T. status or running the native Disk Utility application. Since Apple has sealed and deeply integrated flash storage directly into the logic board of Mac models, it is important to check drive health regularly. These methods can save you from potential storage degradation.
Method 1: Checking S.M.A.R.T. Status via System Report
The System Report dashboard shows the health status report directly from Mac’s internal controller. This reads the drive’s built-in self-monitoring hardware to confirm whether your physical flash storage is operating safely or actively degrading. It provides a simple pass-or-fail grade on your drive’s stability.
Here is how to check SSD health using S.M.A.R.T. Status on Mac:
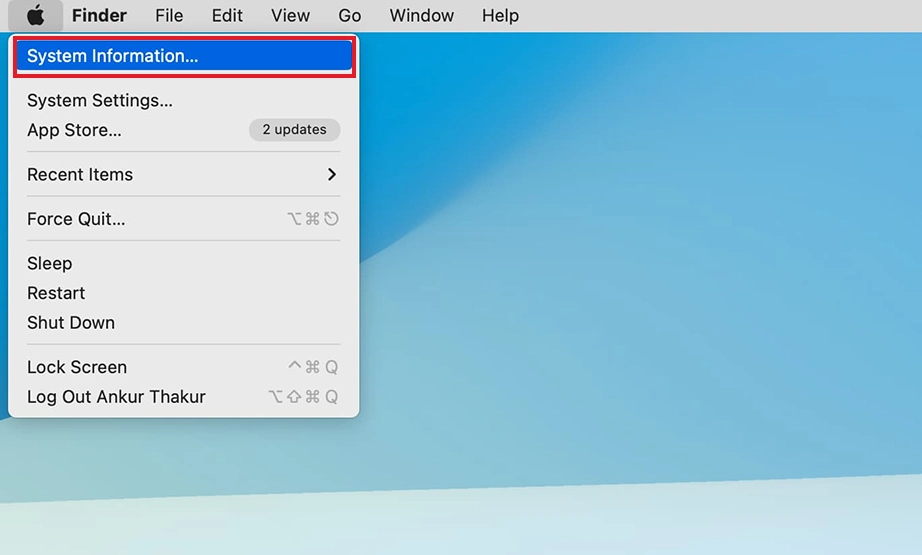
Press and hold the Option key on your keyboard and click the Apple menu in the very top-left corner of your screen while holding the key.
Select System Information from the drop-down menu.
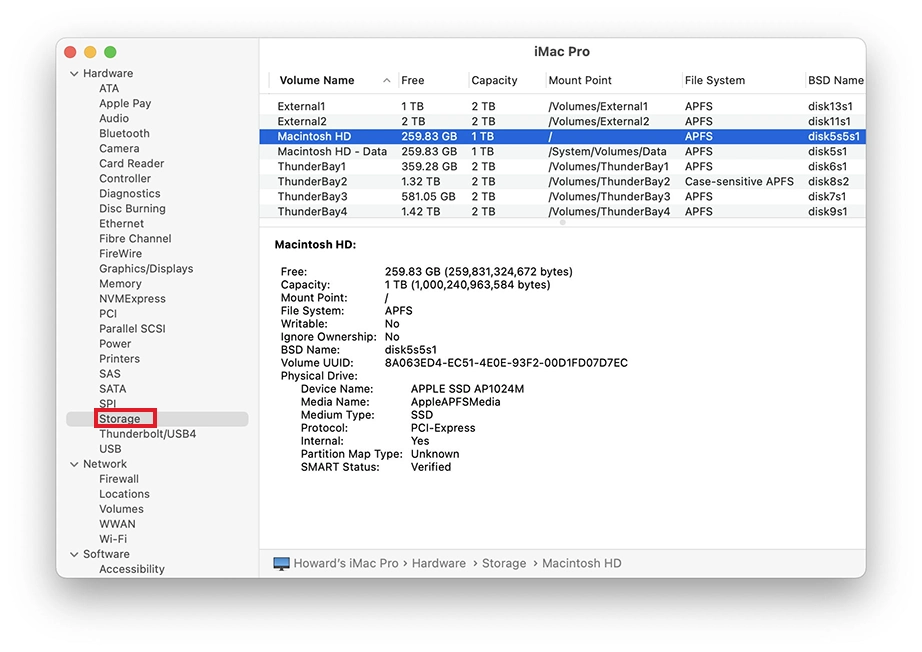
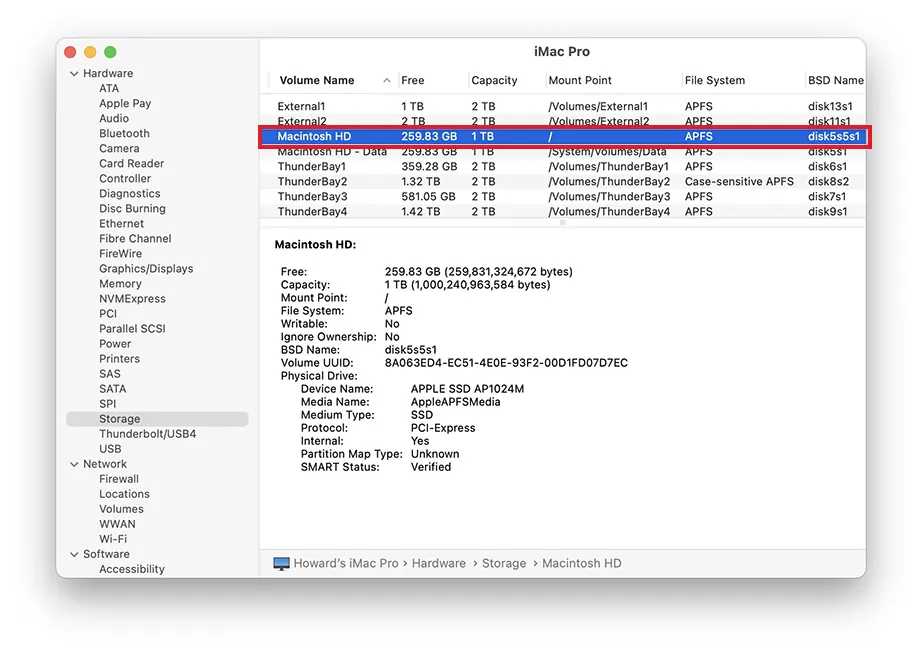
Look at the left sidebar, find the Hardware section, and click on Storage.
Select your primary internal drive from the list at the top of the window.
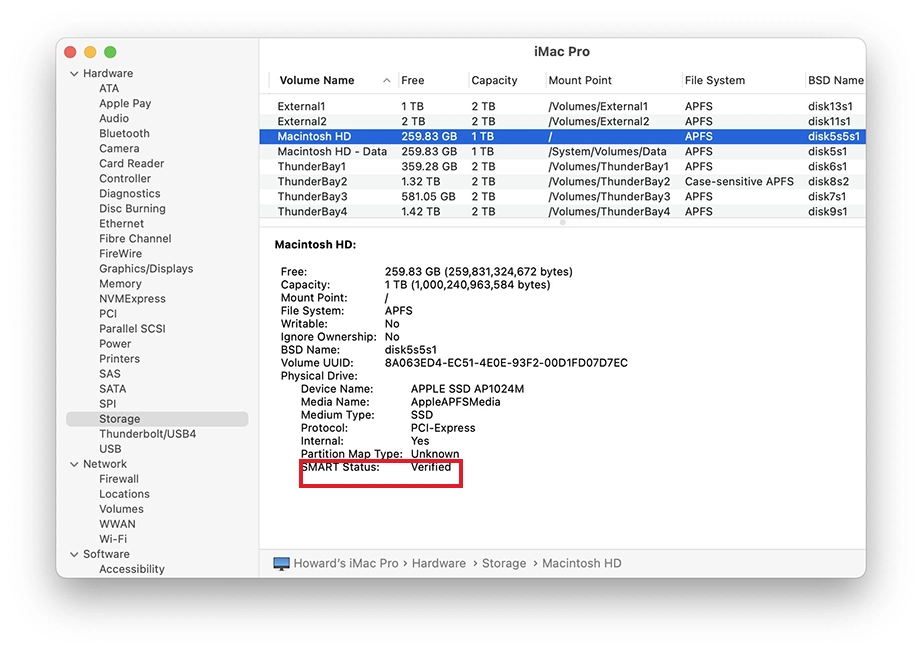
Scroll down to the bottom details pane and locate the S.M.A.R.T. Status row.
Verified: Your SSD is healthy and running safely.
Failing: Your SSD has detected hardware errors and needs to be backed up immediately.
Method 2: Running Disk Utility First Aid
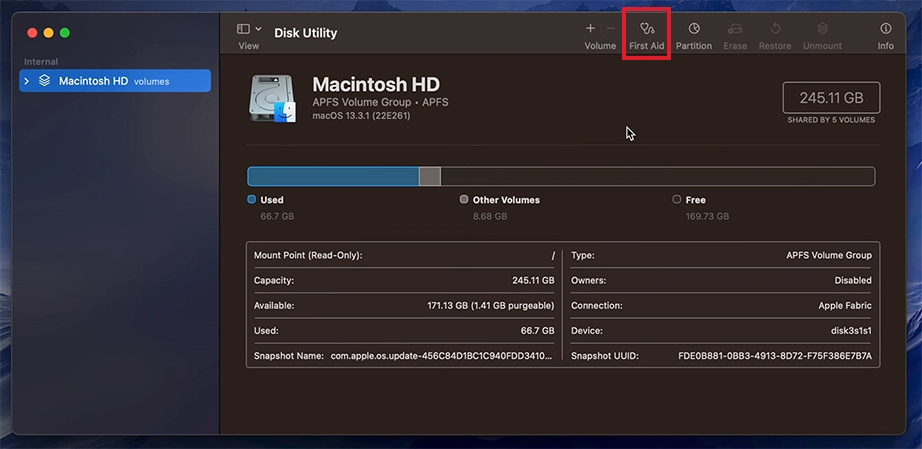
Disk Utility First Aid is the tool to check the logical health of your storage formatting and underlying structures. Running this tool regularly is highly recommended because it acts as an immediate diagnostic checkpoint. It not only detects issues but also scans and attempts to fix them automatically so your Mac drive operates smoothly without needing any technical configurations or external applications.
Steps to run First Aid on Mac to scan SSD for errors and fix them:
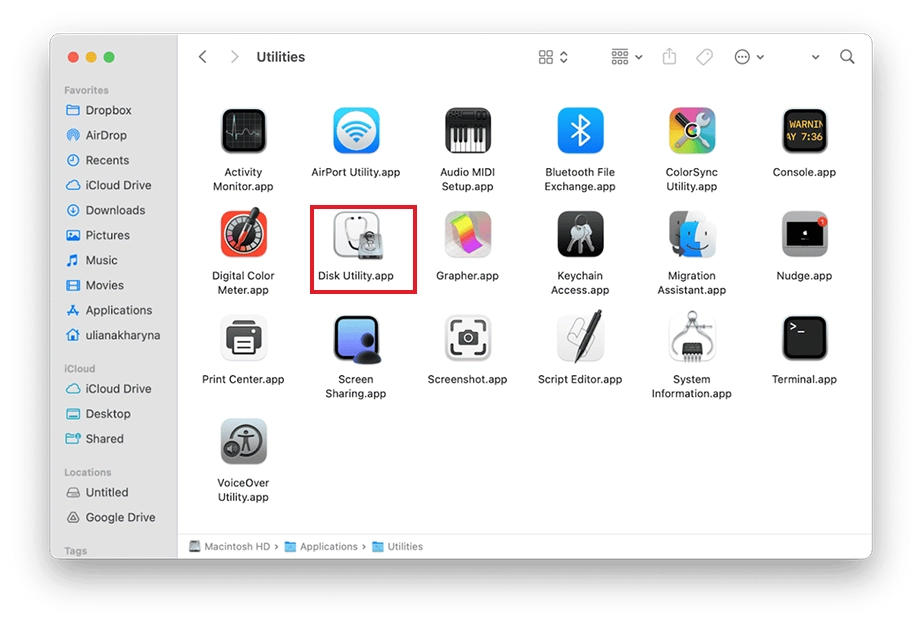
Open Finder, go to Applications, open the Utilities folder, and double-click Disk Utility.
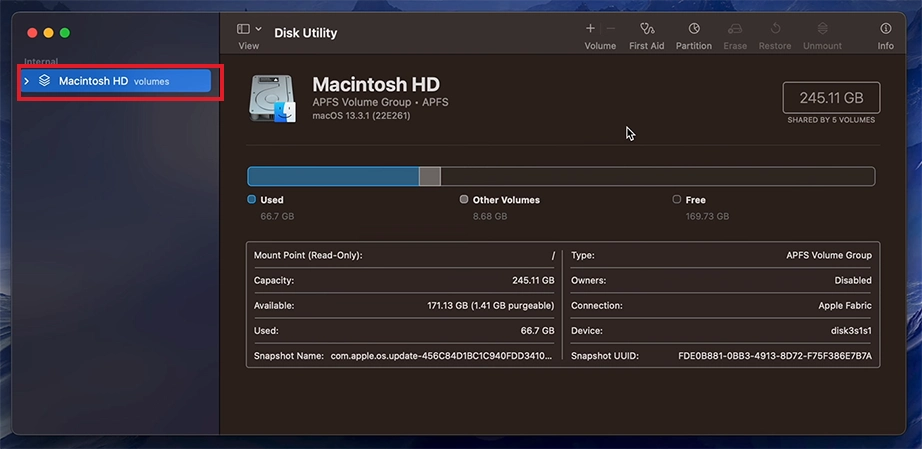
Select your main internal volume (mainly named Macintosh HD) from the left sidebar.
Click the First Aid button located in the toolbar.
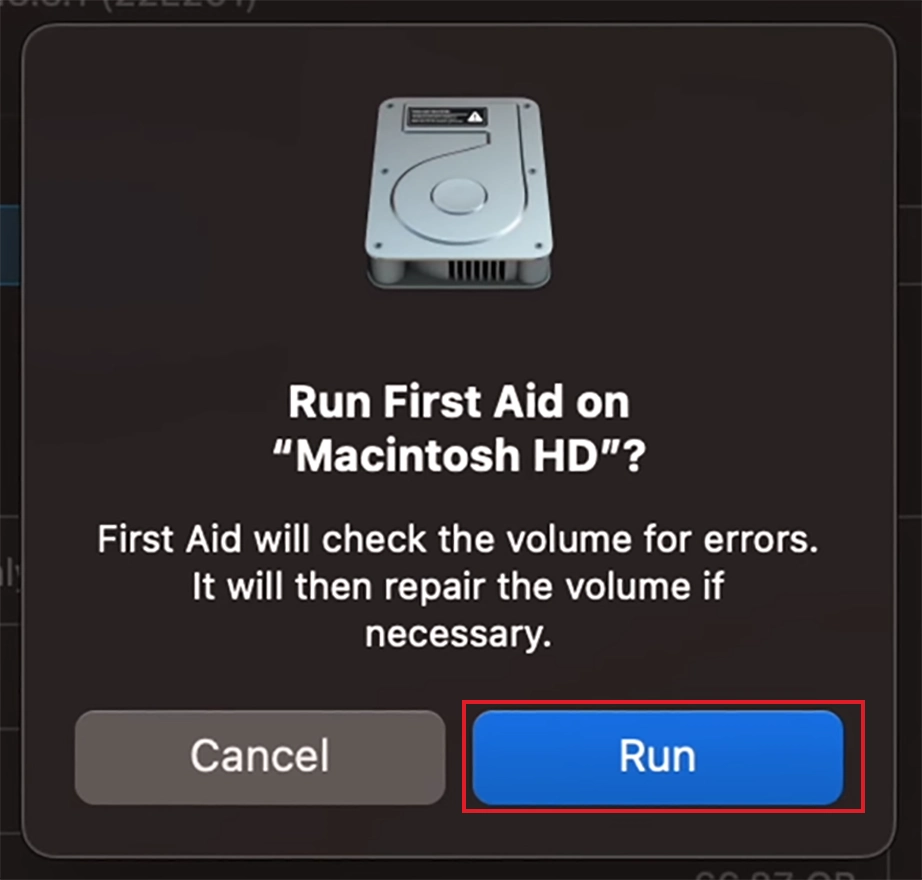
Click Run to confirm the diagnostic scan.
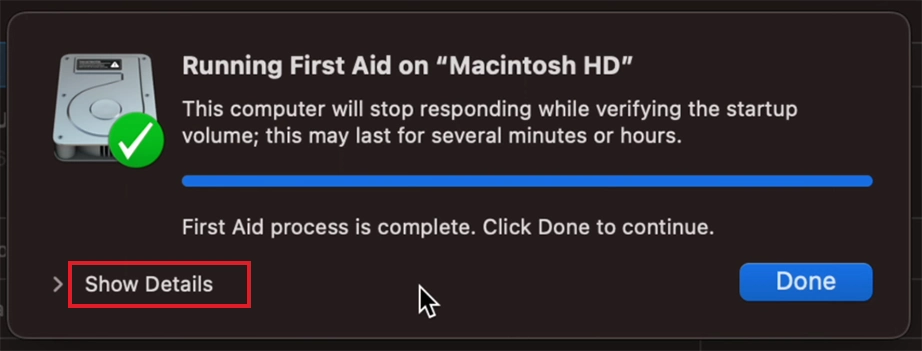
Wait for the scan to finish and click Show Details to review the report.
Emergency Steps: How to Recover Data From a Failed SSD?
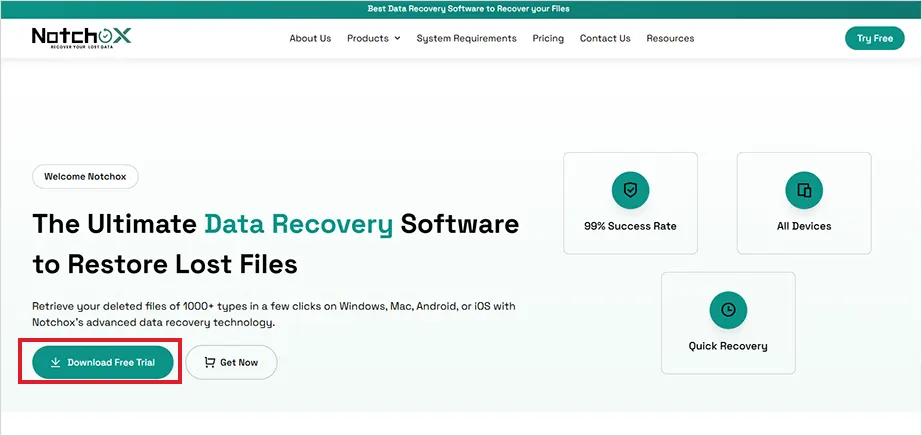
In case you get negative results from an SSD SMART test, it means your SSD is failing or has become completely unreadable. You need to immediately rescue your files before the hardware gives out entirely. For this, the most direct way to recover data from SATA SSD or NVMe SSD is by using professional file restoration software such as Notchox Data Recovery Software.
Notchox is designed to scan the drive using advanced algorithms to safely restore your files from corrupted partitions, RAW sectors, unresponsive or virus-affected SSDs.
Steps to recover your SSD data securely:
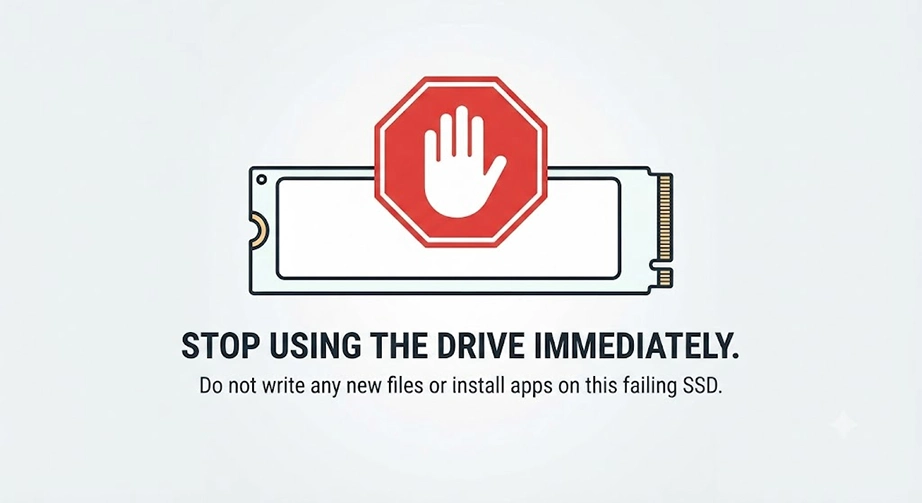
Stop using the drive immediately. Do not write any new files or install apps on the failing SSD.
Install Notchox Data Recovery Software on a completely separate and healthy drive or a secondary computer to keep the failing SSD isolated.
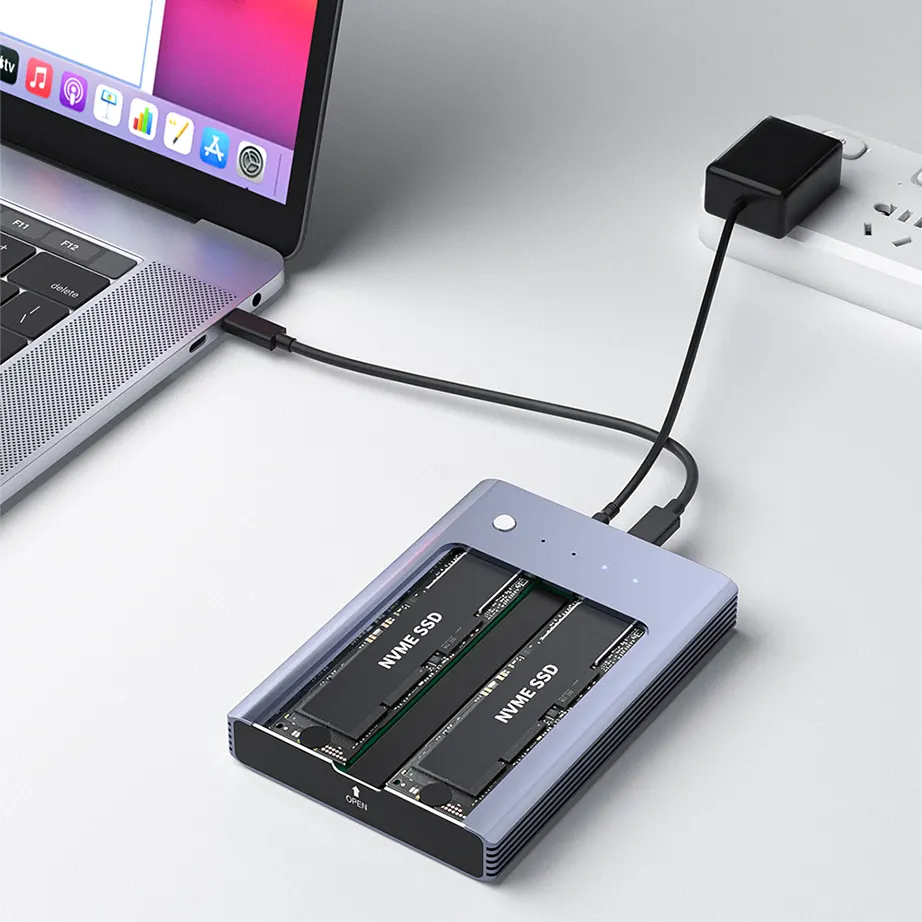
If you are recovering from an external drive or a different computer’s drive, connect it via a stable USB adapter or enclosure.
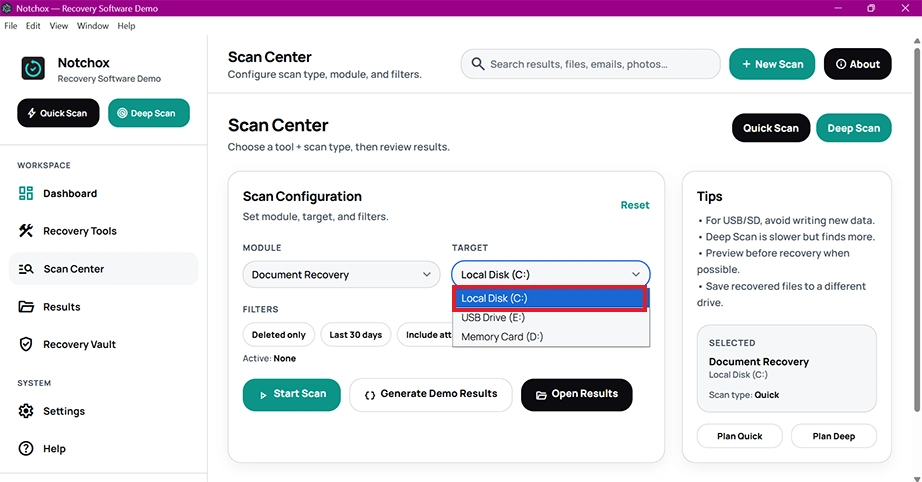
Launch the Notchox tool, select the failing SSD from the dashboard interface as the target drive to scan.
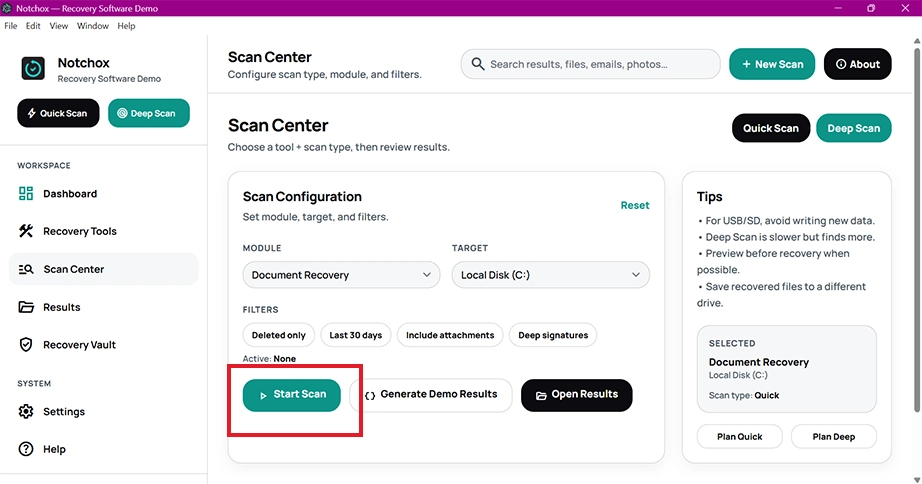
Initiate a Deep Scan. Click the Start Scan button to begin the recovery process and scan the corrupted sectors.
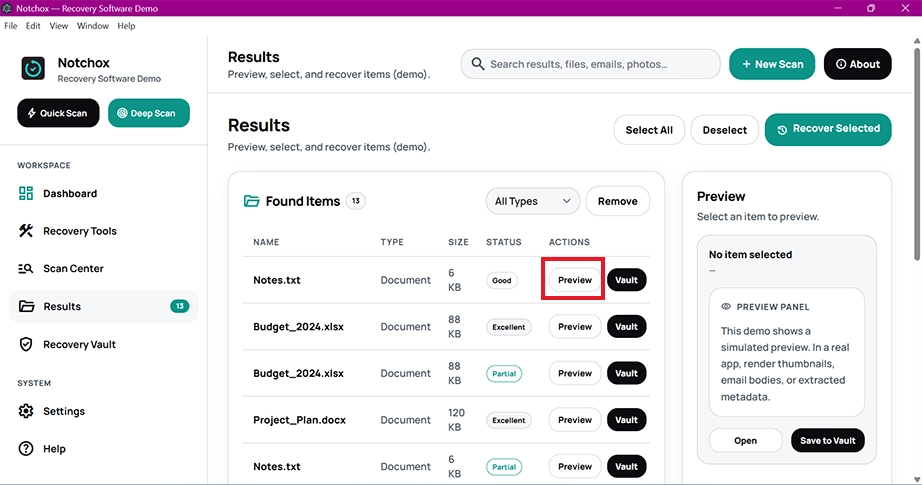
Once the scan finishes, click the Preview button next to the file’s name.
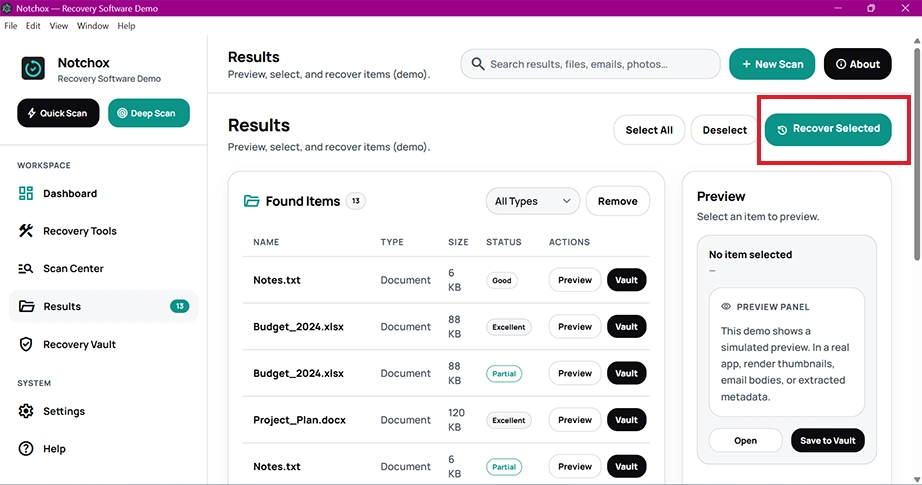
Select the file you wish to restore and click the Recover Selected button at the top right of the window.
Conclusion
By taking advantage of free built-in tools like the Windows 11 storage settings, Command Prompt and PowerShell status queries, or the native macOS System Report, you can instantly check status of SSD. This is much needed because regularly checking your SSD health is the single best way to protect your drive’s data from sudden drive failure.
If your diagnostic checks ever flag a critical warning, saving your data must be a top priority. Use Notchox data recovery software to scan and extract your valuable files before the hardware shuts down permanently.
Frequently Asked Questions
Q1: How to check SSD health on Windows?
Ans: Press Windows Key + I to open Settings, go to System > Storage > Advanced storage settings > Disks & Volumes, and click Properties next to your SSD to view its remaining life percentage and temperature. Also, open Command Prompt as administrator and run the command: wmic diskdrive get status.
Q2: How to test SSD health on macOS?
Ans: To check SSD health on macOS, you can try either of the following methods:
Hold the Option key, click the Apple menu, and select System Information. Click the drive and check the S.M.A.R.T. Status row.
Open Disk Utility and select the main SSD. Click the First Aid button, then scan the drive to test and repair the SSD.
Q3: How to test a solid state drive?
Ans: You can test a solid-state drive natively by using built-in system dashboards like Windows Storage Settings or Mac System Information.
Q4: How do I know if my SSD is bad?
Ans: Your SSD is likely failing if your computer suffers frequent Blue Screen of Death (BSOD) crashes, file corruption, unwritable read-only files, or your system severely slows down during simple tasks.
Q5: What is the lifespan of an SSD?
Ans: The average lifespan of a modern consumer SSD is 5 to 10 years, depending on how much data you write to it daily.
Q6: Is CHKDSK f or r better?
Ans: chkdsk /f is much better and safer for an SSD. The /f flag quickly finds and fixes the software-level file system errors. You must avoid using chkdsk /r on an SSD because it forces your system to repeatedly write data to find bad sectors.
Q7: How do I fix my corrupted SSD?
Ans: You can patch up a corrupted SSD by running the built-in chkdsk C: /f command in Windows Command Prompt to repair file system errors.
Q8: What is the best SSD data recovery software?
Ans: The best SSD data recovery software is Notchox Data Recovery Software. It is specially engineered with advanced deep scanning algorithms that safely read degraded flash memory blocks to recover deleted or corrupted files from unstable SSDs.
Deeksha Arora is a Data Protection & Recovery Writer focusing on writing accurate, informative, and easy-to-understand technical articles for Notchox’s readers. Her content on the prevention of data loss, understanding risks of device failures, and guides to fix problems helps readers make the right decisions and understand the technical terms easily. She works closely with Subject Matter Experts to ensure high usability and accuracy of her writing.