Deeksha Arora Jun 8, 2026
Ans: When data is overwritten, new information is written onto the physical storage sectors that were previously occupied by old data.
If a new file has completely overwritten the exact same physical sectors on a disk, the original data is permanently gone and can not be recovered. Data recovery from an overwritten disk is a race against time and technical reality.
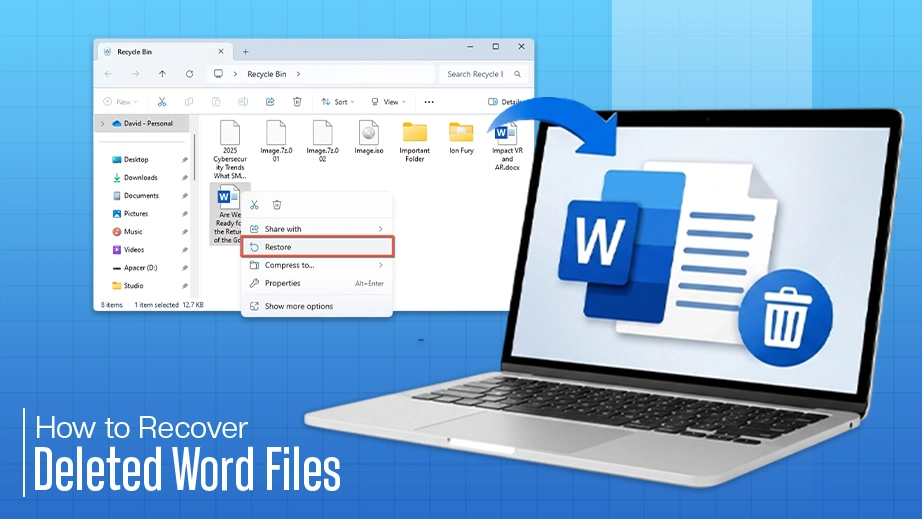
While typical “deleted” files are hidden from view, overwritten data occurs when new information physically replaces the original binary code on storage sectors. In this article, we break down the hard truth about data permanence and provide step-by-step methods to recover files from overwritten disk.
Quick Answer: To recover files from overwritten disk, use backups or specialised software (provided the data isn’t fully replaced).
- Windows users can use File History, Windows File Recovery, or OneDrive/Dropbox.
- Mac users can use Time Machine, “Revert to”, or iCloud.
- If data is only partially overwritten, specialised data recovery software may restore remnants, but success is not guaranteed.
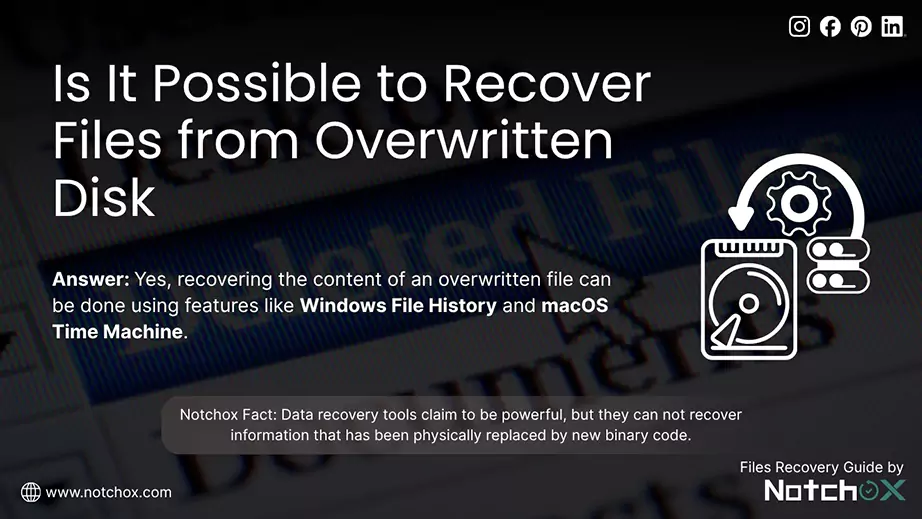
Overwritten data is generally considered difficult to recover using standard software because the original binary data (0s and 1s) has been replaced with new information. While raw data recovery from an overwritten drive is generally impossible, recovering the content of an overwritten file is highly successful using features like Windows File History and macOS Time Machine.
Overwritten Disk Cause:
Recovery dependency also lies in recovery states.
| State | Description | Recovery Chance |
| Backup State | The OS took a snapshot or backup of the file in the background before the overwrite happened. | High (Via File History/Time Machine) |
| Temp State | While you were editing, the software created a “Temporary File” version. | Good (Via Auto Recover) |
| Fragmented State | The new file was smaller than the old one. Therefore, part of the old file was overwritten. | Partial (via recovery software) |
| Final Overwrite | The new file is larger than or equal to the old one and occupies the exact same sectors. The old data is gone. | Near Zero |
Wiping programs (like DoD and Shredder) destroy files by physically overwriting the data’s storage sectors with meaningless patterns (like random characters or all zeros/ones). While a standard delete command only removes the file’s index entry, a wiping tool ensures every trace of binary code is replaced. Once these bits are changed on hardware, the original information is permanently destroyed.
For the next section, we will explore how to recover files from overwritten disk using both specialised software and manual system-level techniques.
Recovering data from an overwritten disk is one of the most challenging tasks in data software, as it only depends on the physical state of the drive sectors. Data recovery tools claim to be powerful, but they can not recover information that has been physically replaced by new binary code.
In most cases, these tools perform a “Deep Scan” to find fragments of their original data in areas the new files haven’t reached yet. This means you only achieve a partial recovery rather than complete restoration.
No tool can recover 100% data when physically replaced.
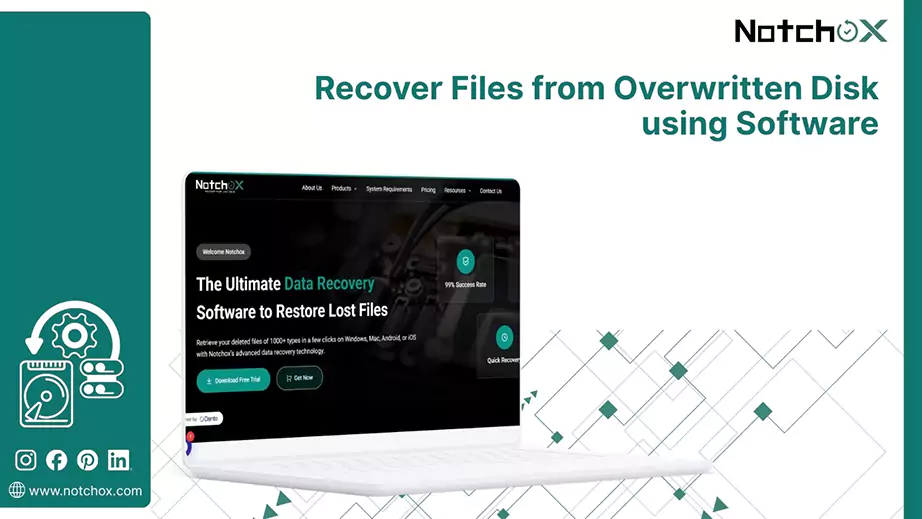
But for the highest possible success rate in recovering what’s left, Notchox makes maximum recovery possible that hardware allows. It is a premium data recovery solution built to address a wide range of data loss scenarios, letting users recover their valuable data.
Scenarios where Notchox excels:
Recovering files from an overwritten drive without third-party software depends on the safety nets your Operating System has. Both Windows and Mac offer certain built-in safety recovery features that can be used in such cases. These manual methods are considered reliable because instead of scraping the damaged remaining data, they pull the exact versions of your files from system caches/backup.
| Pros | Cons |
| Completely safe, no risk of downloading malware | Only works if you have the backup feature turned on |
| It’s completely free | Need to be activated beforehand |
| Original files are preserved |
In this section, we will discuss specific recovery workflows for both Windows and MacBook environments, covering all the built-in utilities.
Windows provides several built-in features and external options to retrieve your original data when overwritten. Following, we will explore three effective methods to restore your files. We will look into File History, Windows File Recovery, and cloud backups to help you get your important information back.
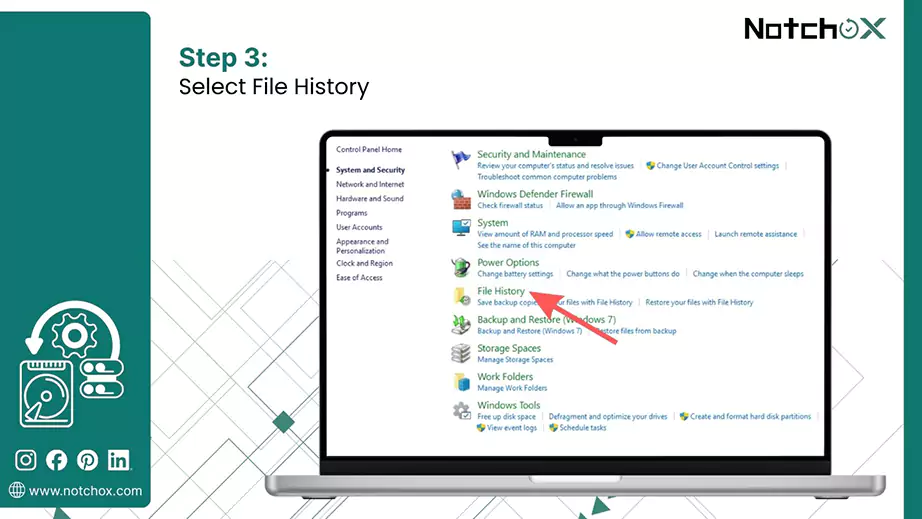
File History is the primary built-in utility for Windows. It is designed to protect your personal files from accidental loss or overwriting. This tool saves “snapshots” of your files to a drive or network location every hour. It lets you travel back in time to recover a version of a file exactly as it existed before it was overwritten.
Note: File History backs up only specific libraries, which include Documents, Photos, Music, and Desktop by default.
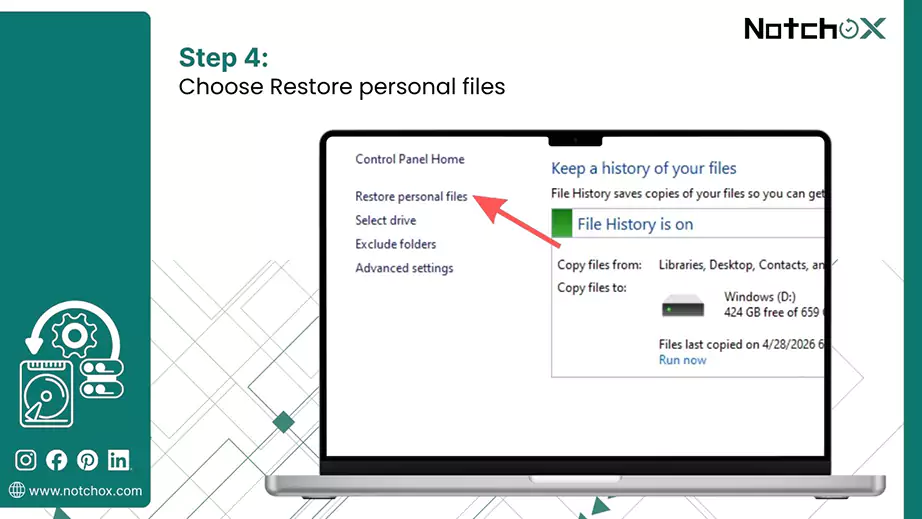
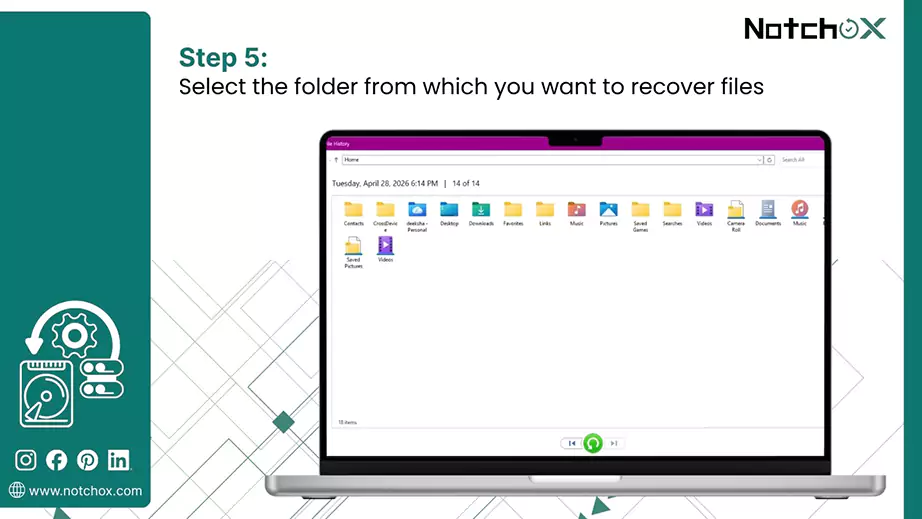
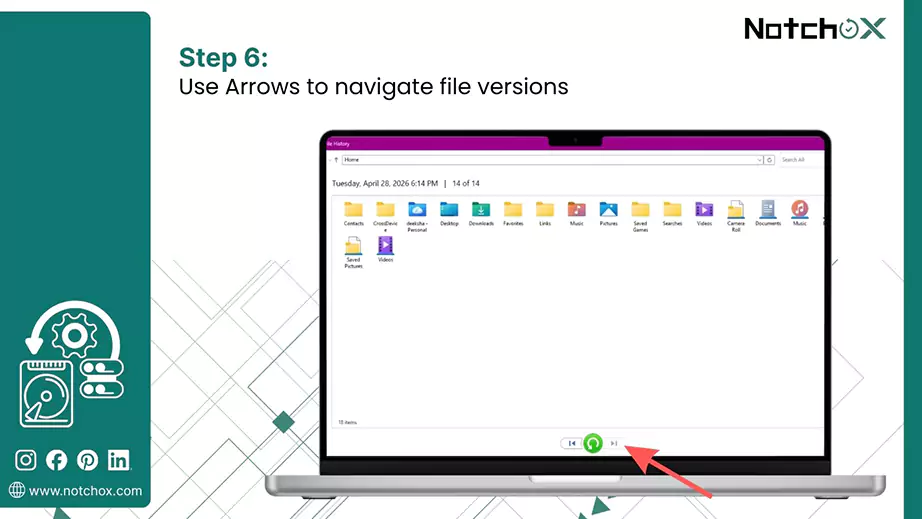
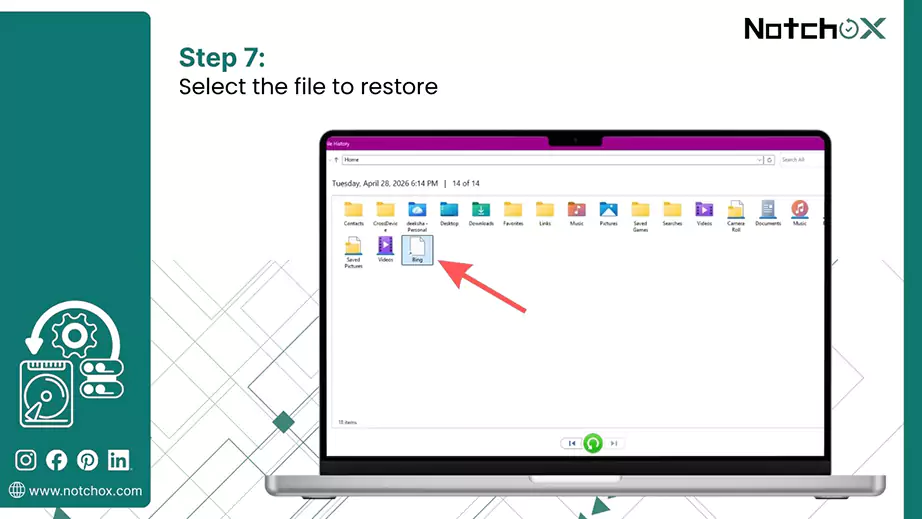
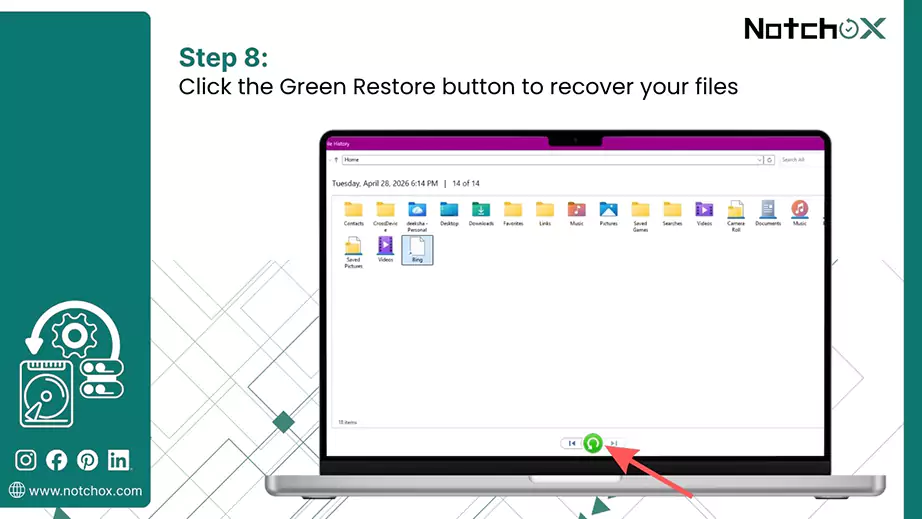
To recover an overwritten file using File History, follow these steps:


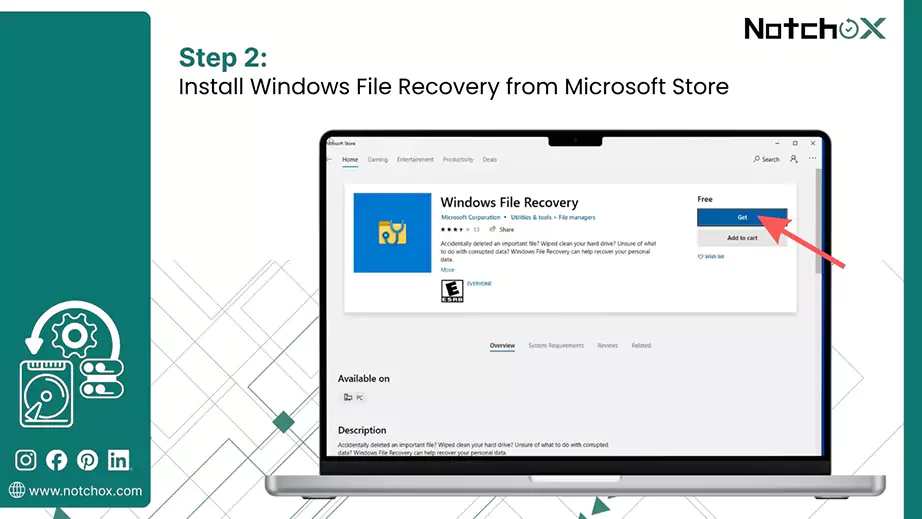
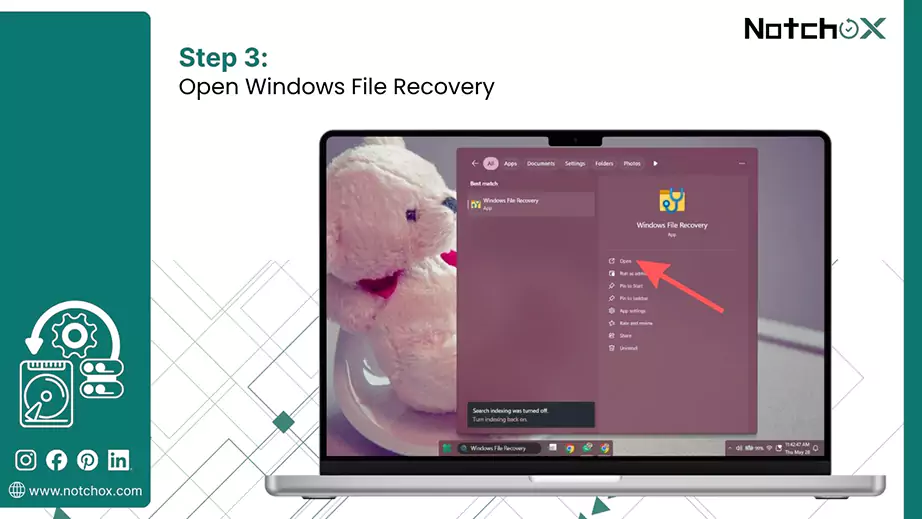
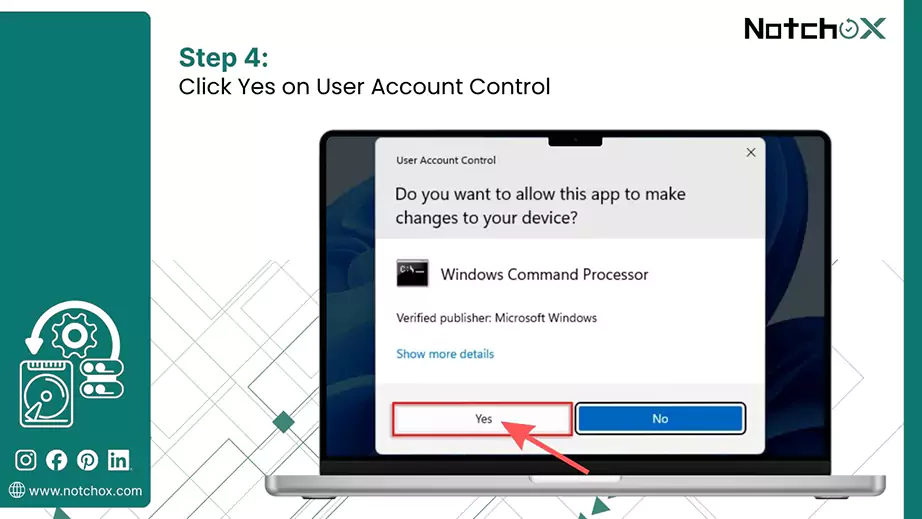
Microsoft provides a free command-line tool, Windows File Recovery, to restore files in case of deletion, corruption, overwriting, and missing. You can easily download it from the Microsoft Store.
Tip: Always save recovered files to a different drive than the one you are recovering from to avoid further overwriting.

winfr source-drive: destination-drive: [/mode] [/switches]
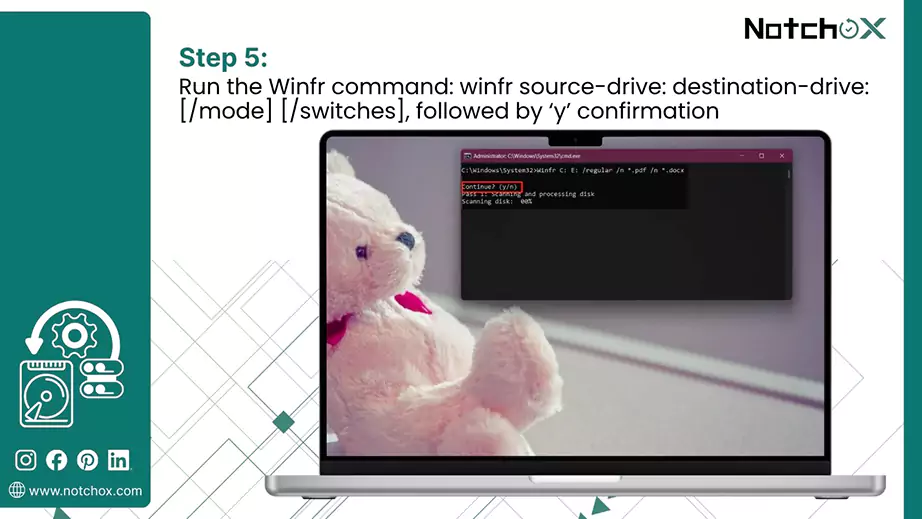
Remember: There are 2 modes: regular and extensive. Here, we will use the extensive mode because we are recovering files from an overwritten disk.
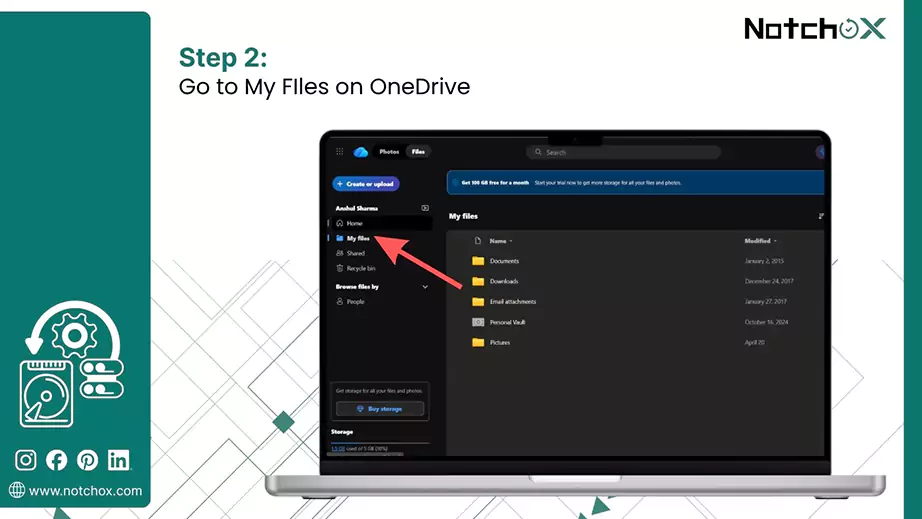
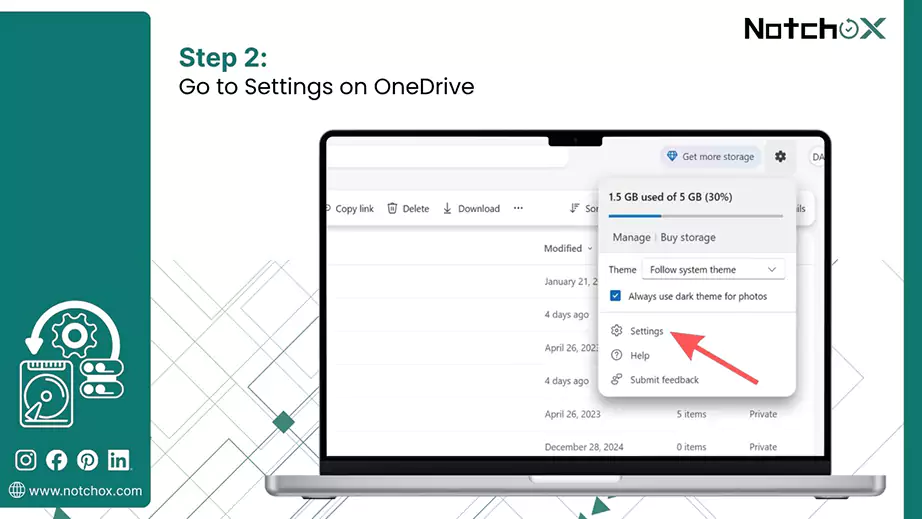
OneDrive is Microsoft’s cloud-based storage service that acts as a copy of your device data files, making them accessible from any device. It syncs your device folders automatically. Beyond just syncing, OneDrive offers various features that help in restoring files:
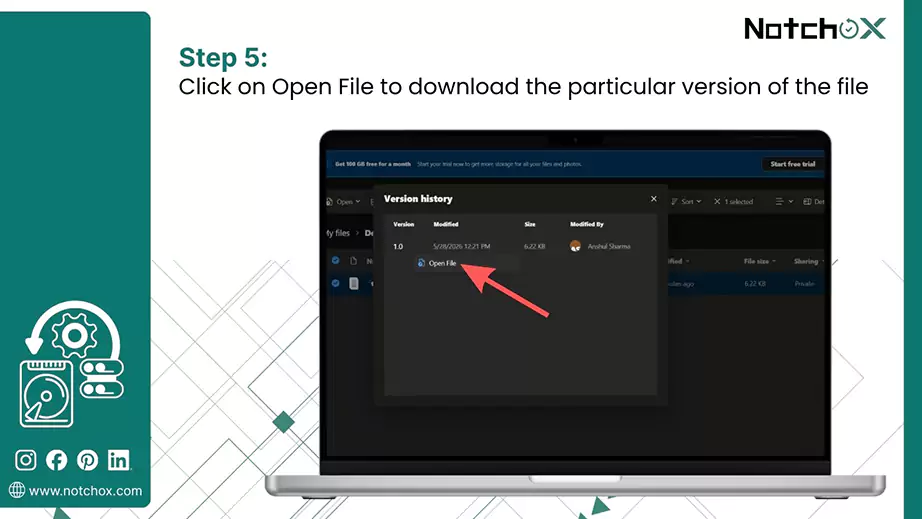
Individual File Recovery (Version History)


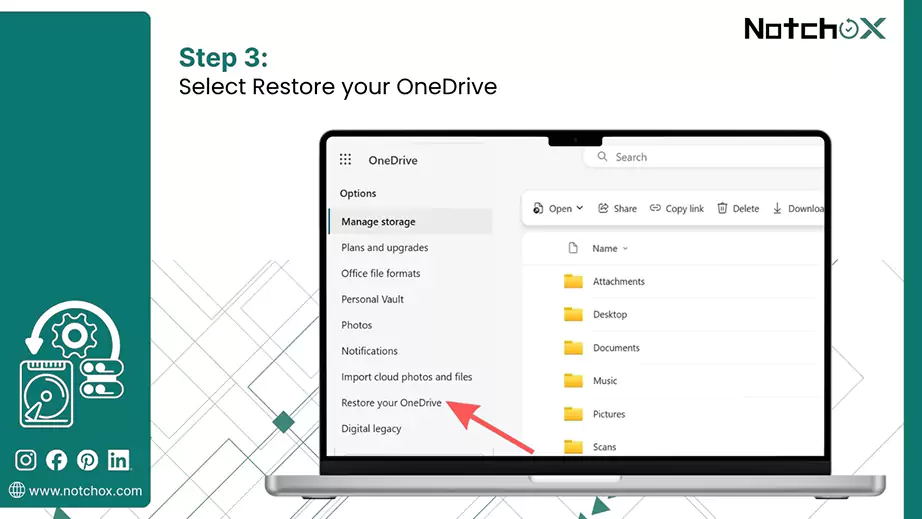
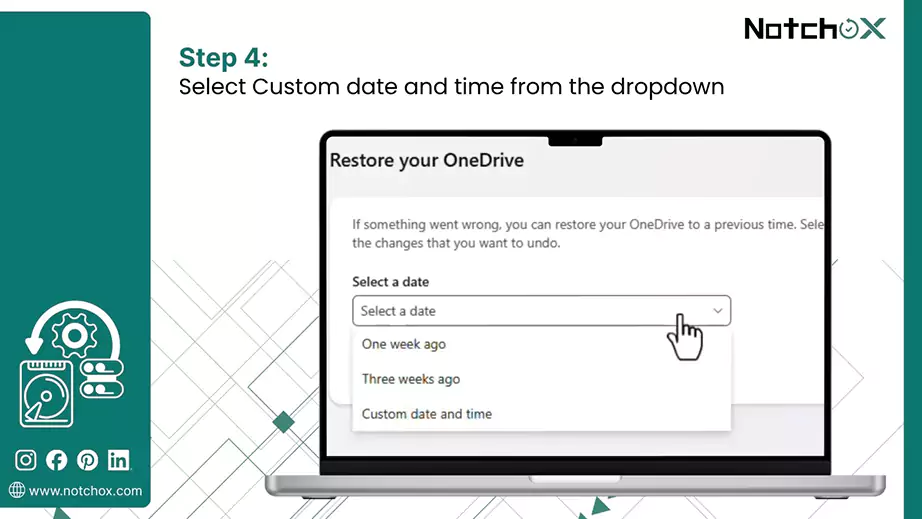
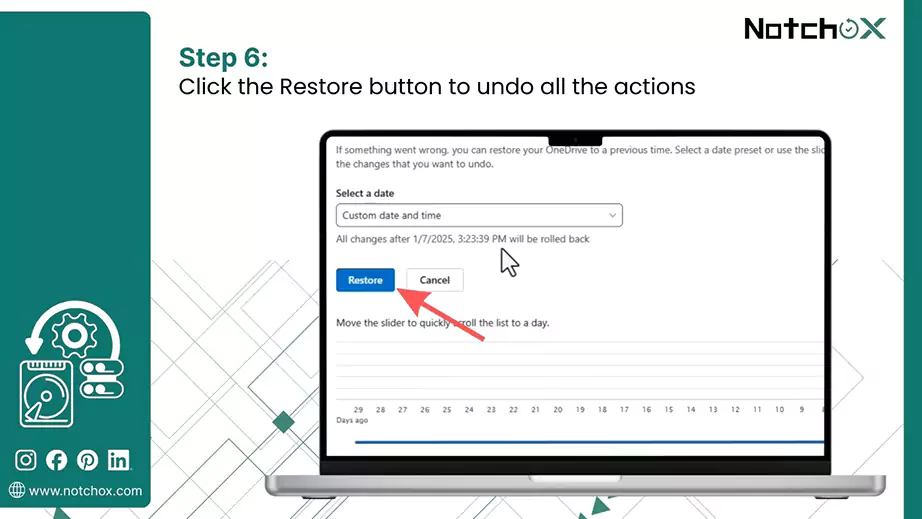
Bulk Recovery (Restore your OneDrive)


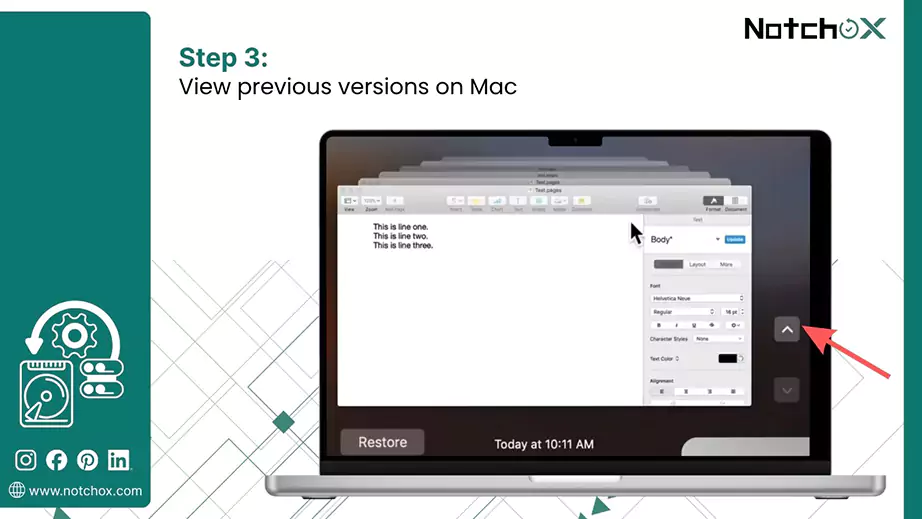
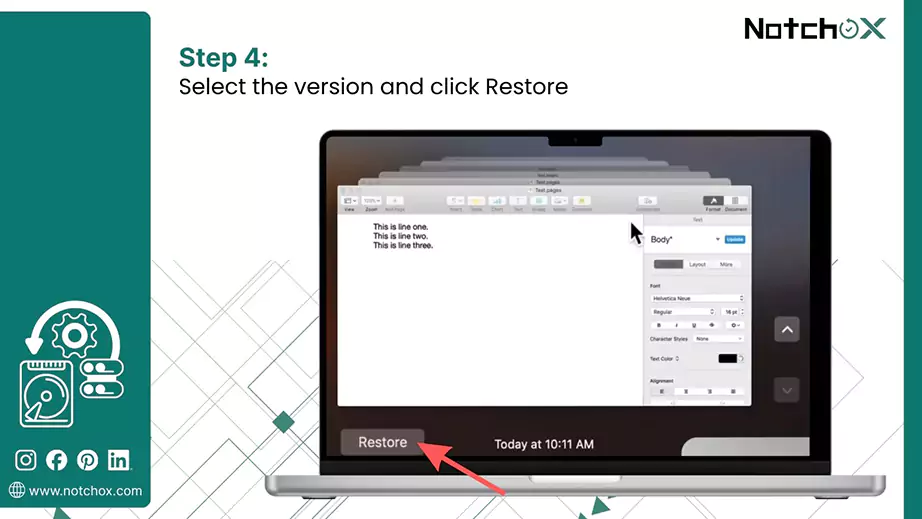
Accidental file modifications on macOS are entirely reversible through native system features and cloud services. If you need to roll back an unwanted save, several pathways exist. We will break down the exact recovery steps using three Mac tools:
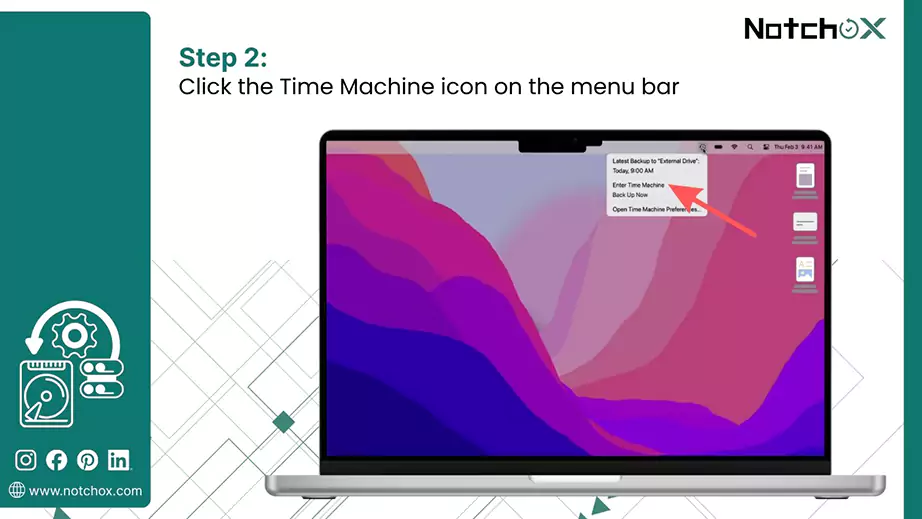
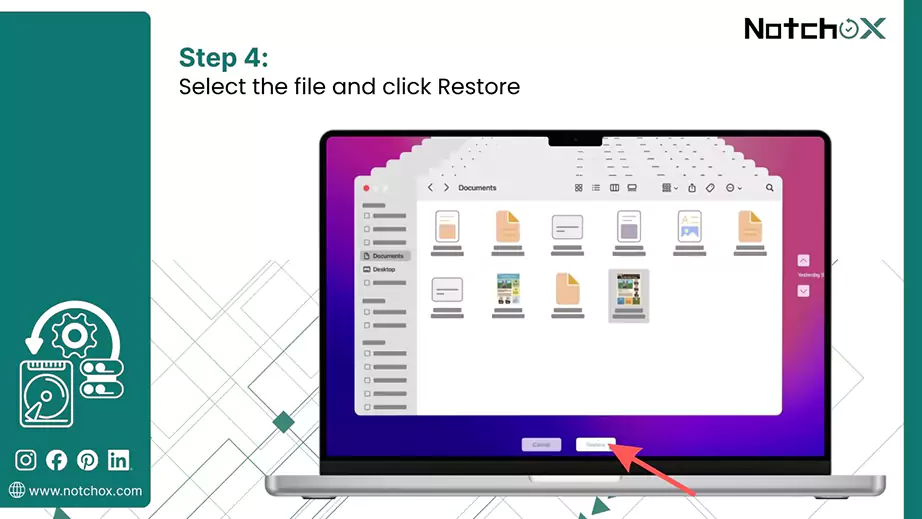
Time Machine is Apple’s built-in backup feature for macOS that automatically creates incremental backups of your entire system. If this was enabled before the overwrite occurred, it is the fastest way to revert a folder to its previous state.

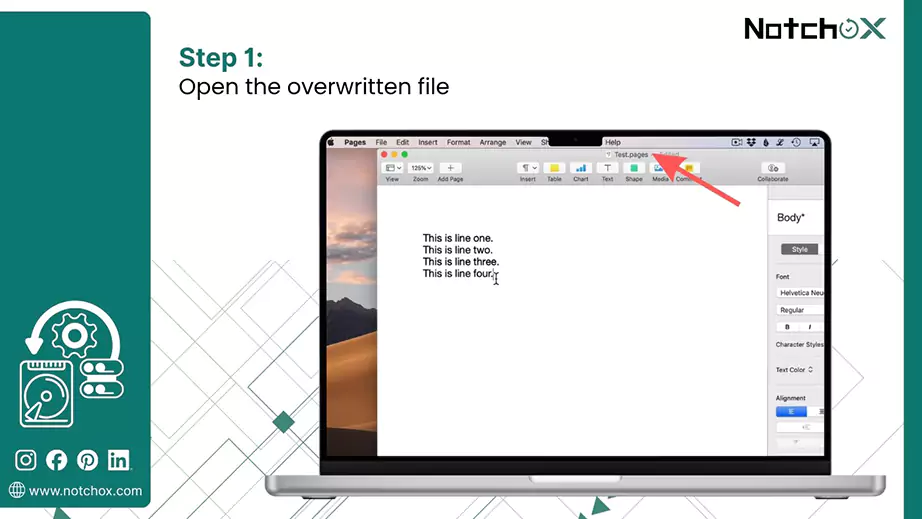
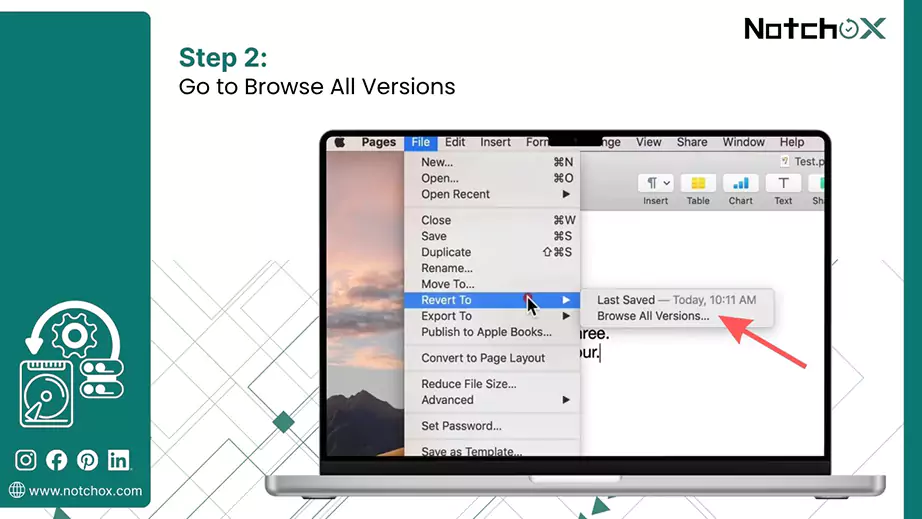
Many native Mac apps and Microsoft Office apps track changes. You can browse through their versions and go back to an older version.
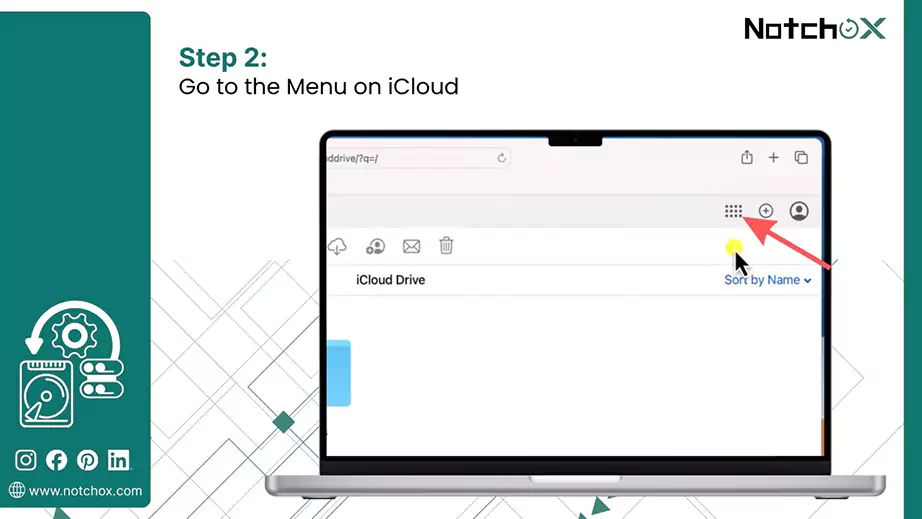
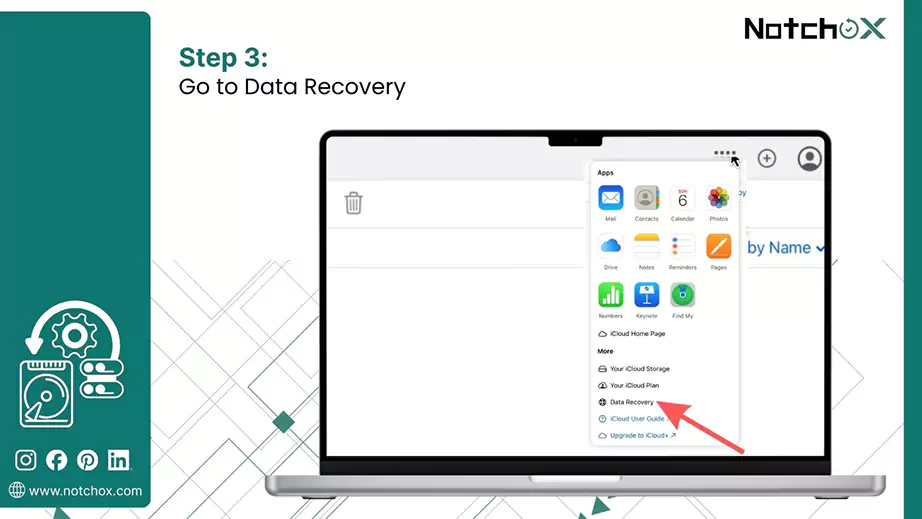
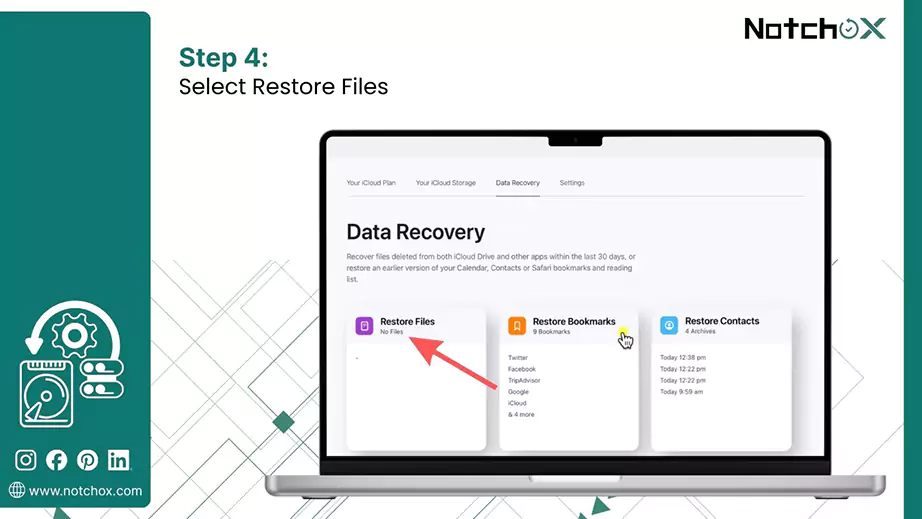
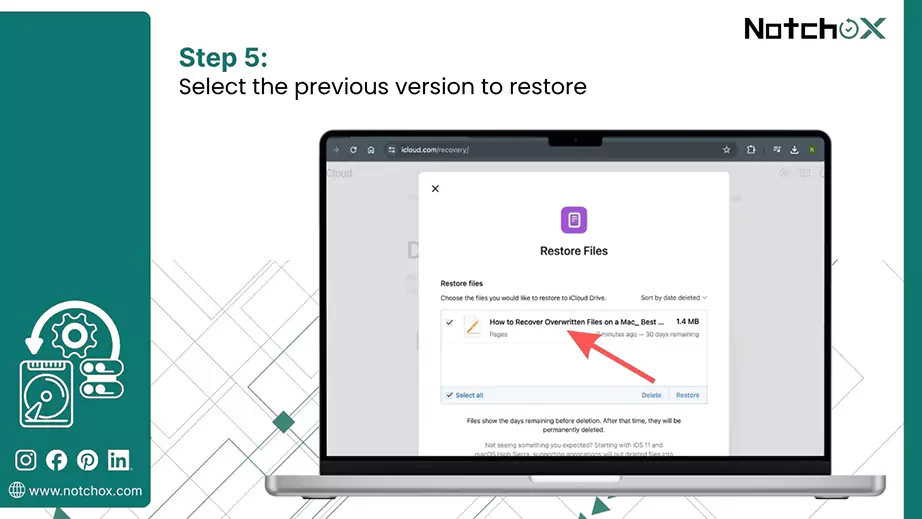
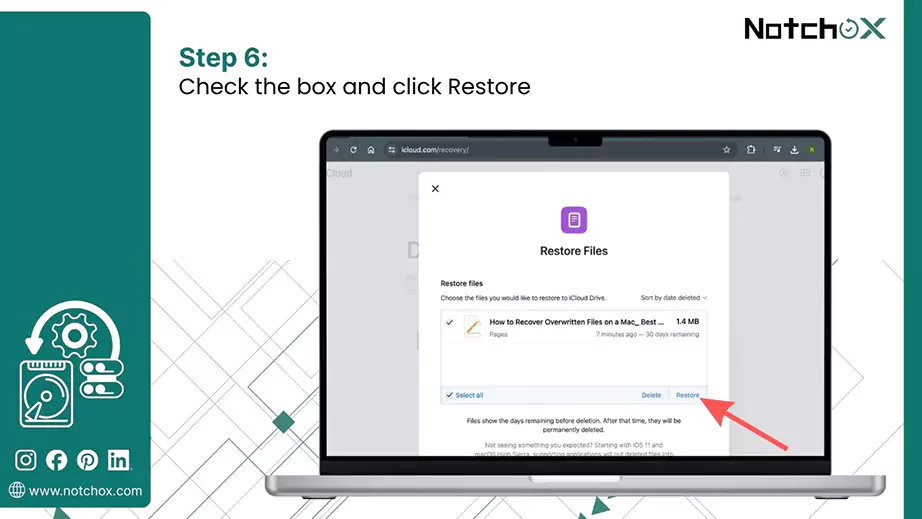
iCloud is Apple’s backup and sync utility that stores your files to be accessed from any Apple ecosystem device. For iCloud backup on Mac, recovery of overwritten files is handled through Data recovery.

Disk overwriting is the process by which new information replaces existing data at the physical level of a storage device. Once the data is overwritten, the original data is destroyed at the binary level, making it permanently inaccessible.
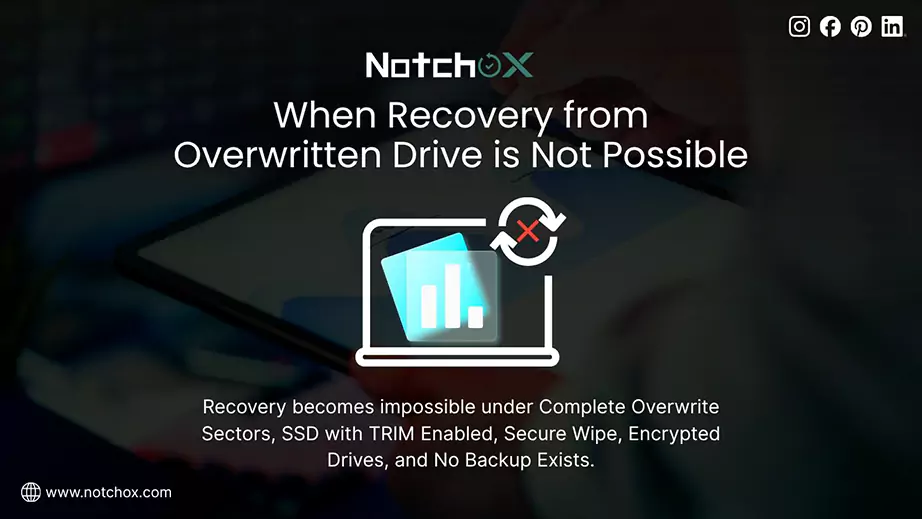
Recovery becomes impossible under the following specific conditions:
New data has physically replaced the original 1s and 0s in the exact same and complete sectors on the disk. The previous data is permanently destroyed.
In modern SSDs, the TRIM command wipes data from storage cells when it is deleted or overwritten to maintain drive speed. This makes recovery impossible even for professional labs.
Unlike quick format, full format is a secure wipe that overwrites the entire drive with zeros.
If the drive is encrypted and the original file headers or keys are overwritten, the remaining data becomes unreadable and can not be decrypted.
The only solution in case of an overwritten disk is the backups. If there is no backup of your device data, or if the backup or sync was not on, recovery is not possible
To prevent files from being overwritten, you should focus on proactive file management and system settings. Digital systems typically replace the old versions with new ones if the file name and location are identical. Therefore, to prevent it, you should break that direct replacement cycle.
The most effective way to prevent overwriting is to adopt Version Control or Cloud Storage services like OneDrive, iCloud, or Dropbox. They recover the history of changes. If you accidentally save over a document, these tools let you “go back in time” to a previous version and recover it.
For local files, using the “Save As” habit ensures you create a new file rather than replacing the original.
Another layer of protection is using File Attributes to lock critical data. By right-clicking a file and selecting Properties > Read-only, you can prevent the system from saving any changes directly to that file. If you try to save, the computer will force you to choose a new name or location.
Prevention Tips:
Recovering files from an overwritten disk is a challenging task, but now always impossible. Success largely depends on whether the physical sectors of the hard drive containing your original data have been completely replaced by new information or not. The moment you realise data is missing, stop using the drive to prevent further overwriting. Use the built-in tools as mentioned above first. Maintaining regular backup is the only guaranteed way to protect your digital data.
Ans: When data is overwritten, new information is written onto the physical storage sectors that were previously occupied by old data.
Ans: Recovering overwritten files is extremely difficult. If the data has been fully replaced at the binary level, it is considered unrecoverable. Having a backup can be a saviour in this situation.
Ans: To recover overwritten files on an external hard drive, connect the drive to a PC and use specialised data recovery software, but remember full recovery is not guaranteed.
Ans: Because the data is physically altered, it is difficult to recover overwritten data. The original data traces are replaced by new bits, leaving no original copy for software to find.
Ans: To recover overwritten files on Windows 11, use:
Ans: To recover overwritten files on Mac, use:
Ans: No. Wiping means writing the data with zeros or random data, making the original data permanently gone.
Deeksha Arora is a Data Protection & Recovery Writer focusing on writing accurate, informative, and easy-to-understand technical articles for Notchox’s readers. Her content on the prevention of data loss, understanding risks of device failures, and guides to fix problems helps readers make the right decisions and understand the technical terms easily. She works closely with Subject Matter Experts to ensure high usability and accuracy of her writing.