Deeksha Arora Jun 8, 2026
Ans: Microsoft offers various methods to recover deleted Word files. You can retrieve them from the Recycle Bin, OneDrive backups, version history, and AutoRecover folder.
Microsoft Word includes various built-in recovery features that can help recover deleted Word files. This guide explains multiple methods to recover deleted, unsaved, overwritten, hidden, and damaged documents in Microsoft Word in a comprehensive way, so that you don’t need to visit different websites struggling to find solutions.
Let’s go through these methods in detail.
Quick Answer:
To recover deleted Word files, the best hassle-free solution is using advanced data recovery software like Notchox. While basic troubleshooting methods like pressing Ctrl + Z, checking the Recycle Bin, OneDrive backup, or searching AutoRecover (.asd) folders can resolve minor issues, Notchox deeply scans your drive to safely restore missing documents completely in case of permanent deletion or corruption.
It is indeed possible to recover deleted Word files that were accidentally deleted due to a power disruption, system crash, or intentional deletion. So, before you give up and start from scratch, take a deep breath. This section covers the ultimate hack to get back your deleted Word documents. We’re talking about unearthing the document from the Recycle Bin, trying Undo on the file, recovering from the OneDrive backup, and maybe using the data recovery software.
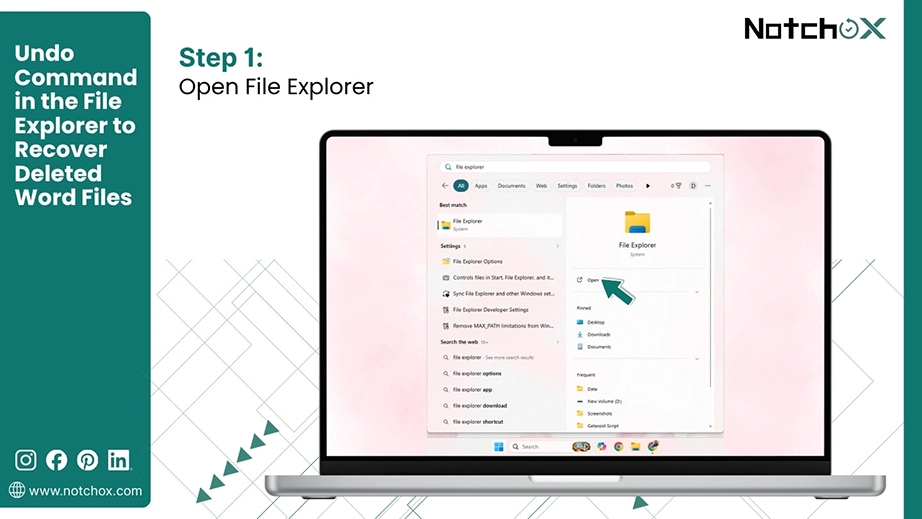
Undo is the first option anyone should try when a file is accidentally deleted. But remember, it cannot restore a permanently (Shift + Delete) deleted or overwritten Word document.
Step 1: Open the File Explorer.
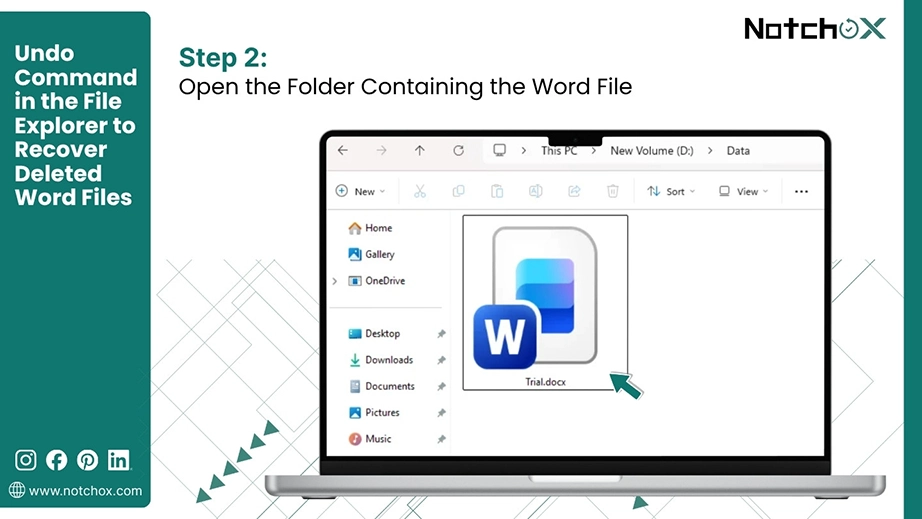
Step 2: Go to the folder where the Word document was saved.
Step 3: Right-click in that folder and click Undo Delete (Ctrl + Z).
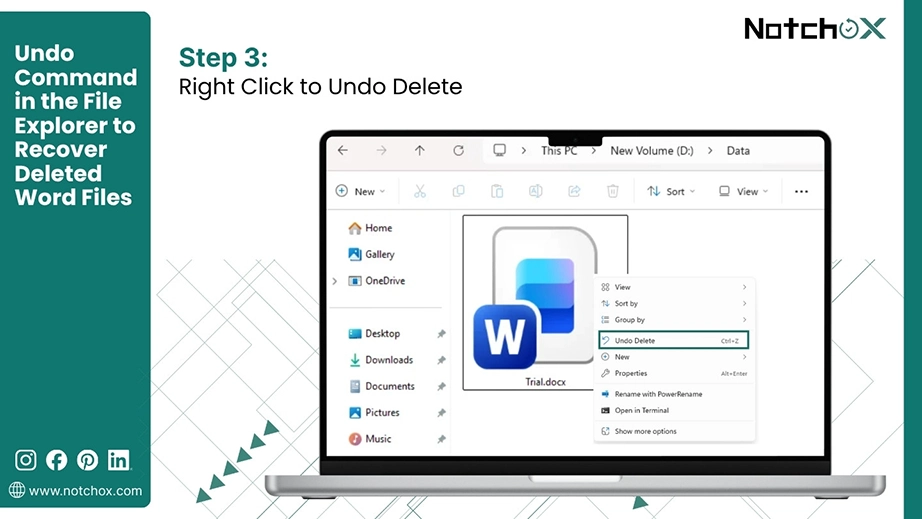
Note: This method does not work if any action is done after the Word document deletion.
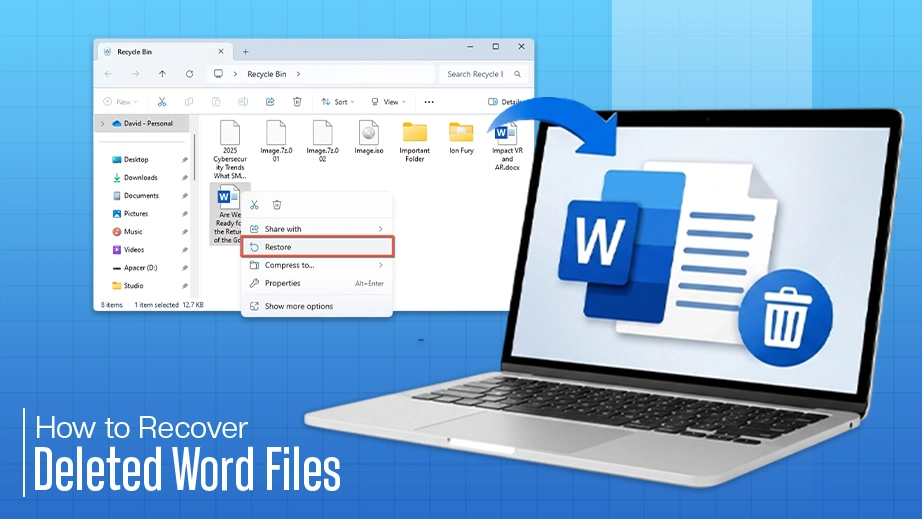
Accidentally deleted the Word document, the Recycle Bin is your saviour. There are 90% chances of recovering the deleted Word document from the Recycle Bin. It keeps the deleted data indefinitely or until manually emptied.
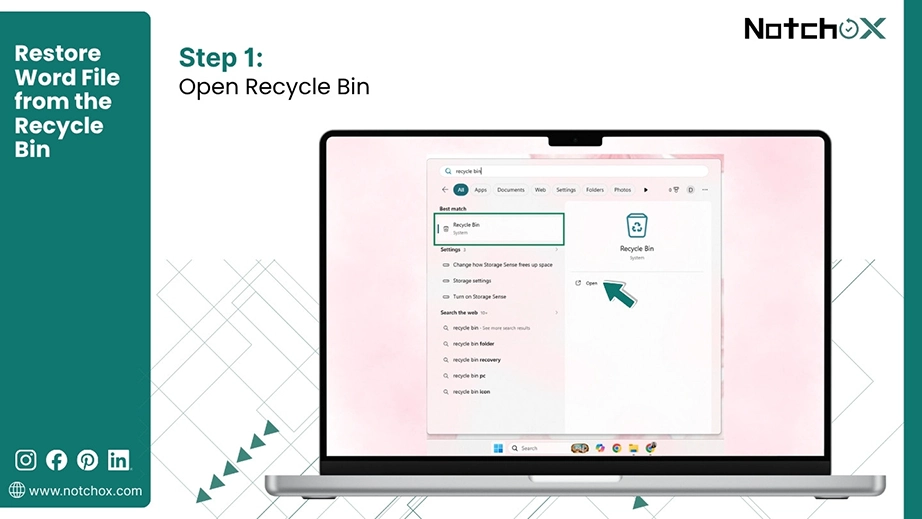
Step 1: Open the Recycle Bin on your computer.
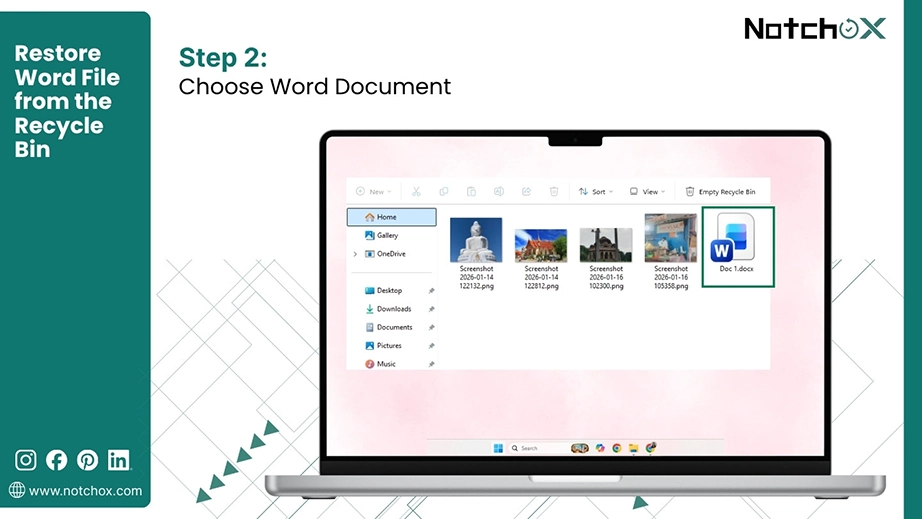
Step 2: Look for the deleted Word document. If recently deleted, you can sort the data by date deleted.
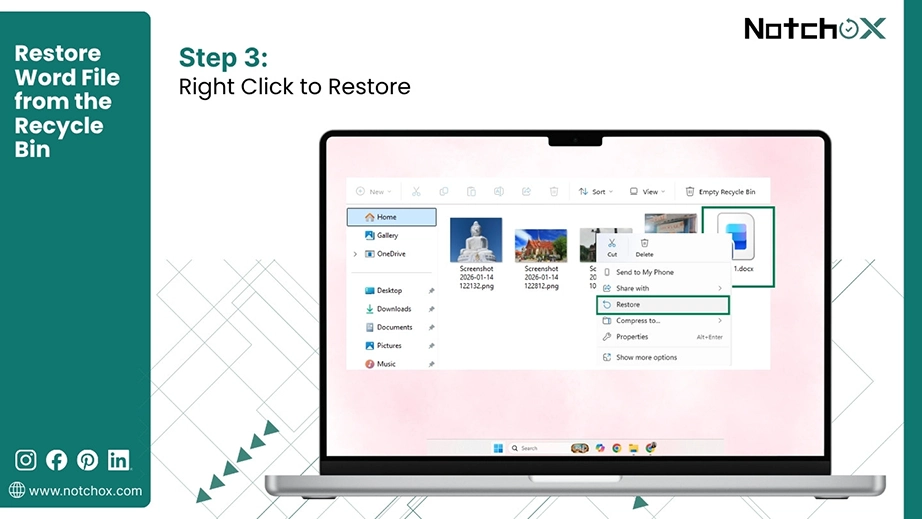
Step 3: Select and right-click on the document. Click Restore. The document will be restored to its original location.
OneDrive synchronises data across all devices. So that if you made a document on a PC, you can still work in real time on it with a tablet. But it also means that if a document is deleted from the computer’s storage, it also gets deleted from the OneDrive. But it stays there in OneDrive’s recycle bin for 30 days.
Follow these simple steps to recover deleted Word files from OneDrive’s Recycle Bin:
Step 1: Go to onedrive.com and sign in to your Microsoft account.

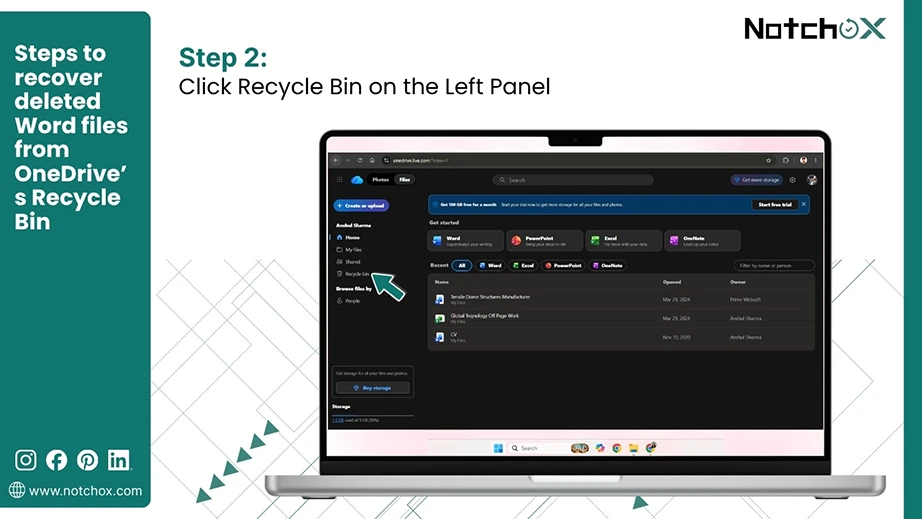
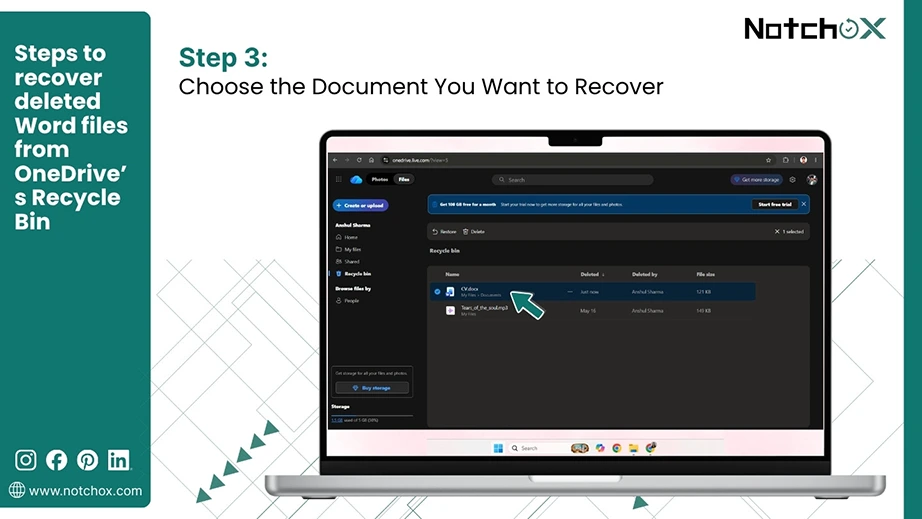
Step 2: Navigate to the Recycle Bin from the left panel.
Step 3: Search your deleted Word file and check the box against it.
Step 4: Click Restore at the top panel. This restores the document to your original OneDrive’s storage and syncs it back to your computer.
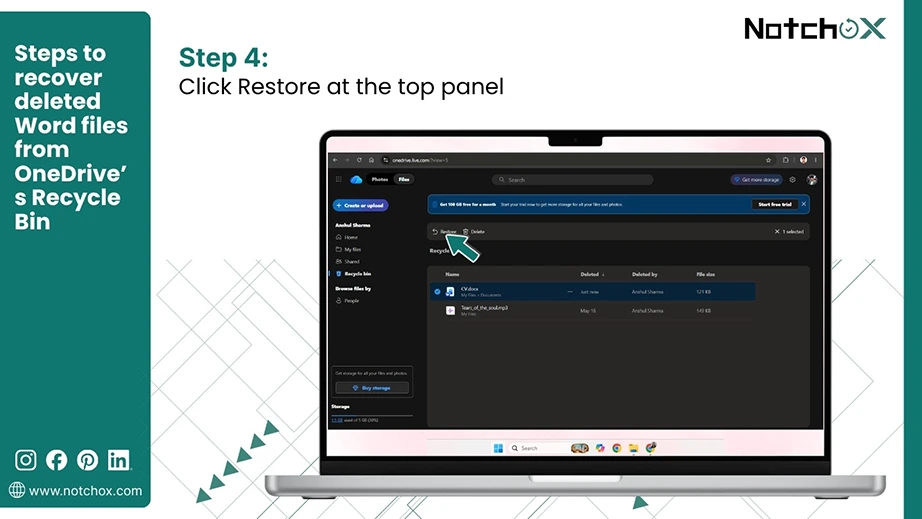
Note: Unlike the computer’s recycle bin, OneDrive’s recycle bin stores files for only 30 days and is permanently deleted afterwards.
Yes, data recovery software can recover deleted Word files. Specialised tools like Notchox are highly effective at recovering the permanently deleted files. They operate by collecting lost data bit by bit until they can completely restore its original state.
Notchox particularly offers document recovery that supports all major document types, doc, pdf, ppt, etc., without affecting drives. It uses deep scan technology to scan through the storage device for file signatures and recover them in their original format. It is globally regarded as the best solution for data recovery due to its 99% success rate.
Here’s how to recover your deleted Word documents using Notchox:
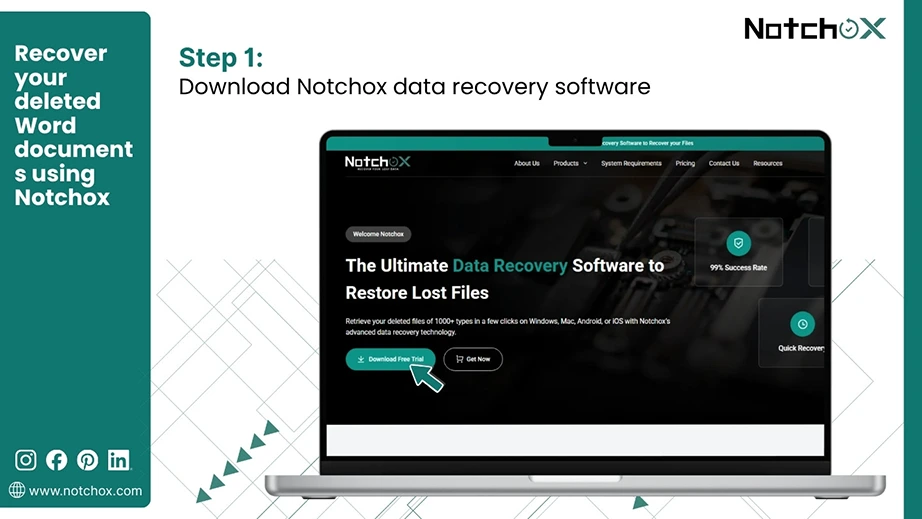
Step 1: Visit the Notchox official website and download data recovery software.
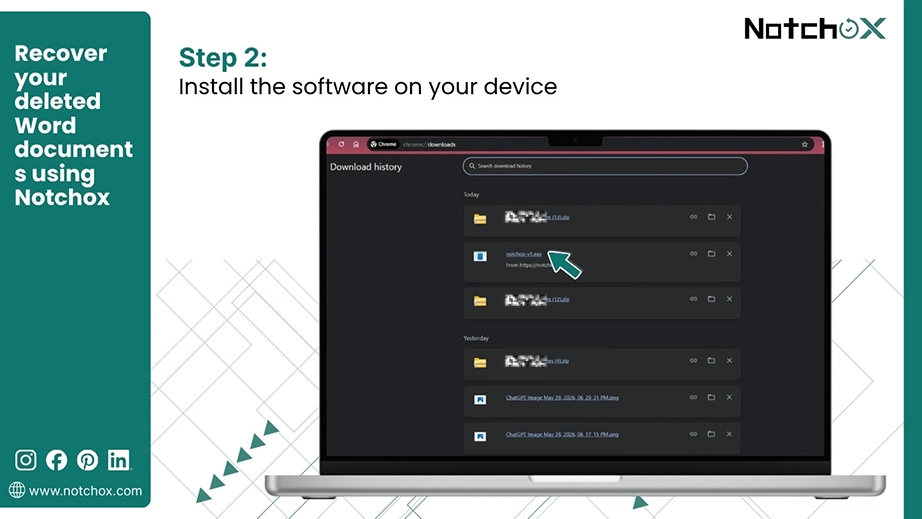
Step 2: Follow the guided steps and install the software on your device.
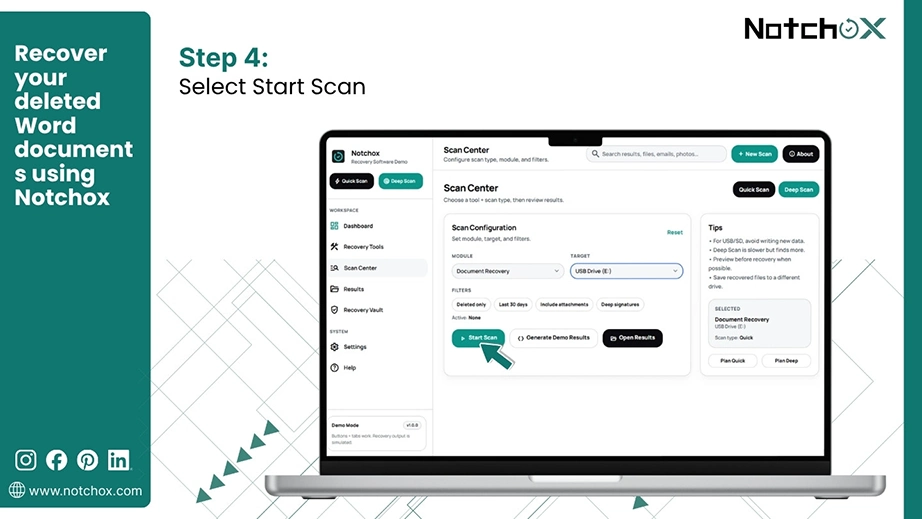
Step 3: Select the Document Recovery module, the concerned drive and apply the Filters to narrow down the search.

Step 4: Click Start Scan.
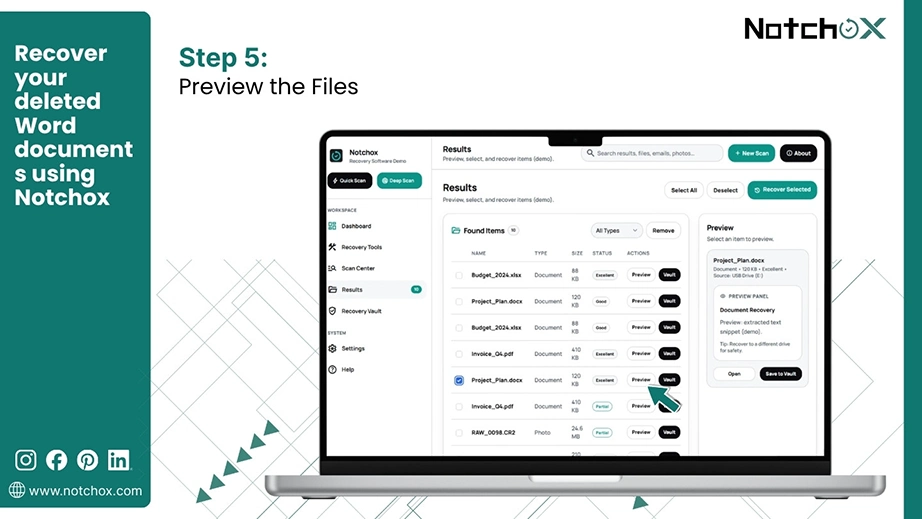
Step 5: Preview the recovered files with Notchox’s free pre- recovery data preview.
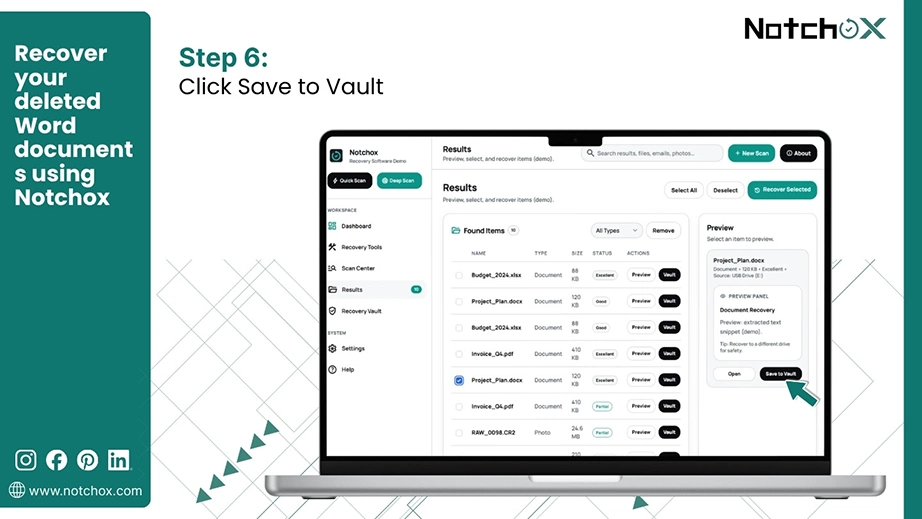
Step 6: Select the files and click Save to Vault to retrieve them.
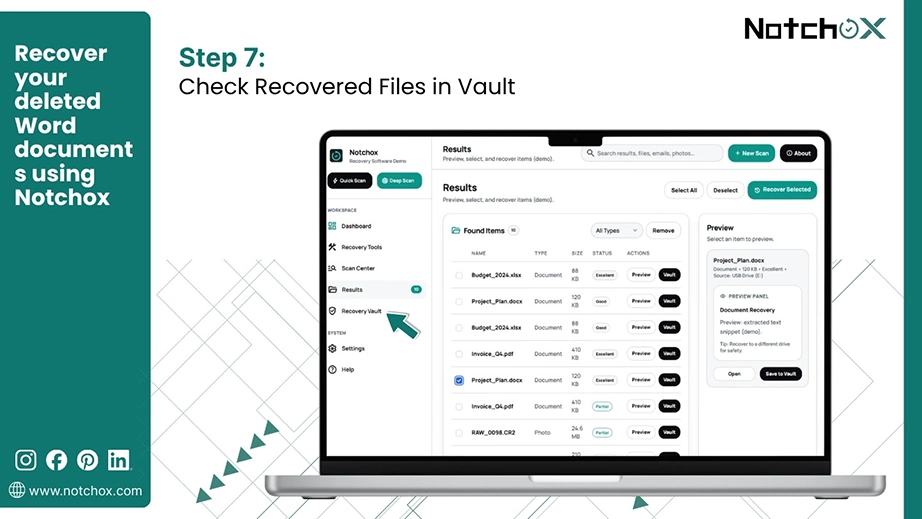
Step 7: Click Recovery Vault to check and move the documents to a secure location and recover them.
Microsoft allows unsaved Word documents to be recovered using various professional methods due to a sudden application crash, a power outage, or when a user forgets to save the document. We’ll see ways to recover unsaved Word files using the recover unsaved document feature, the AutoRecover folder, temporary files, and the recovery pane.
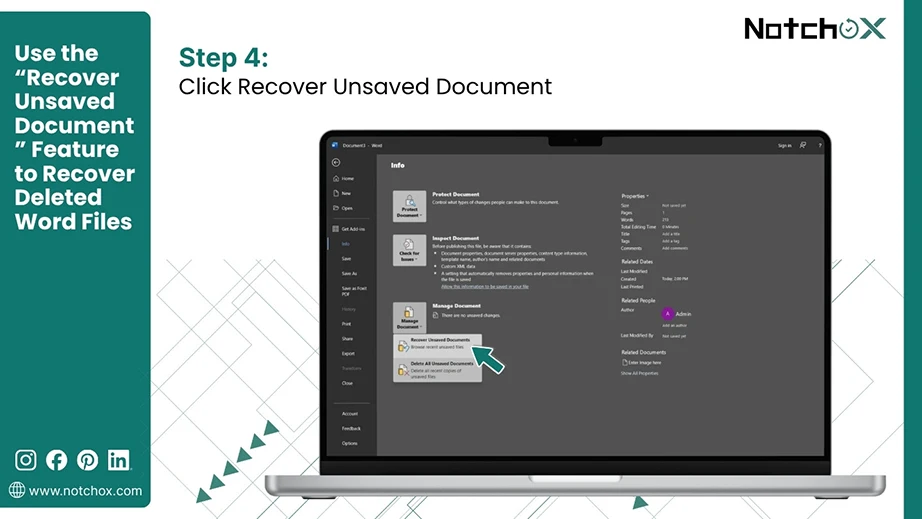
Microsoft Word offers a recover unsaved document feature to recover a document that couldn’t be saved for any reason. It is the easiest feature to use; just follow these steps, and you’ll have your unsaved doc file back.
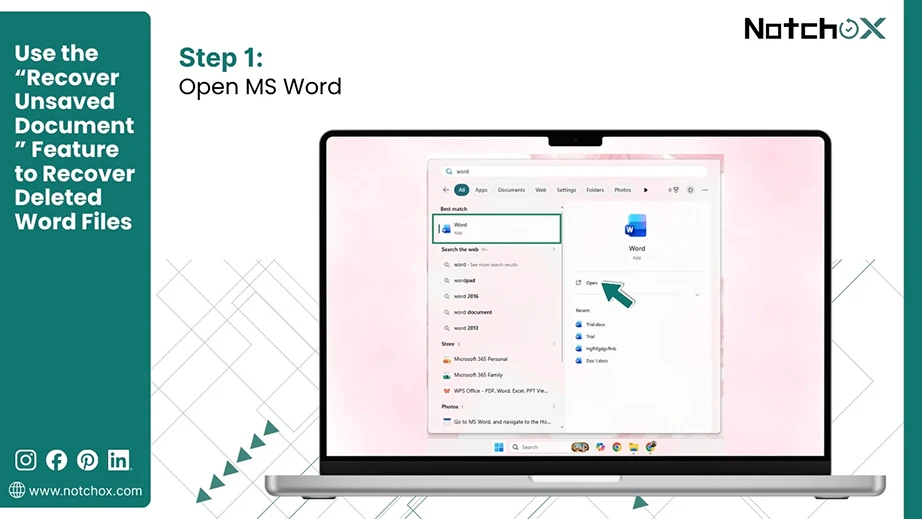
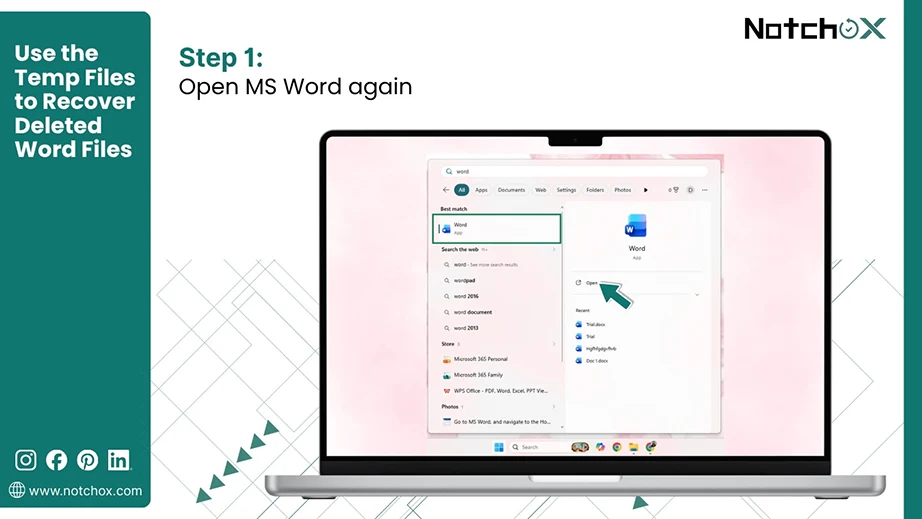
Step 1: Open MS Word on your computer.
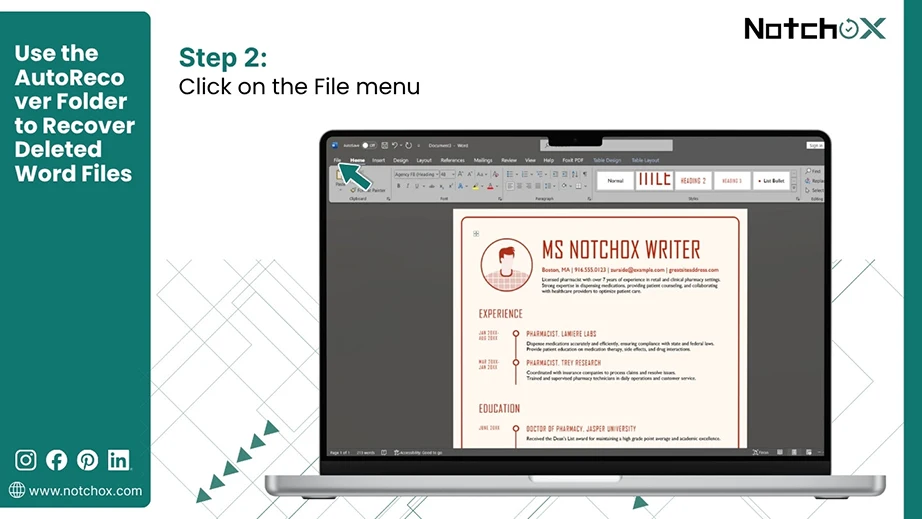
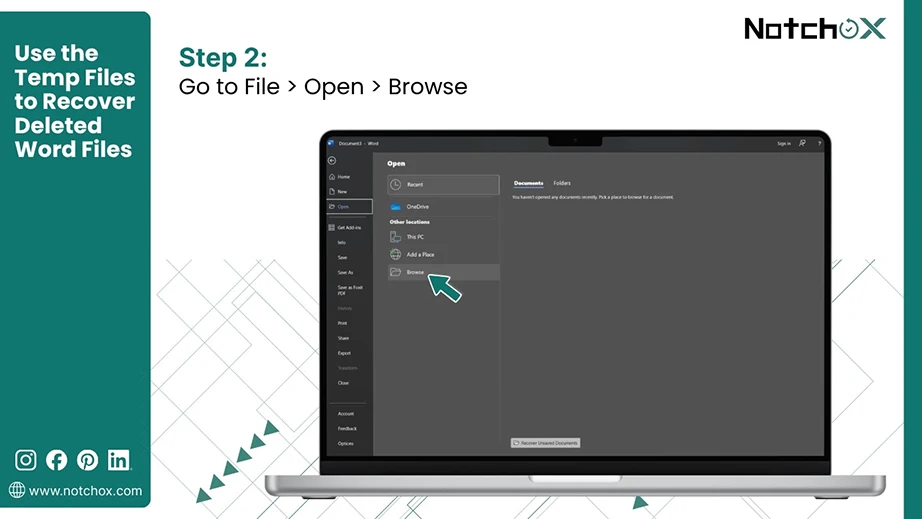
Step 2: Click on the File tab on the top left corner of the ribbon.
Step 3: Choose Info and click on Manage Document.
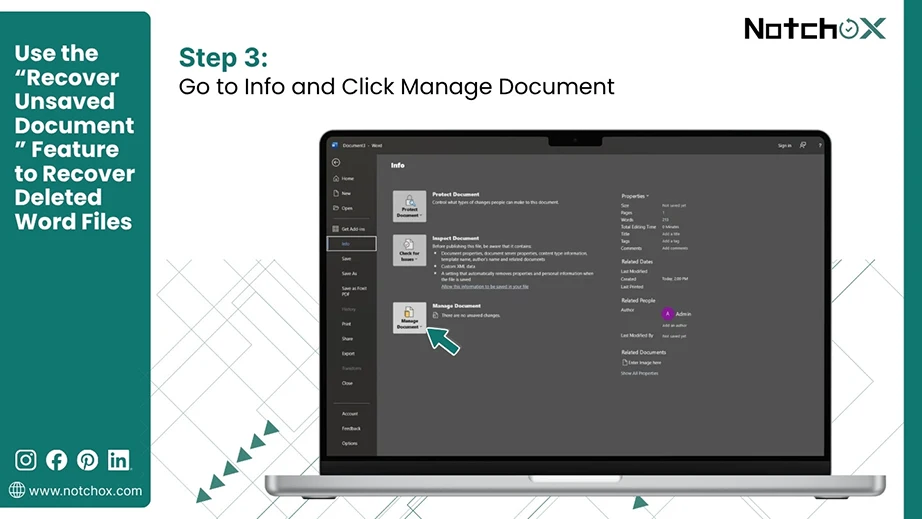
Step 4: Scroll down and click Recover Unsaved Documents.
Step 5: Find and select the document. Click on Open to restore.
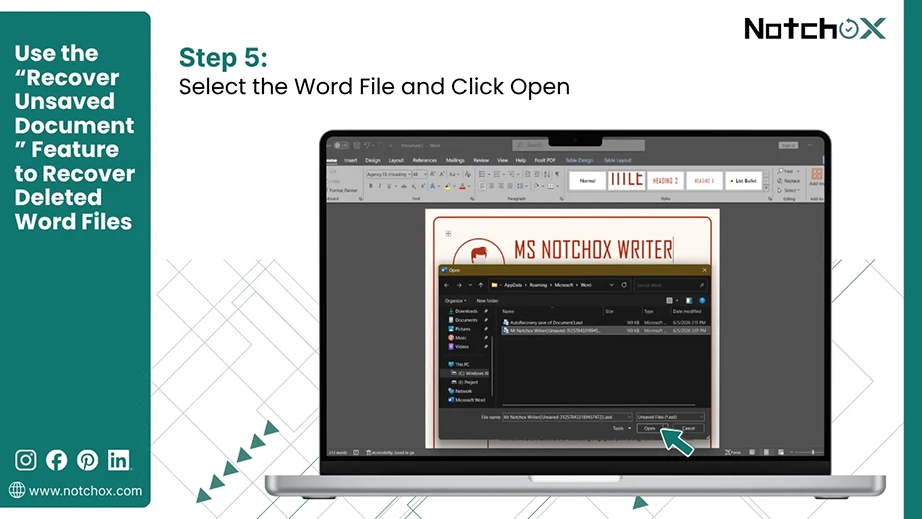
Step 6: When the document opens, save the Word file.
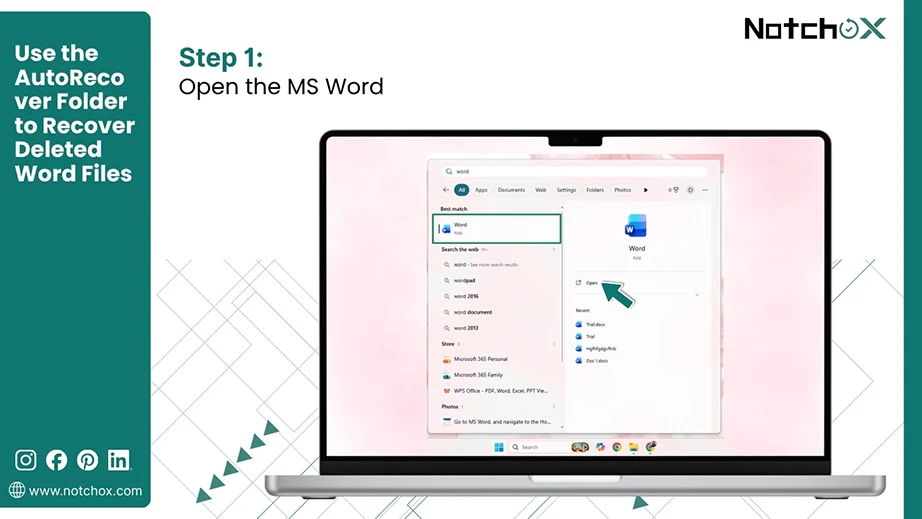
You can also manually access the folder where MS Word stores AutoRecover files.
Step 1: Open MS Word on your computer.
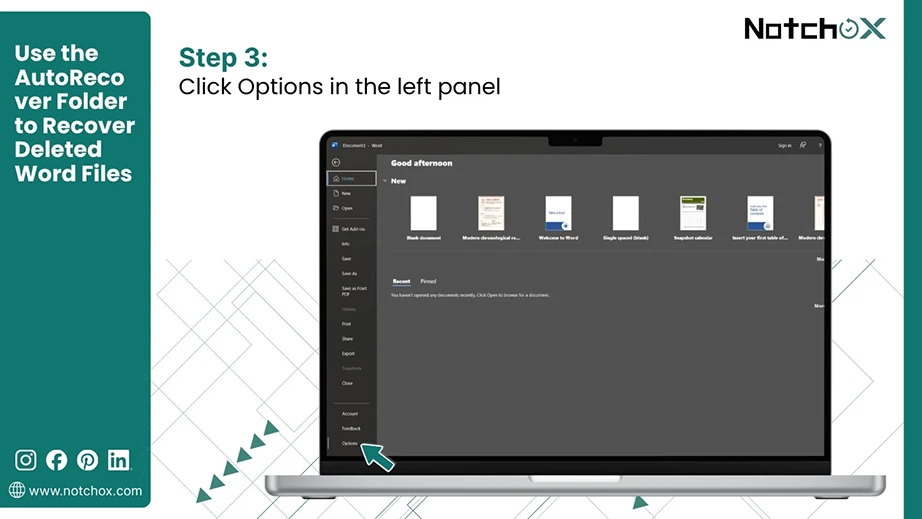
Step 2: Go to the File tab.
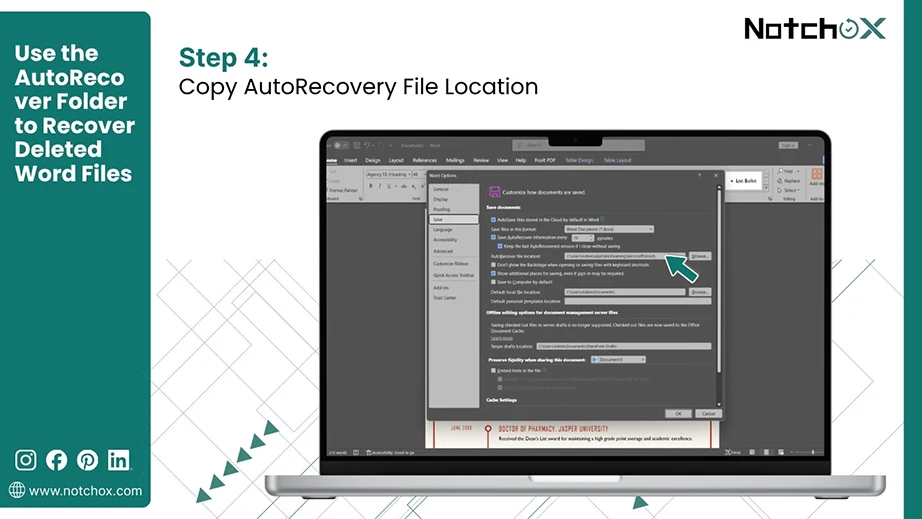
Step 3: Click on Options at the bottom left corner.
Step 4: Go to the Save tab and copy the AutoRecovery file location.
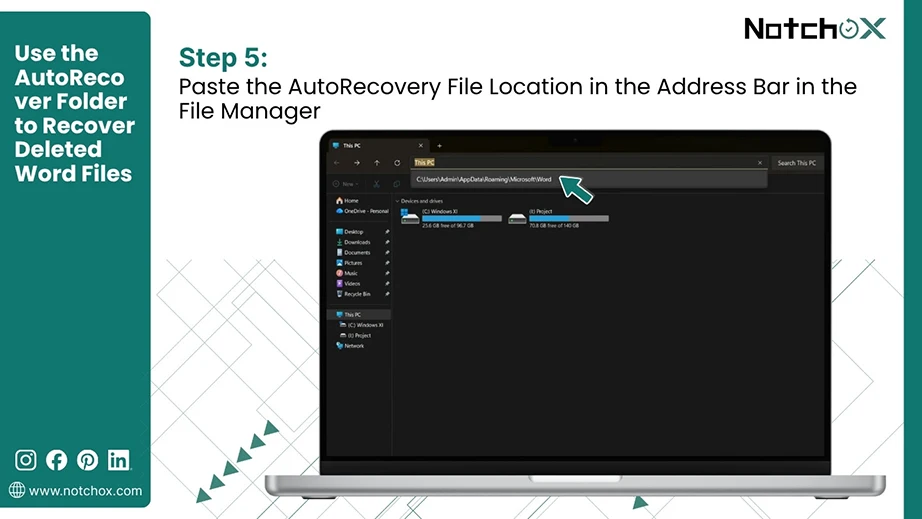
Step 5: Open the File Explorer and paste the AutoRecovery file path in the address bar. Press Enter.
Step 6: Look for files with the “.asd” extension. Double-click the files to open.
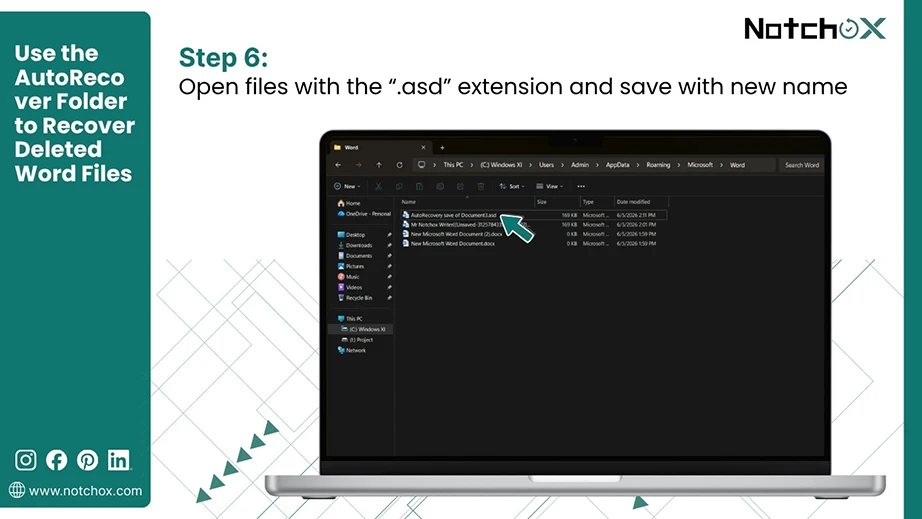
Step 7: Save the recovered document with a new name.
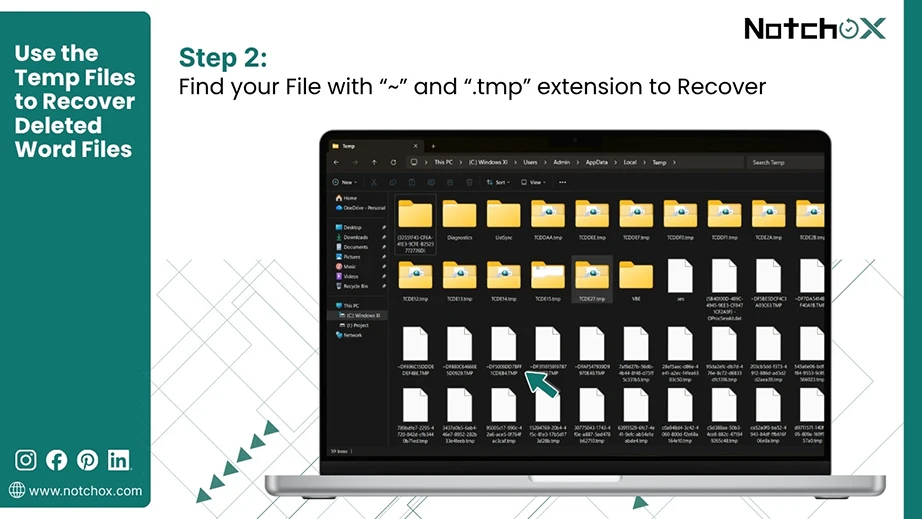
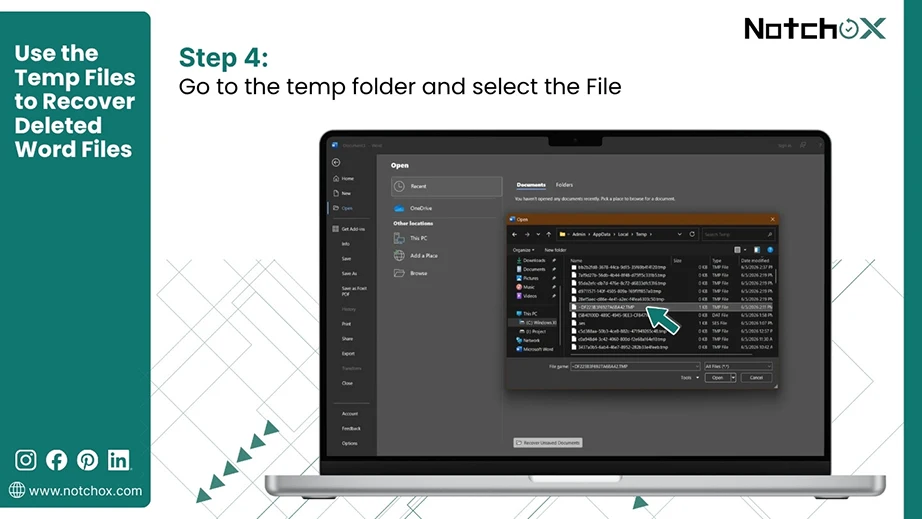
Microsoft Word creates temp files to save changes in real time. This acts as backup in case of a crash. Files are generally found in C:\Users\[Username]\AppData\Local\Temp or C:\Windows\Temp.
Here’s how you can recover a Word document from temp files:
Step 1: Open the File Explorer and in the address bar type “%temp%” and press Enter.
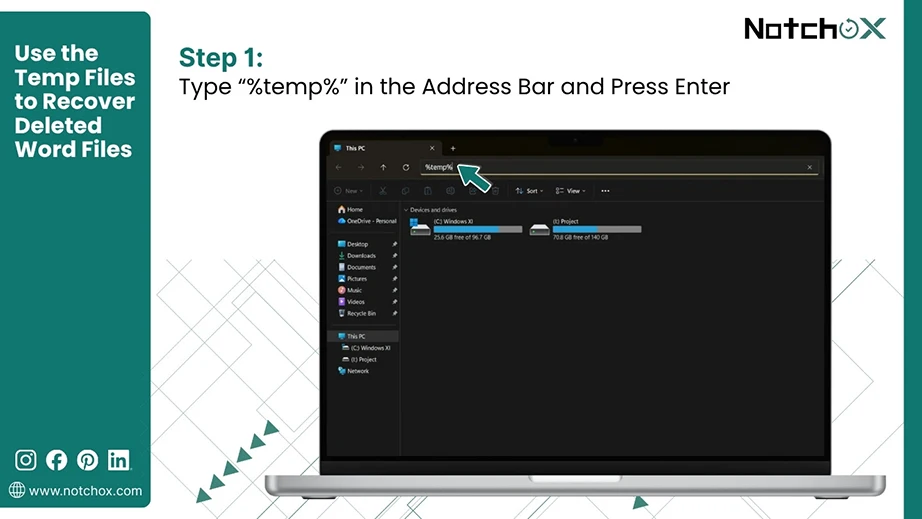
Shortcut: To open temp files, press Win + R and type “%temp%” and press Enter.
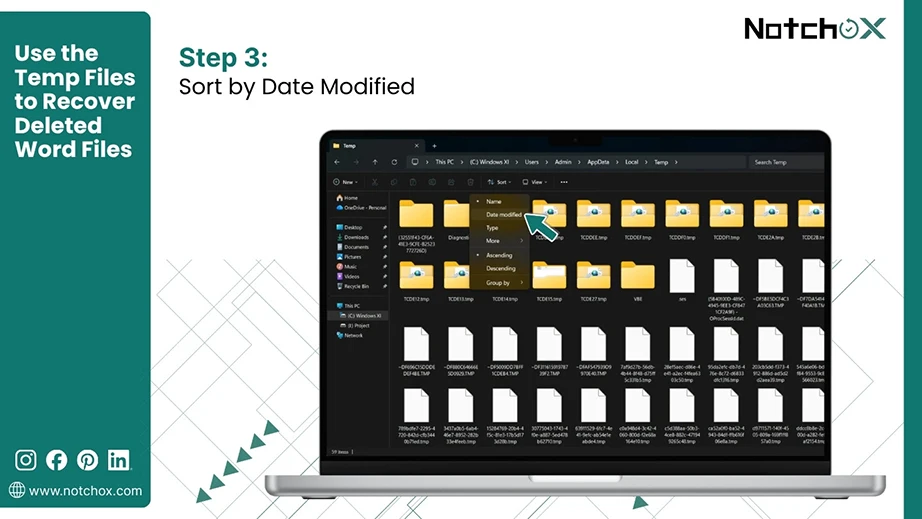
Step 2: Find file names starting with “~” and “.tmp” extension.
Step 3: To find recently created temp files, sort by date modified.
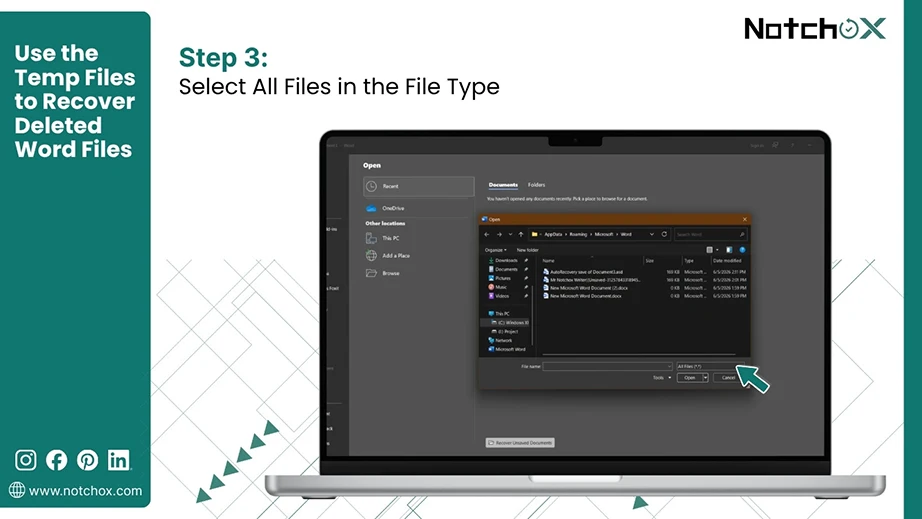
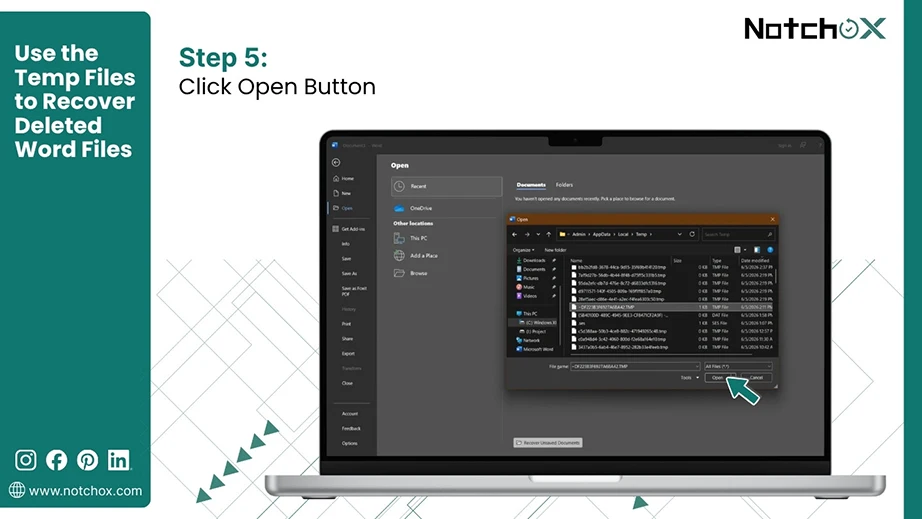
Step 4: Open the temp Word file by:
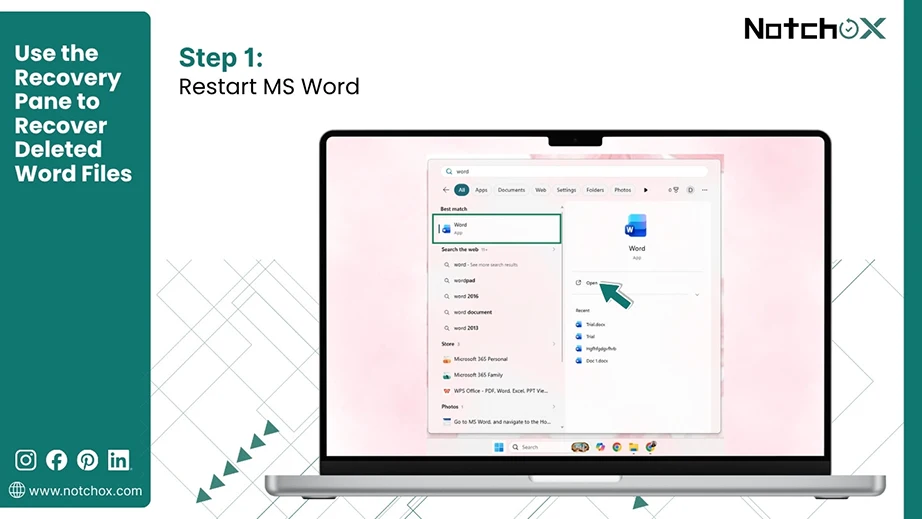
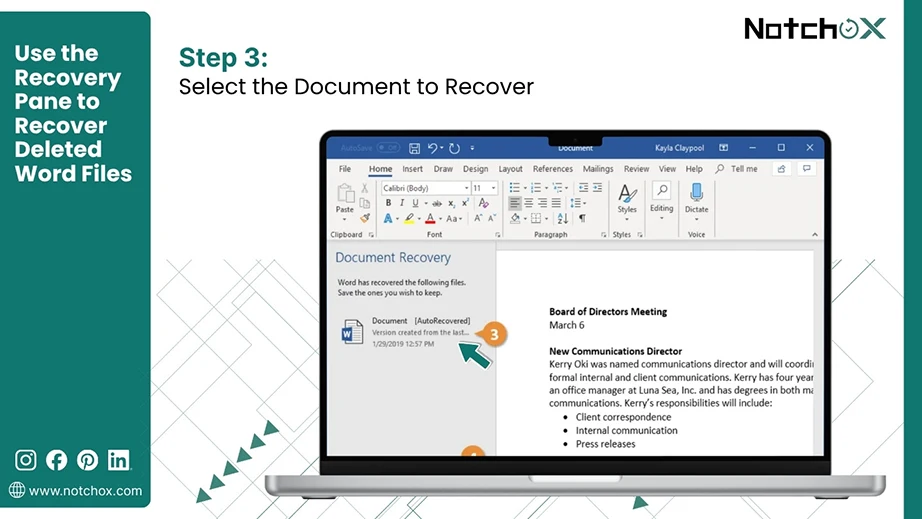
In certain scenarios, Word provides a document recovery option when you restart Word. This is because Word detected that the previously opened Word document was not saved properly.
Step 1: Restart MS Word. and open a new or any document.
Step 2: If any document is unsaved, a recovery pane will appear on the left side. The document shows date, time and version.

Step 3: Double-click the document to view and recover. The document’s last auto-save version opens.
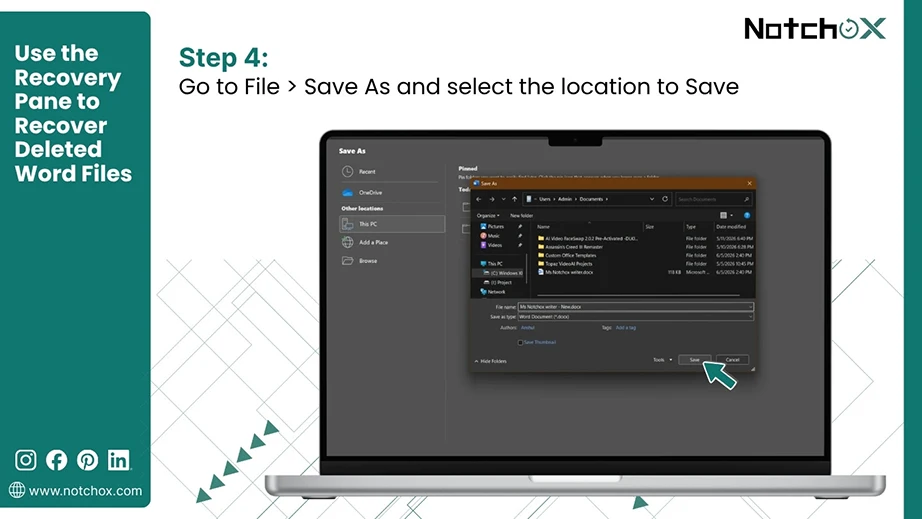
Step 4: To save the document, go to the File tab. Click on Save As, and select the location. Click the Save button.
An overwritten Word document means the data in the document is replaced /overwritten by new data. In this case, the previous data is permanently deleted. This happens due to a corrupted bug, file extension issue, or when the new version is saved using the same file name.
Following, you will see the Microsoft-provided ways to restore an overwritten document.
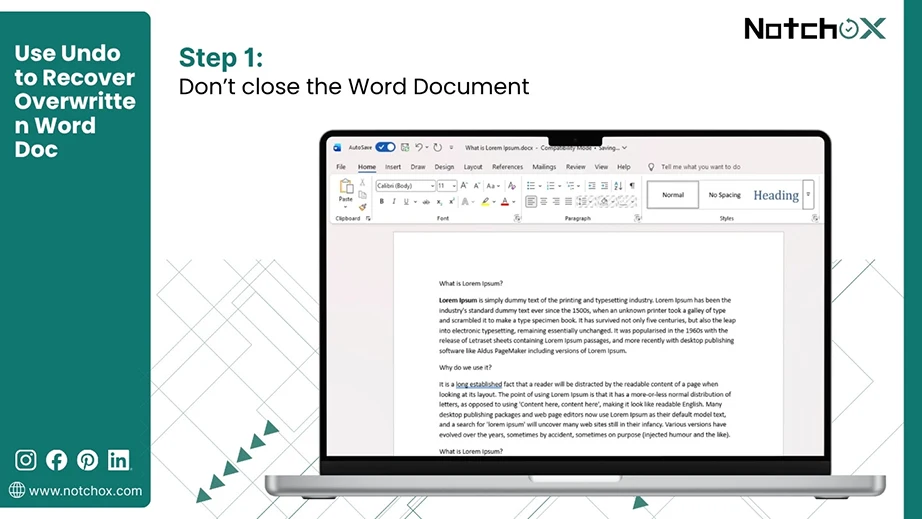
Undo is the quickest way to restore a document.
Step 1: Don’t close the Word when you realise the mistake.
Step 2: Press Ctrl + Z to undo the changes. You’ll see the changes being undone in the document.
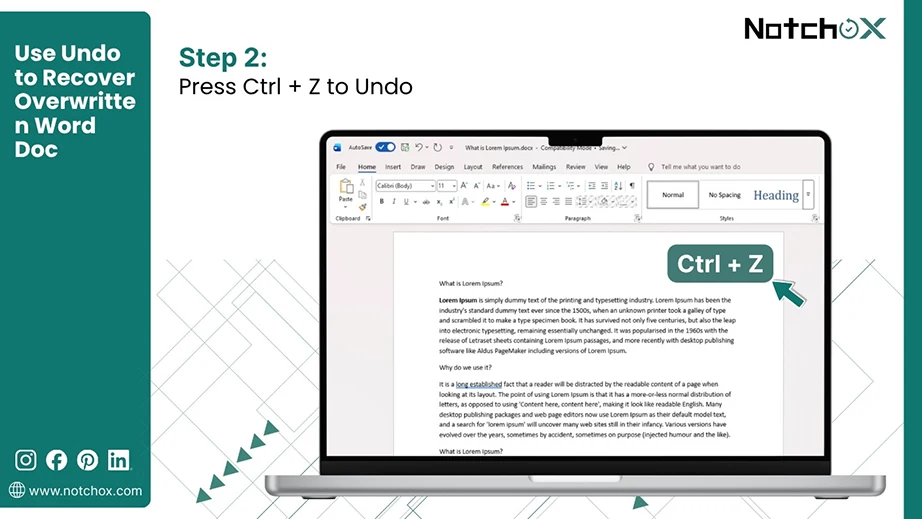
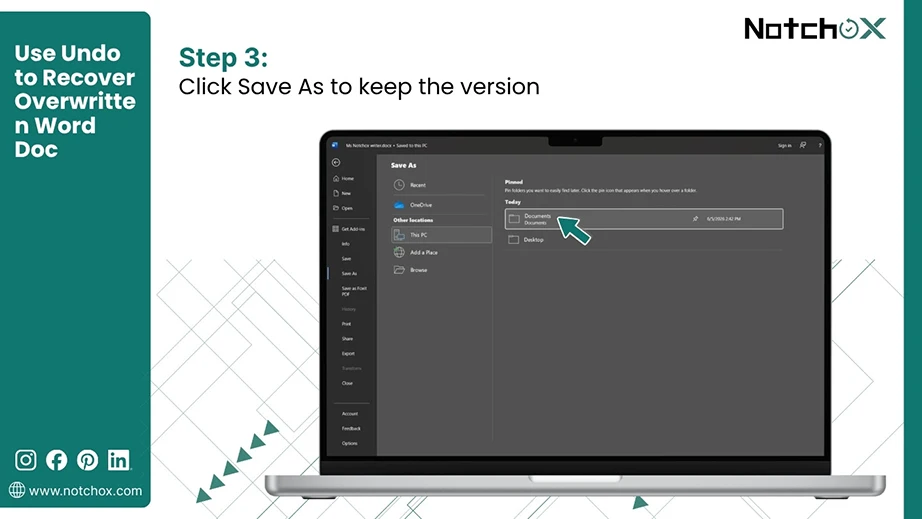
Step 3: Continue pressing Ctrl + Z until you are at the version you want to recover. Now save the document using Save As to keep the version for further access.
In Windows, File History enables you to recover a previous version of your document, provided you have turned on File History.
Follow these steps to recover the previous version of a Word document.
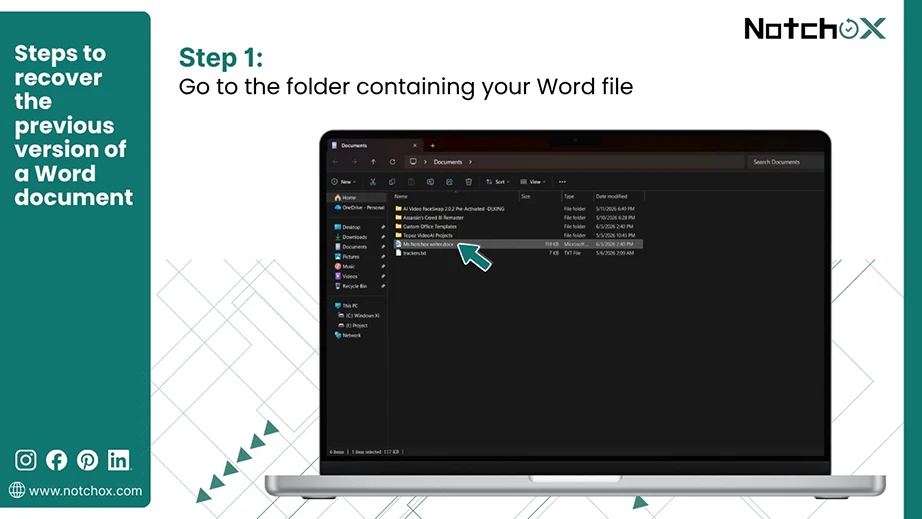
Step 1: Open File Explorer and go to the folder containing your Word file.
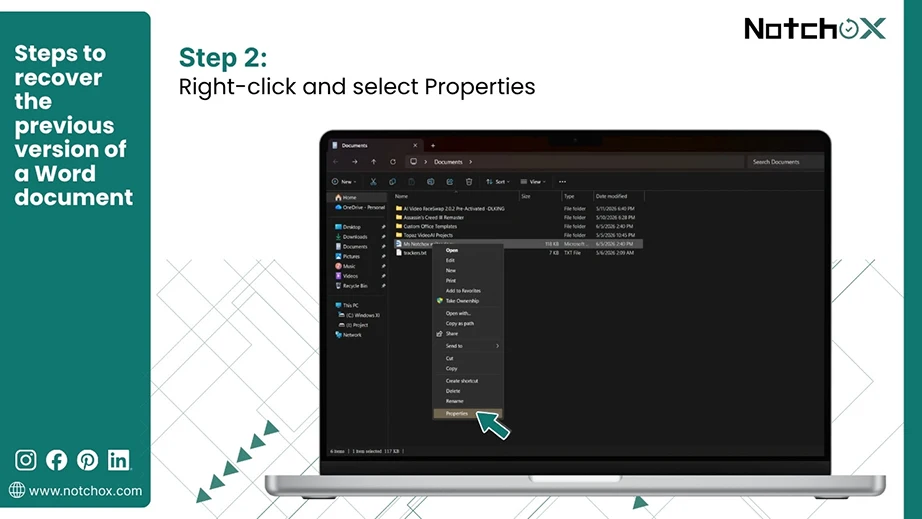
Step 2: Right-click on the document and click on Properties.
Step 3: Choose the Previous Versions tab.

Step 4: Find the version you want to recover and click Restore.
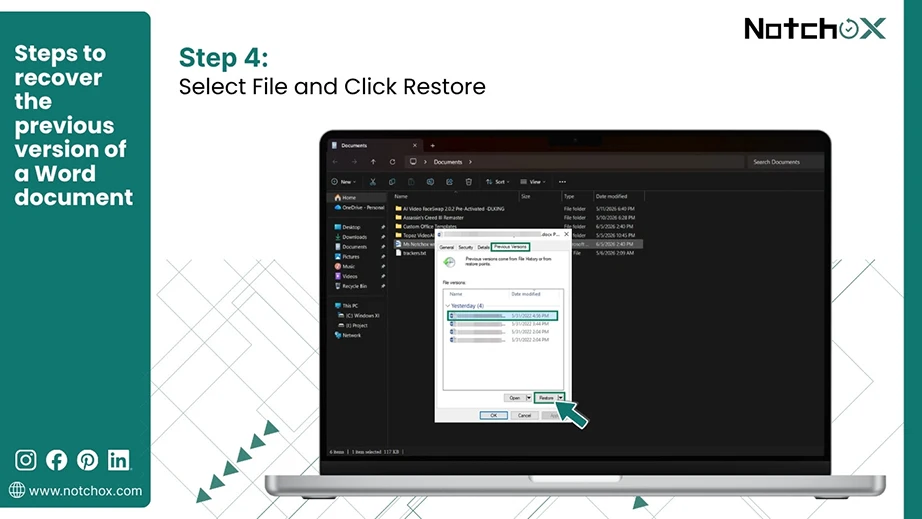
Step 5: Confirm the action. Open and check the document for the recovered version.
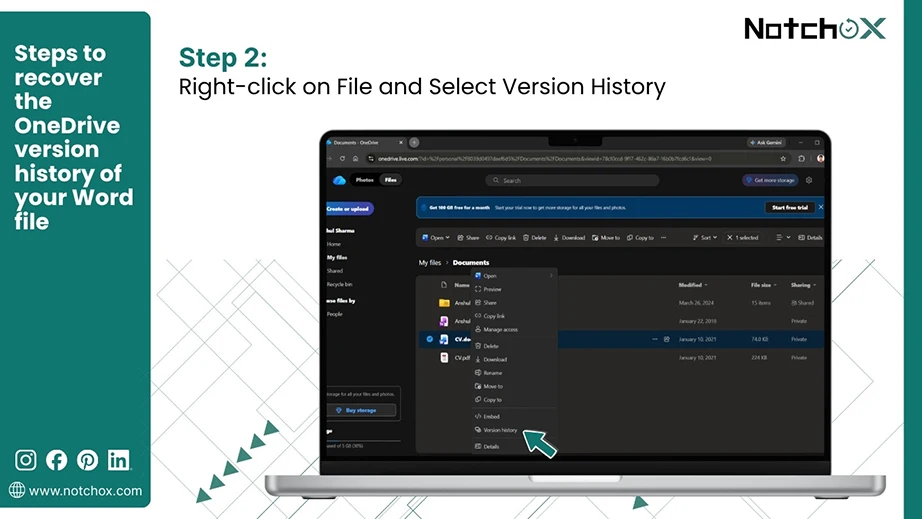
OneDrive maintains a Version History to view, restore or delete previous versions of files stored in the cloud. With this, you may be able to restore even deleted files from the recycle bin.
Follow these steps to recover the OneDrive version history of your Word file.
Step 1: Go to OneDrive.comand sign in using your Microsoft account.

Step 2: Choose your file, right-click and select Version History.
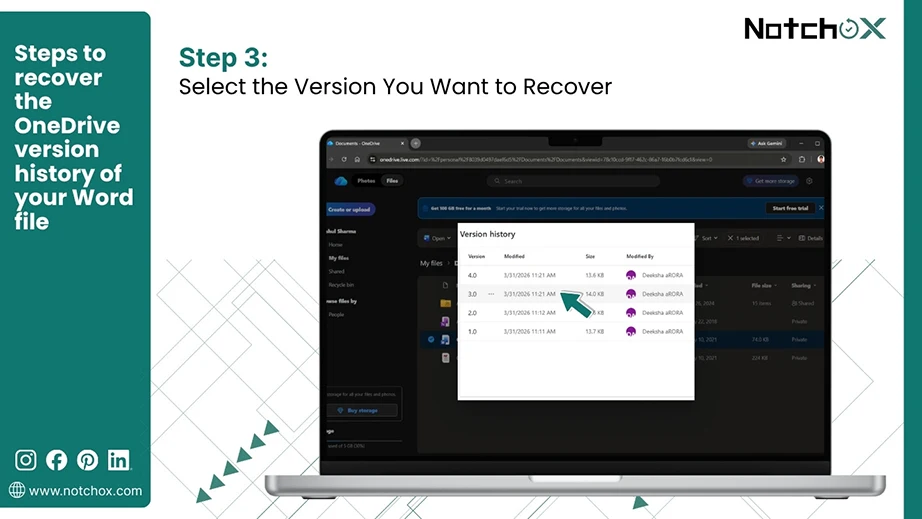
Step 3: Each version shows who made changes and when. Click on the version you want to restore.
Step 4: Click on Options (…) and select Restore.
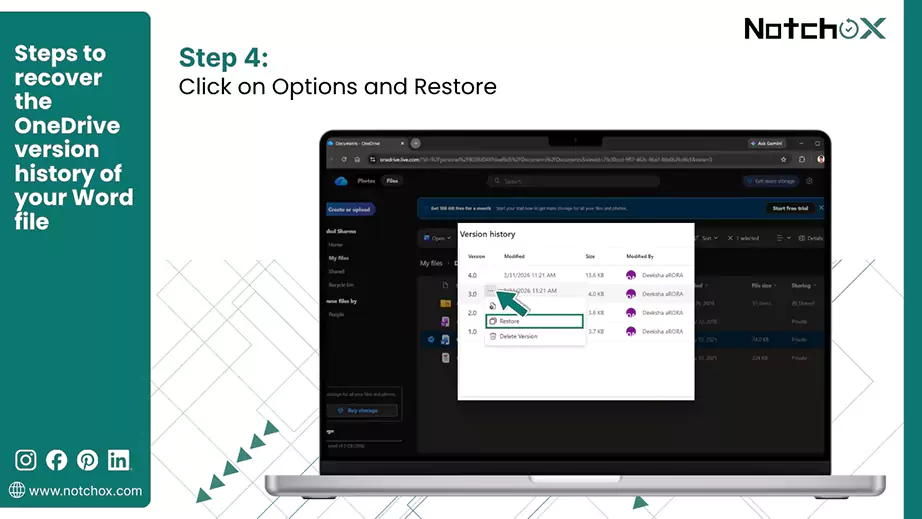
Tip: You can also download the document to save a copy of the version without changing your current file.
Word creates automatic backup files, which are saved in the same directory as the original document with the extension “.wbk”. It updates with every save, ensuring that it has the latest content of the file.
To recover the Word file for Auto Backup, follow:
Step 1: In File Explorer, navigate to the folder that contains the original Word document.
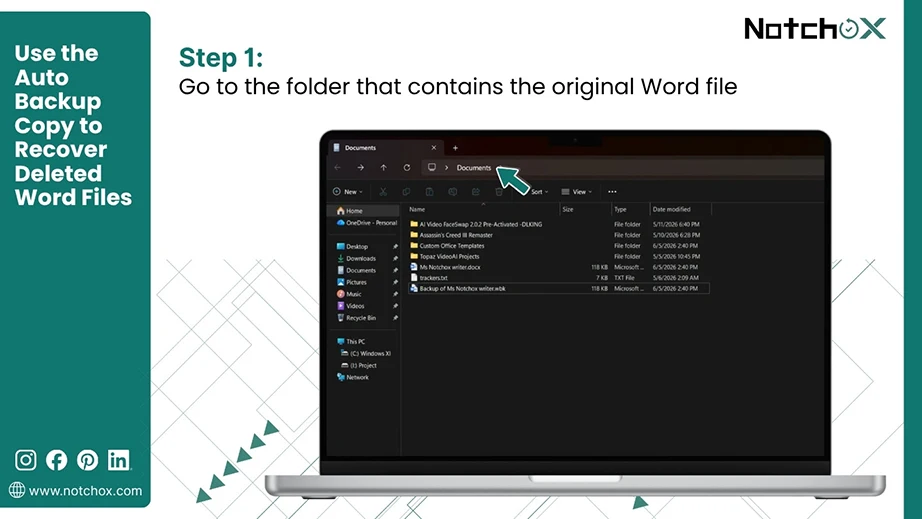
Step 2: Look for a file named “Backup of [Original File Name].wbk”.
![Choose the Backup of [Original File Name].wbk](https://notchox.com/resources/wp-content/uploads/2026/06/Choose-the-Backup-of-Original-File-Name.webp)
Step 3: Double-click to open this .wbk file in Word and save it immediately to work on the Word file.

Fortunately, Microsoft provides many ways to recover deleted Word files, but one must follow best practices to avoid such conditions. Here are the best tips and methods used to recover deleted Word files.
We hope you were able to recover the deleted Word document using this guide, which outlines all the methods and steps to restore the Word document. The Word files are recoverable in every scenario, thanks to Microsoft’s official recovery methods, cloud storage, and data recovery software. Also, protect your Word documents and prevent data loss by following the listed best practices.
Ans: Microsoft offers various methods to recover deleted Word files. You can retrieve them from the Recycle Bin, OneDrive backups, version history, and AutoRecover folder.
Ans: To recover an unsaved Word document, go to File > Info > Manage > Document > Recover Unsaved Document.
Ans: Yes, it is possible to recover files using .ask, .wbk, .asd and OneDrive version files. Alternatively, you can also recover using the AutoRecover folder, the recycle bin and hidden files.
Ans: To find a hidden Word document, in the file explorer, check the “Hidden Files” attribute under the View tab.
Ans: Yes, you can get back the previous version of the Word document. Click on the file name on the top bar > version history. Select the version you want from the right side panel.
Ans: Yes, Word creates an automatic backup of your Word document, saved with the extension .wbk. You can look for these files in the same directory as the Word document.
Ans: Use specialised data recovery software such as Notchox to recover a permanently deleted Word file from your device storage.
Deeksha Arora is a Data Protection & Recovery Writer focusing on writing accurate, informative, and easy-to-understand technical articles for Notchox’s readers. Her content on the prevention of data loss, understanding risks of device failures, and guides to fix problems helps readers make the right decisions and understand the technical terms easily. She works closely with Subject Matter Experts to ensure high usability and accuracy of her writing.