Deeksha Arora Jun 5, 2026
Ans: Use reliable data recovery software such as Notchox to scan the drive even if it’s not recognized by your device.
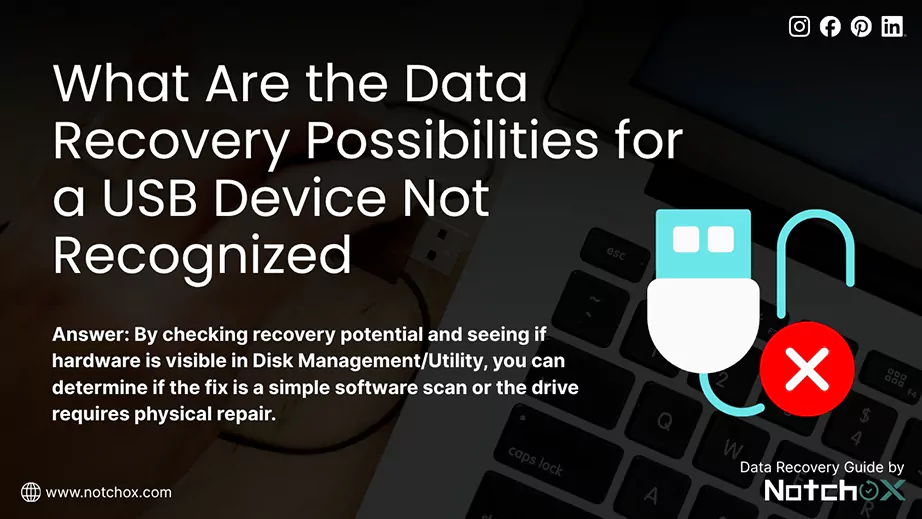
When your PC fails to recognize a drive, it’s usually due to one of these: a faulty USB port, corrupted drivers, or a damaged file system that your PC can’t read. But your data is likely not gone, it’s just not visible to your device. We will start by assessing the potential of data to determine the chances of success. From there, professional data recovery software can step in. These tools perform a deep sector scan of the drive to recover data from USB not recognized. Constructs the data together even when Windows Explorer/ Finder says the drive doesn’t exist.
Quick Answer: If a USB drive is unrecognized, Notchox data recovery software provides a secure and effective solution to scan and restore files from inaccessible drives. The software bypasses file system errors to recover lost data from USB not recognized, making it a top choice.
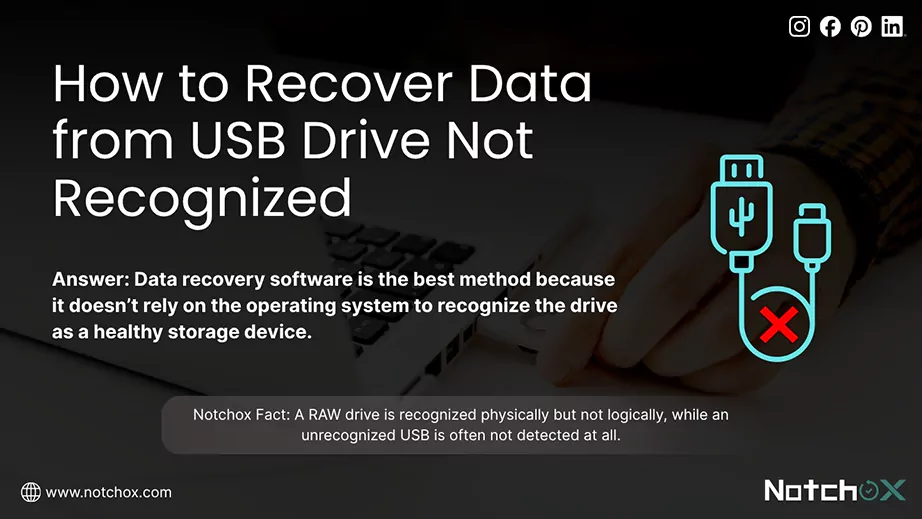
You might plug in your drive, and when it’s not accessed, you might think it’s corrupted, and all your files are gone. But it’s important to know that there’s a big difference between a drive that’s corrupted (RAW) and one that’s simply unrecognized. A RAW drive is recognized physically but not logically, while an unrecognized USB is often not detected at all, indicating hardware or driver failure.
If your computer fails to detect a USB, it means the communication between the device and the OS has failed. By checking recovery potential and seeing if hardware is visible in Disk Management/Utility, you can determine if the fix is a simple software scan or the drive requires physical repair.
| Question | Unrecognized USB | Established USB |
| Does the “USB Device Not Recognized” pop-up appear? | ✅ | ❌ |
| Does the drive show as “Unknown Device” in Device Manager? | ✅ | ❌ |
| Is the drive missing entirely from Disk Management? | ✅ | ❌ |
| Does the USB work on a different computer/port? | ❌ | ✅ |
| Does the drive detect the wrong disk size? | ❌ | ✅ |
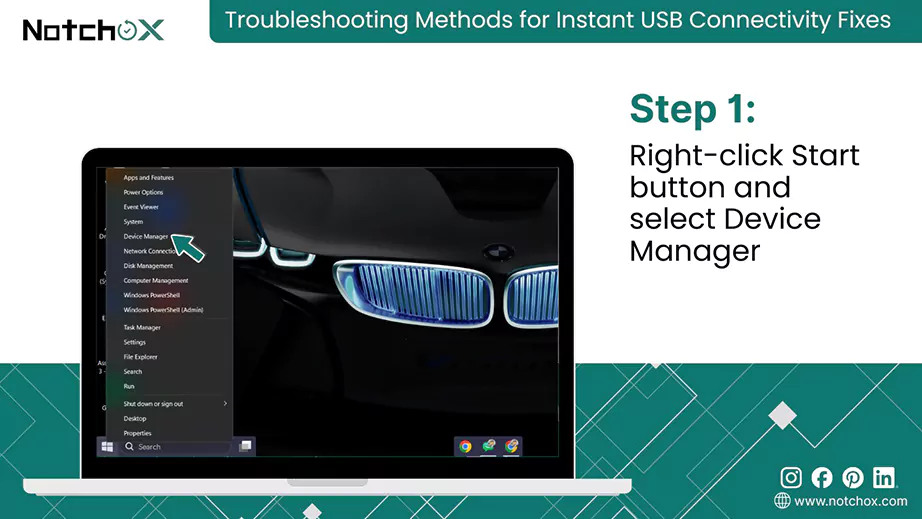
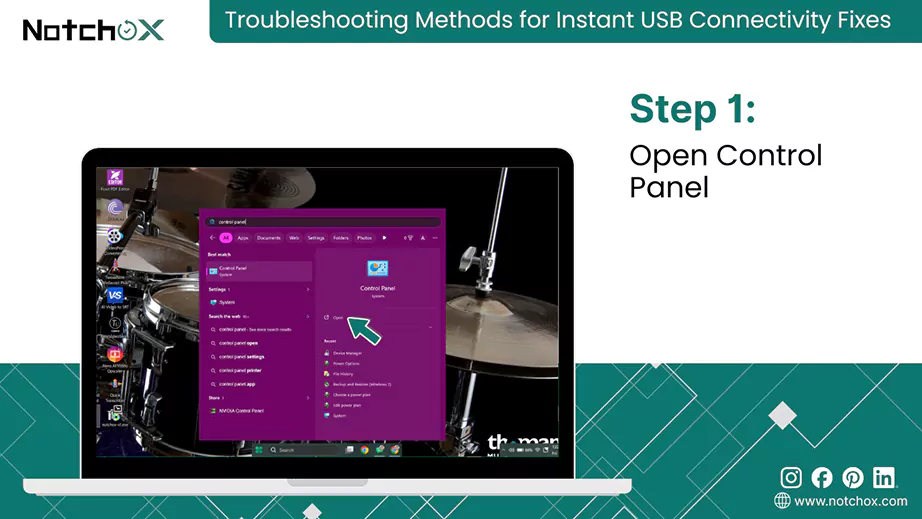
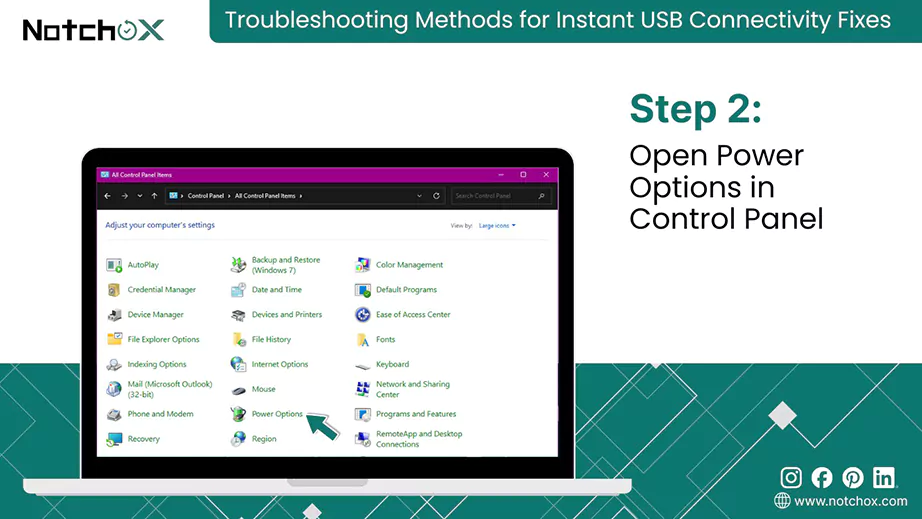
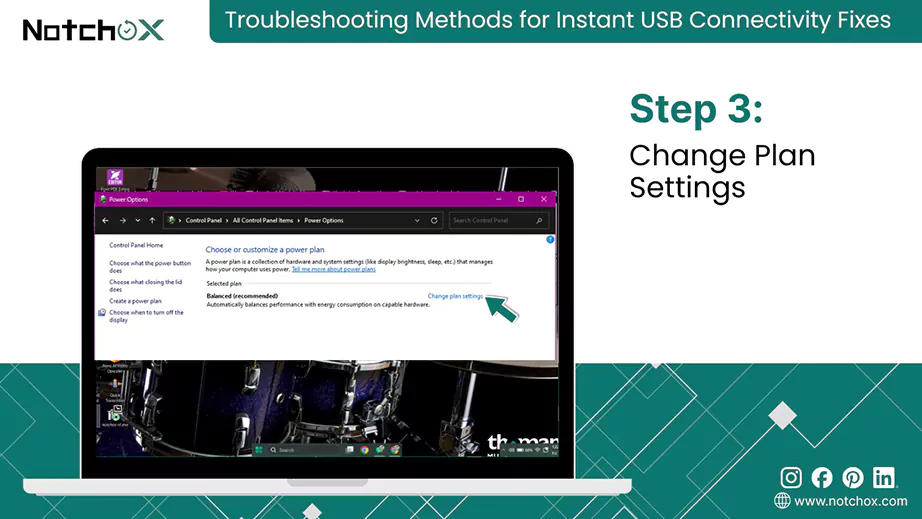
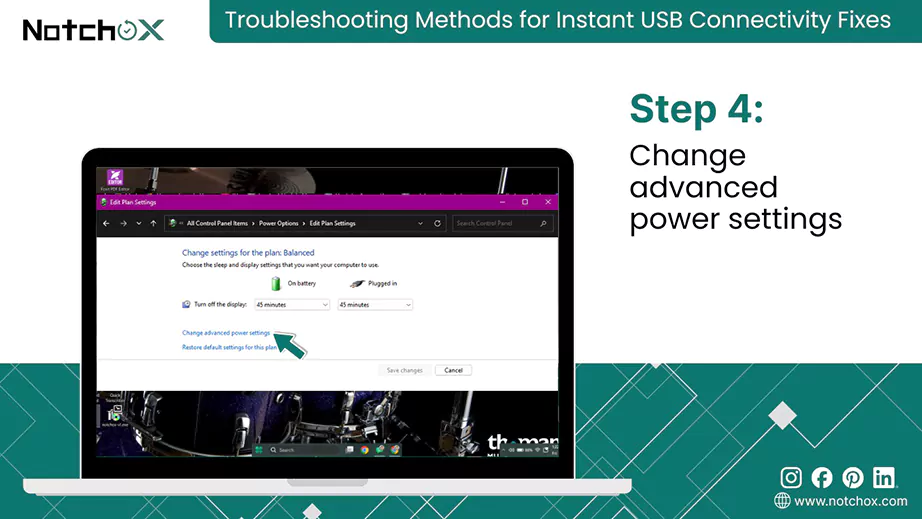
Preliminary Connection/Device Checks:
If the drive remains unrecognized after the checks above, it is likely due to one of the deeper issues:
Next, we will see the ways to recover data from USB not recognized, explaining the steps of each process.
If you have already tried every physical fix (like swapping ports, cleaning connectors, updating drivers, etc.) and the USB still refuses to show up in File Explorer (in Windows) or Finder (in Mac), this is where data recovery software becomes the most effective tool.
Data recovery software is the best method because it doesn’t rely on the operating system to recognize the drive as a healthy storage device. Instead, it bypasses standard file system barriers to scan raw sectors of the USB directly.
It can piece together invisible files that the computer thinks are lost, making it the most powerful way to recover data.
Notchox, being the best data recovery software, lets you recover data from USB not recognized through its deep scan technology that bypasses the file explorer and recovers data that is not accessible by the system. It uses sophisticated techniques to recover data without affecting the drive’s health.
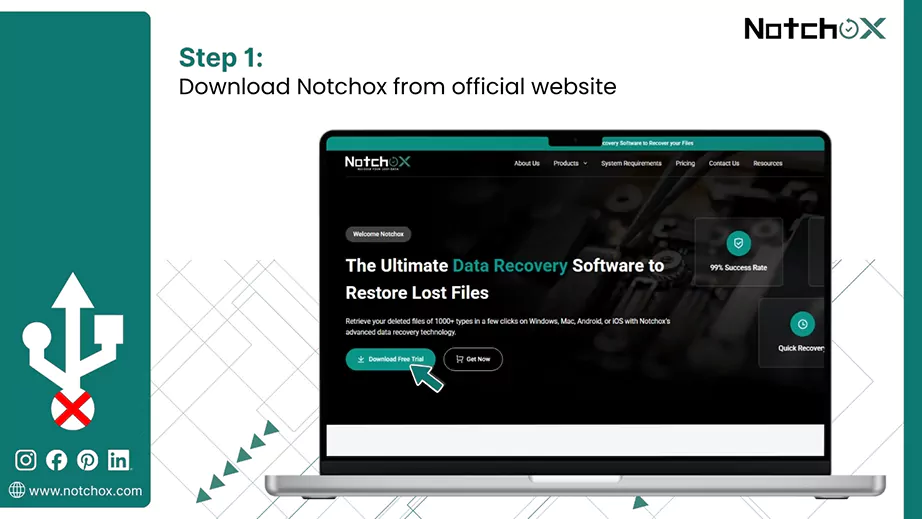
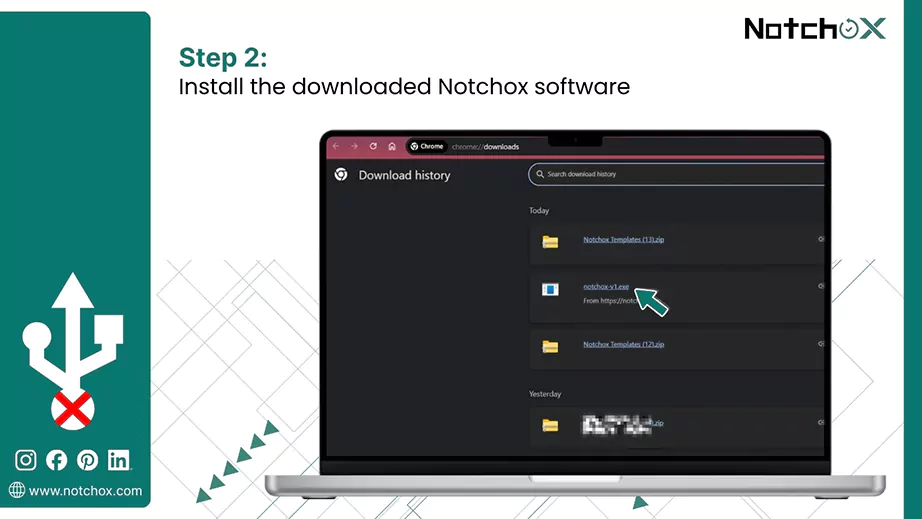
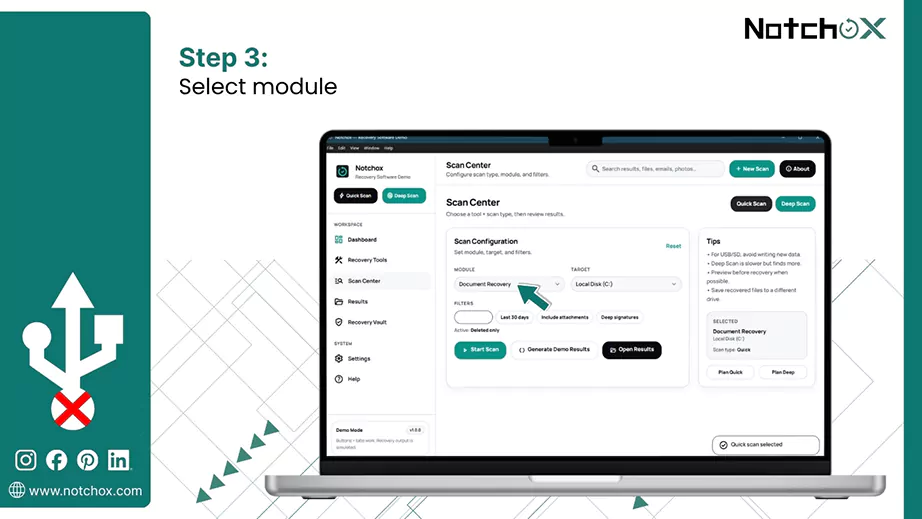
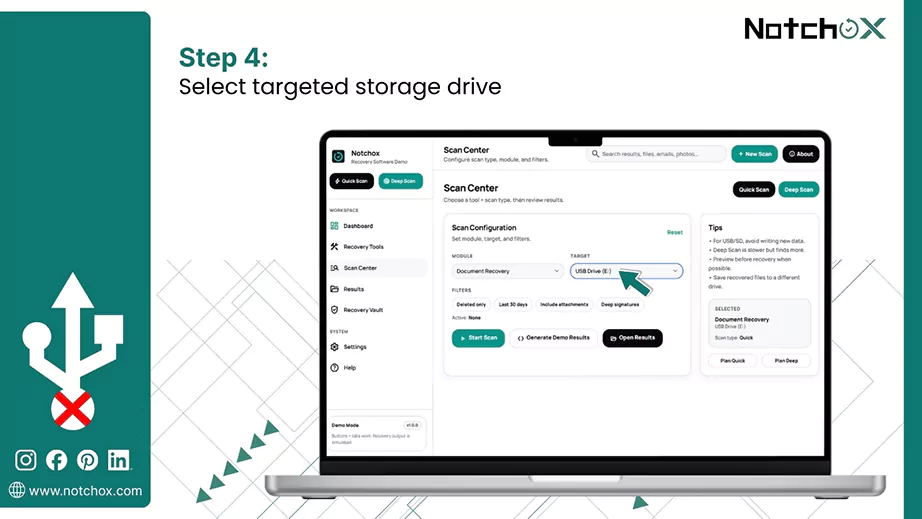
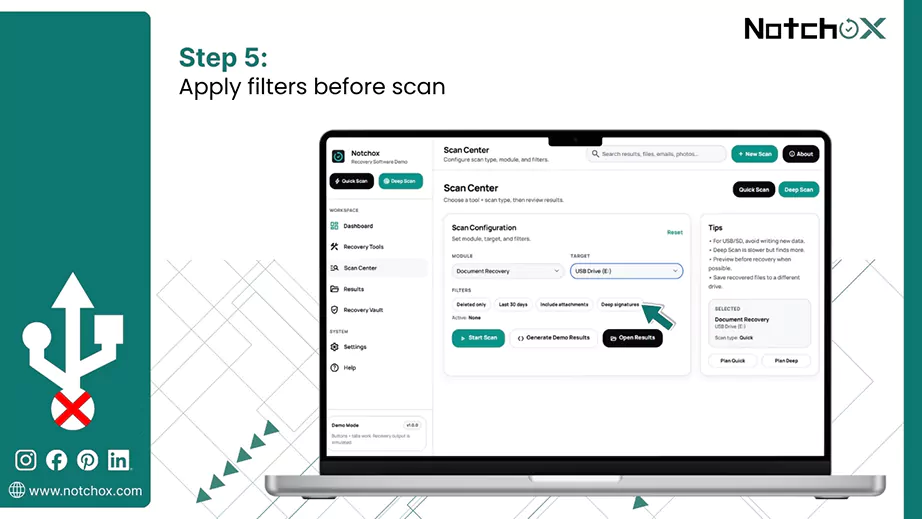
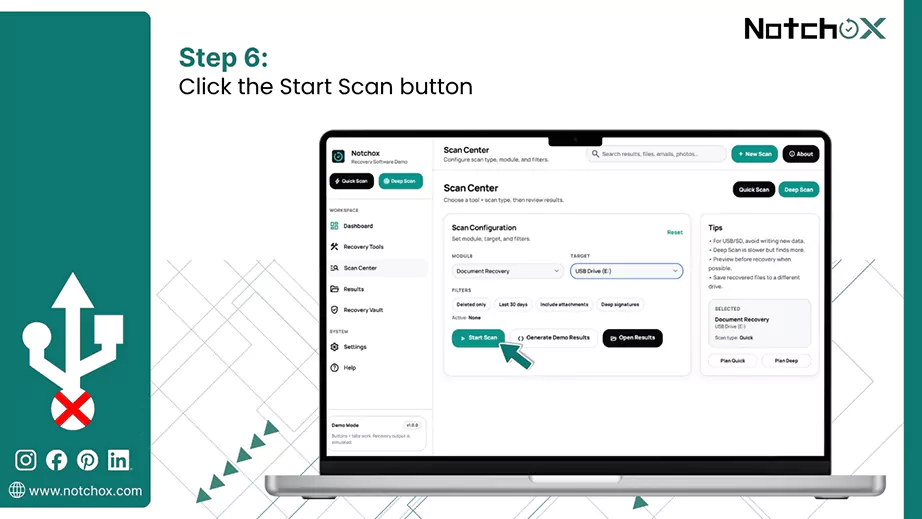
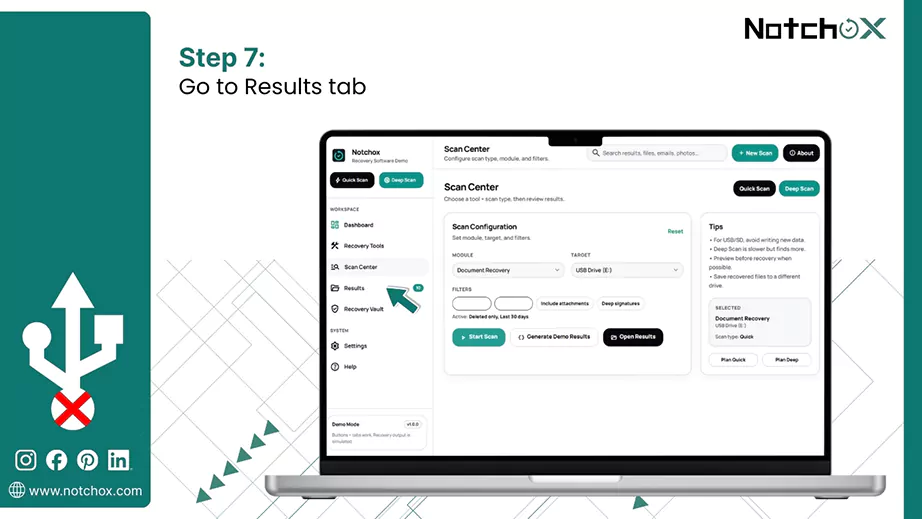
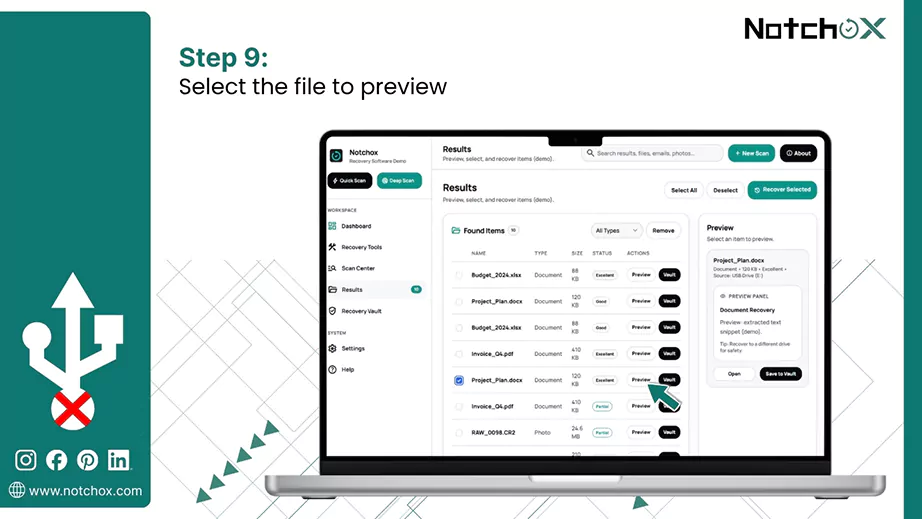
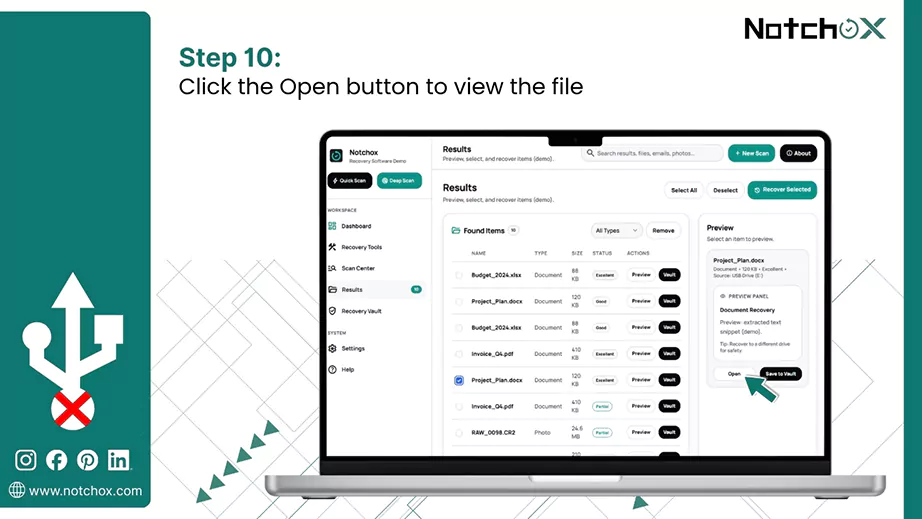
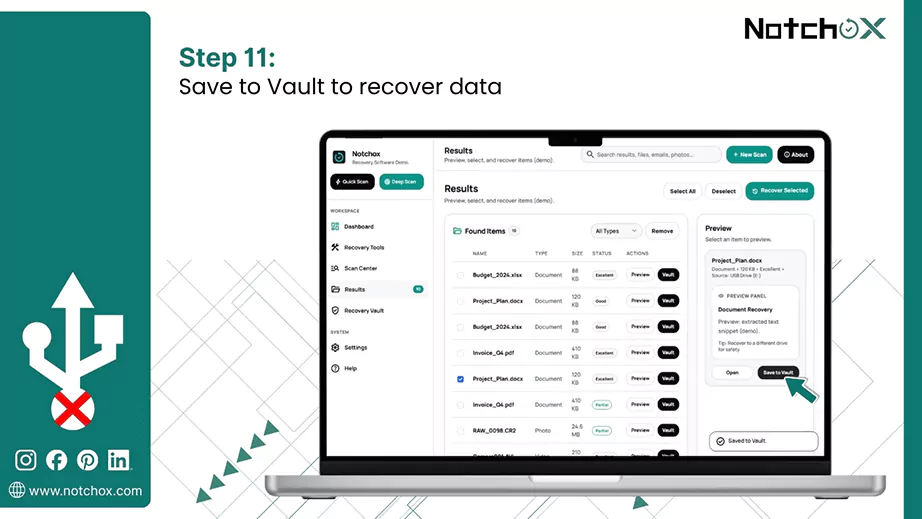
Follow these steps to recover your data:
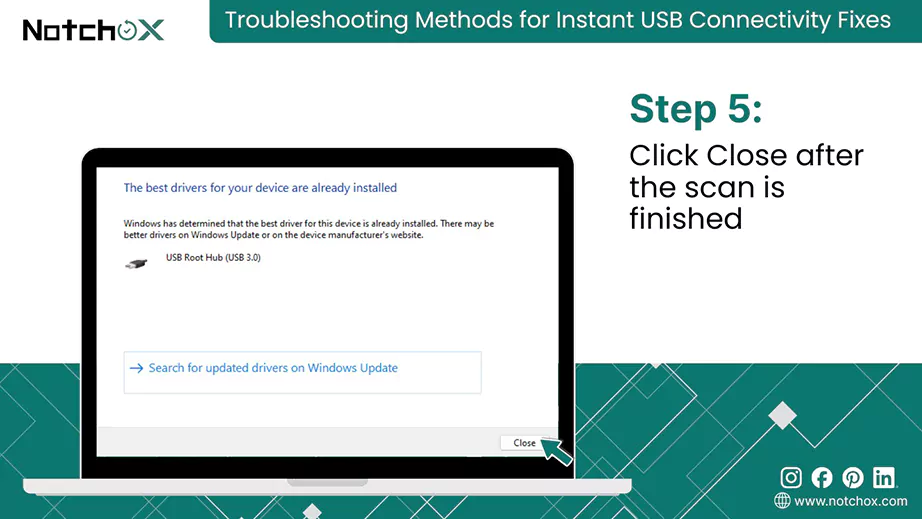
Now that your data is secured, let’s move forward and look at some quick fixes to ensure your USB drive is recognized immediately the next time.
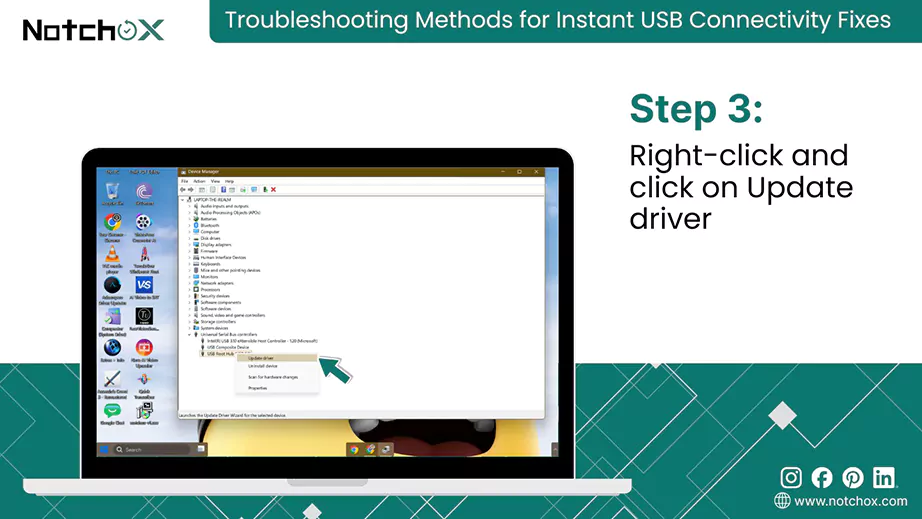
By updating and reinstalling USB drivers, you can clear out old or corrupted data that prevents your PC from seeing the device. It focuses on the operating system to build a fresh and clean connection with your hardware.


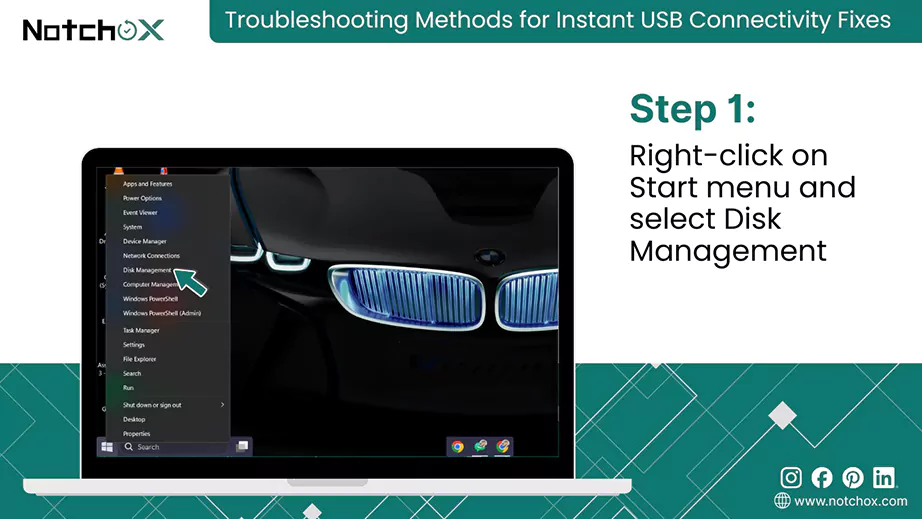
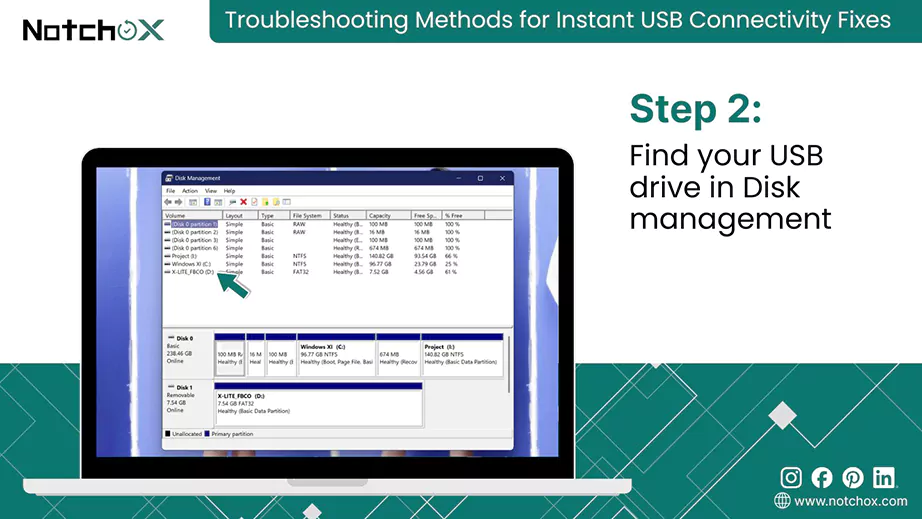
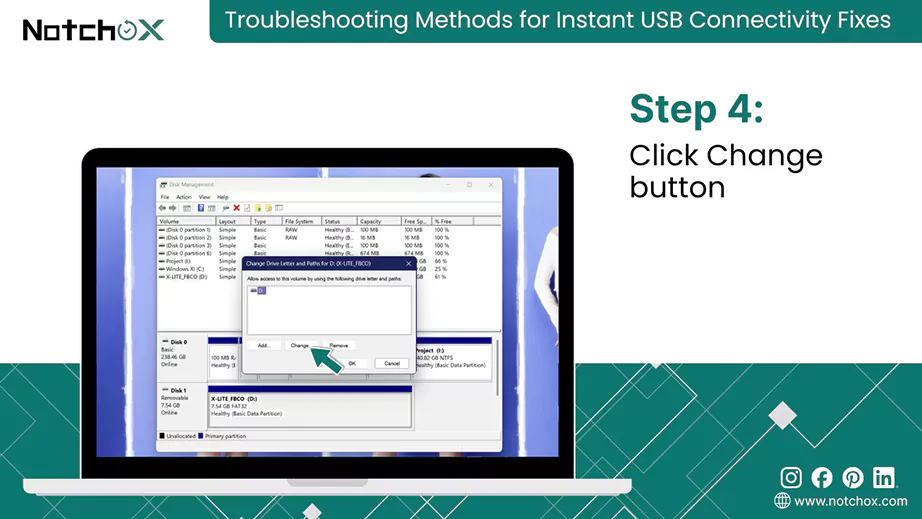
This process assigns a new identity to your USB, which can force Windows to recognize it properly if there’s a path conflict.
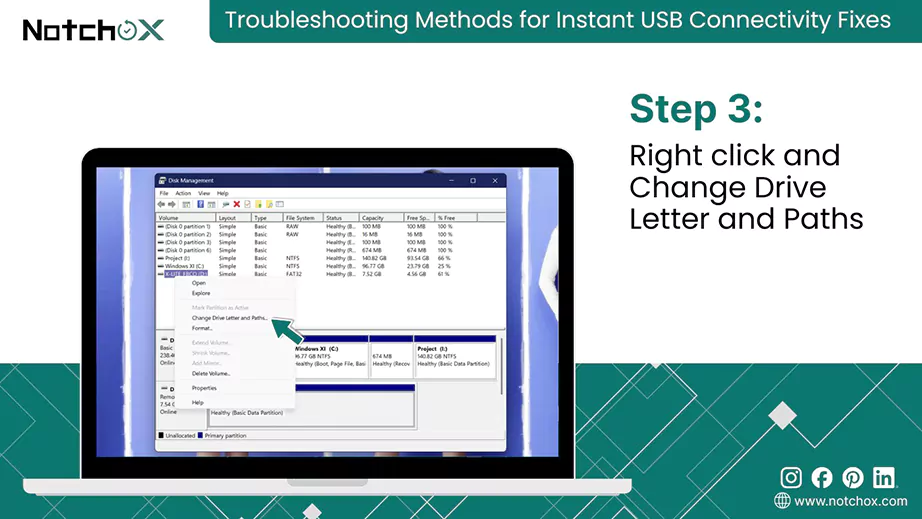
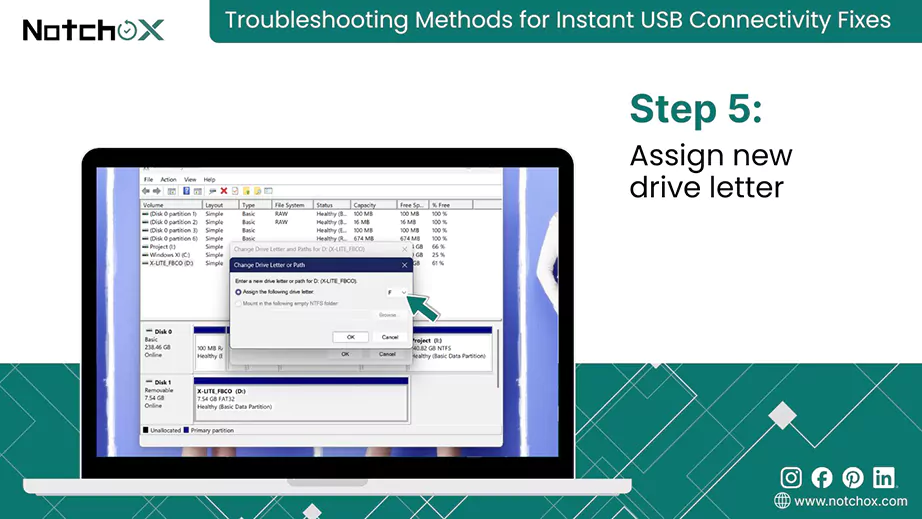
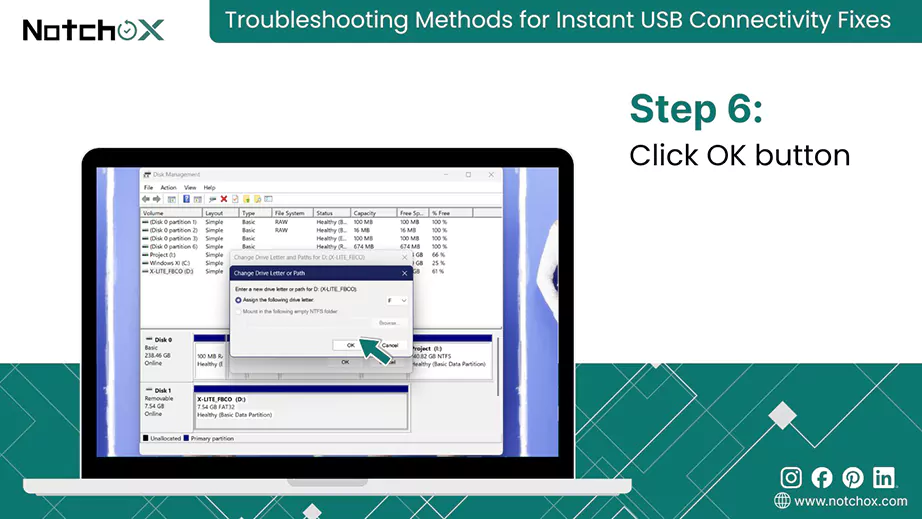
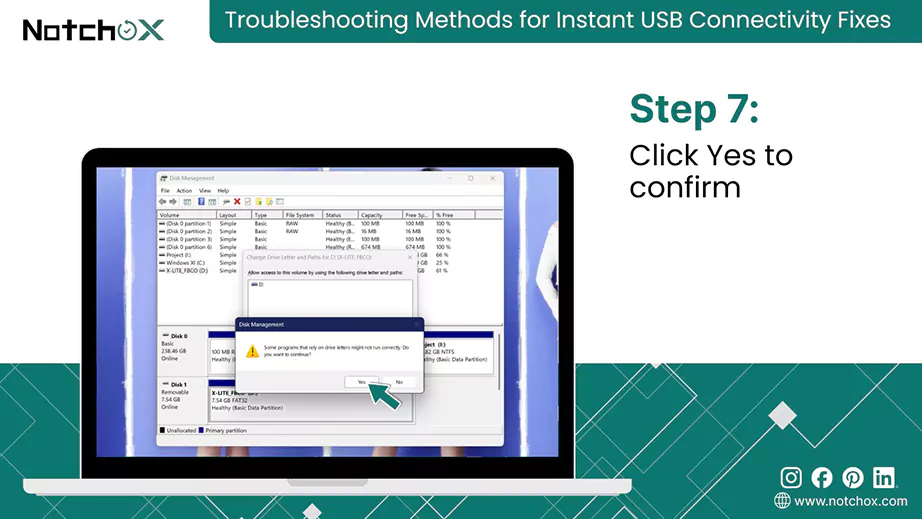
Your USB drive should now appear in the File Explorer with the new letter.
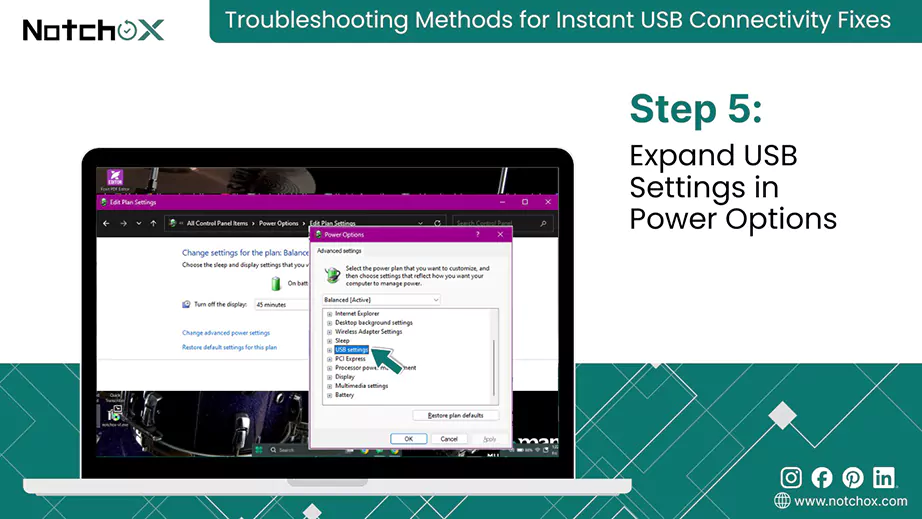
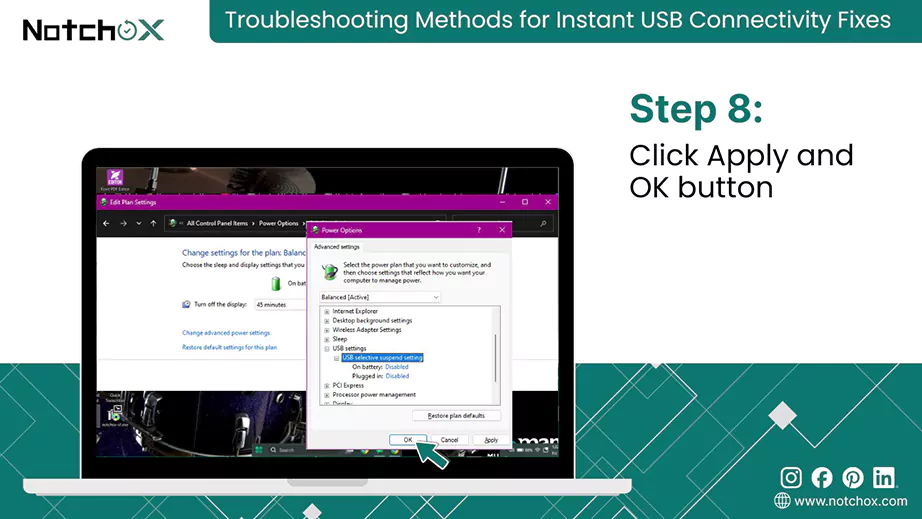
While the USB Selective Suspend is designed to save battery by cutting power to inactive ports, it can sometimes be too aggressive, causing your computer to stop recognizing your USB drive. Disabling these settings lets your ports remain fully powered and ready for a data transfer at all times.
Steps to disable USB selective suspend:


That was how to recover data from USB not recognized on Windows, use data recovery software to recover the data, and these methods to fix the USB drive not recognized issue.
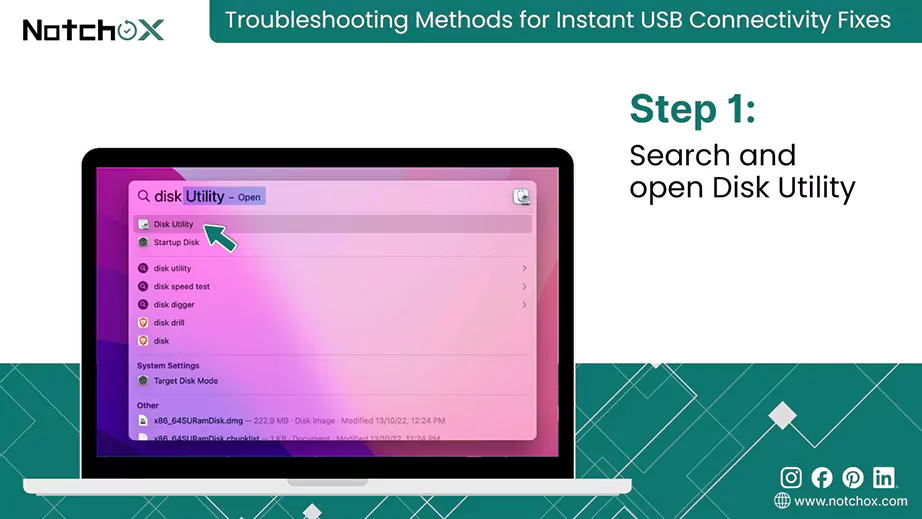
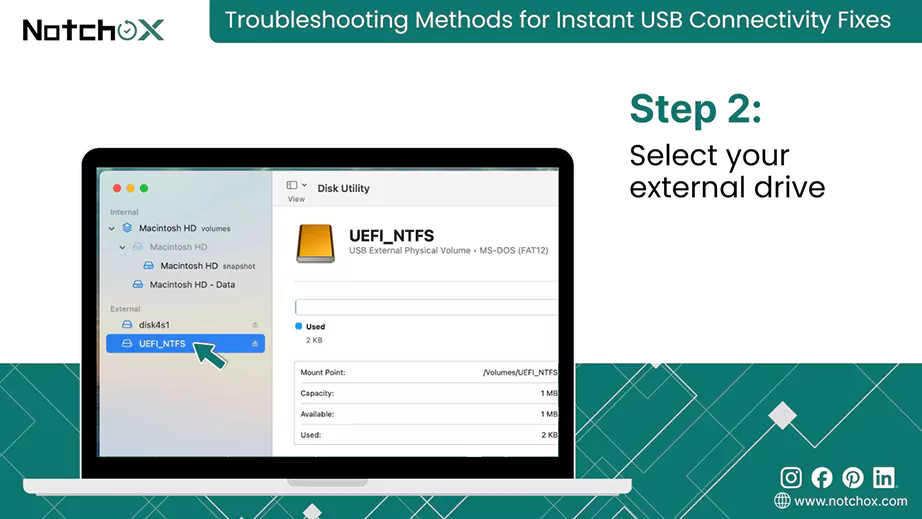
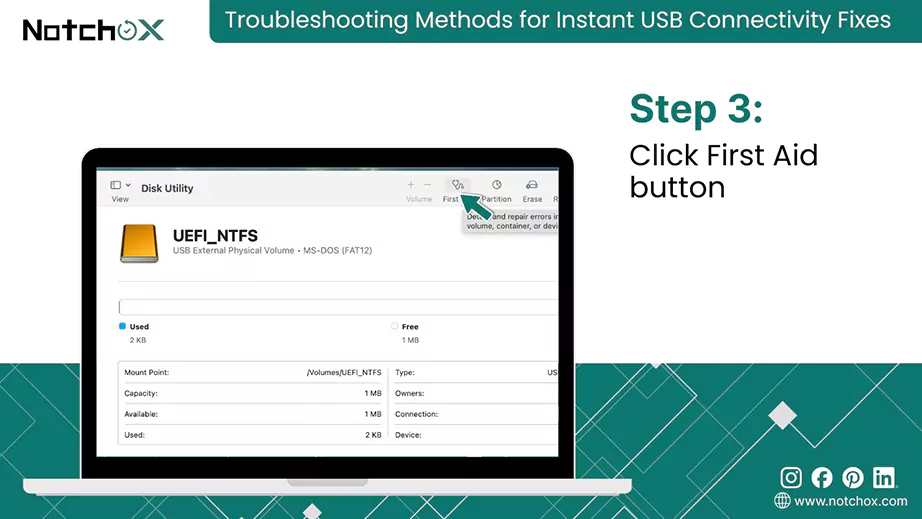
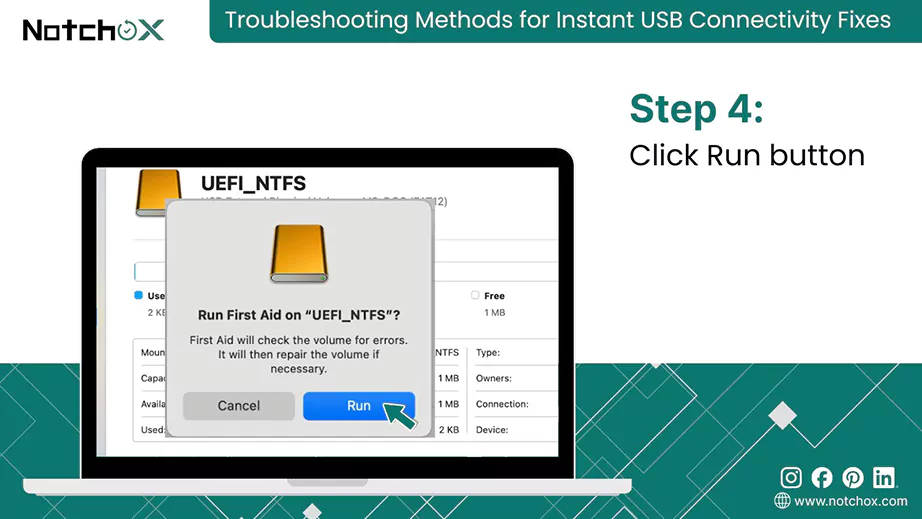
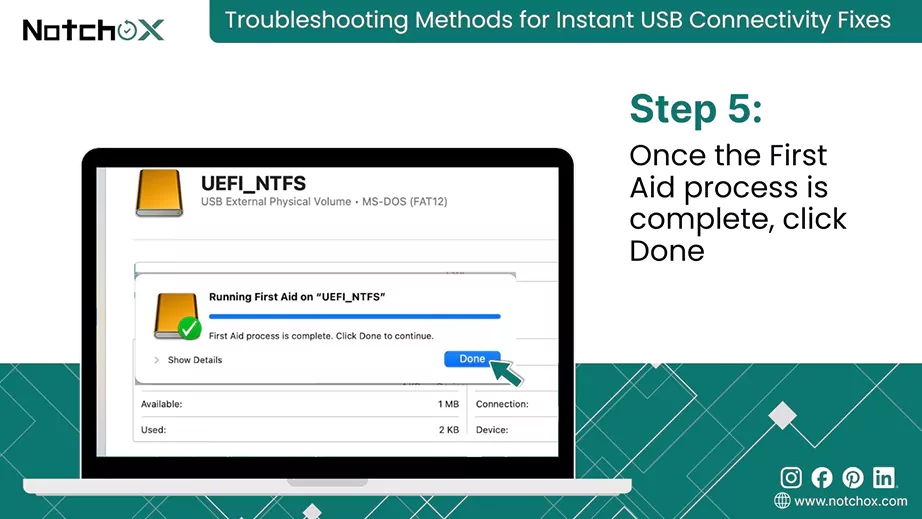
How to recover data from USB not recognized on Mac? It starts with a logical repair that clears the communication path between your hardware and the OS. Using First Aid is the most effective way to fix underlying directory issues that prevent them from appearing.
Steps to Fix and Recover Using First Aid:
That’s how to solve USB not recognized. For detailed recovery of a USB drive (RAW or Corrupted), you can follow specialised guides by Notchox. If these standard troubleshooting steps fail, it often points to a deeper hardware malfunction within the USB.
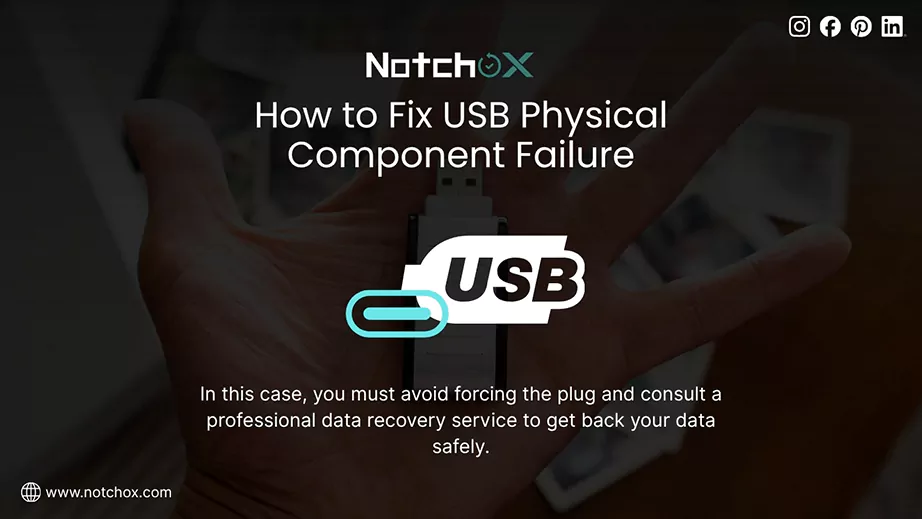
Now that we have covered the initial troubleshooting methods and software-based recovery, it is important to address the possibility that the issue is not within the code, but the hardware itself. If your computer still refuses to acknowledge the USB, there must be a physical failure. In this case, you must consult a professional data recovery service to get back your data safely.
For instance, in such cases, you must avoid forcing the plug. Forcing it can snap the delicate copper traces in the internal circuit board.
If the data on the drive is backed up elsewhere or is not important, it is always more cost-effective to replace the drive. Physical repairs can cost more than the price of a new 128GB or 256GB USB. Use this as a lesson to start a “3-2-1 backup strategy: 3 copies of your data, on 2 different types of media, with 1 copy stored off-site.
Important: Do not attempt to open the physically damaged USB drive yourself. Taking a DIY approach to hardware failure can lead to permanent data loss.
Mastering the steps to recover data from USB not recognized is a complex technical challenge rather than a quick fix, but it only results in permanent loss if the memory chip itself is physically destroyed or the data is overwritten.
Having known the preliminary connection checks, troubleshooting steps in Mac and Windows, and using powerful software like Notchox, you can recover your data successfully. This article listed every possible solution to bypass the “not recognized” error and get your digital data back.
Ans: Use reliable data recovery software such as Notchox to scan the drive even if it’s not recognized by your device.
Ans: To solve USB not recognized problems, try different USB ports, update/reinstall drivers, assign a new drive letter for Windows, or try First Aid on Mac.
Ans: On Mac, use Notchox Mac data recovery software to restore data from a USB not recognized, you can also use First Aid in Disk Utility to repair the drive.
Ans: Yes, if the drive is not recognisable to your file explorer, you can use data recovery software such as Notchox to recover the files. It deep scans your storage media memory sector to recover data.
Ans: Use troubleshooting methods like updating/reinstalling USB drivers, assigning a new letter to the drive, or disabling USB selective suspend to fix the drive not being recognized. You can use specialised data recovery software (like Notchox) to recover data from a USB not recognized on Windows.
Ans: Data recovery software is the best solution to recover files from an unreadable external hard drive.
Ans: Yes, if the computer physically recognizes it (for example, if the sound plays when inserting the drive, the device shows in Device Manager), even if it’s not showing in the File Explorer/Finder.
Deeksha Arora is a Data Protection & Recovery Writer focusing on writing accurate, informative, and easy-to-understand technical articles for Notchox’s readers. Her content on the prevention of data loss, understanding risks of device failures, and guides to fix problems helps readers make the right decisions and understand the technical terms easily. She works closely with Subject Matter Experts to ensure high usability and accuracy of her writing.