Kajal Singh May 5, 2026
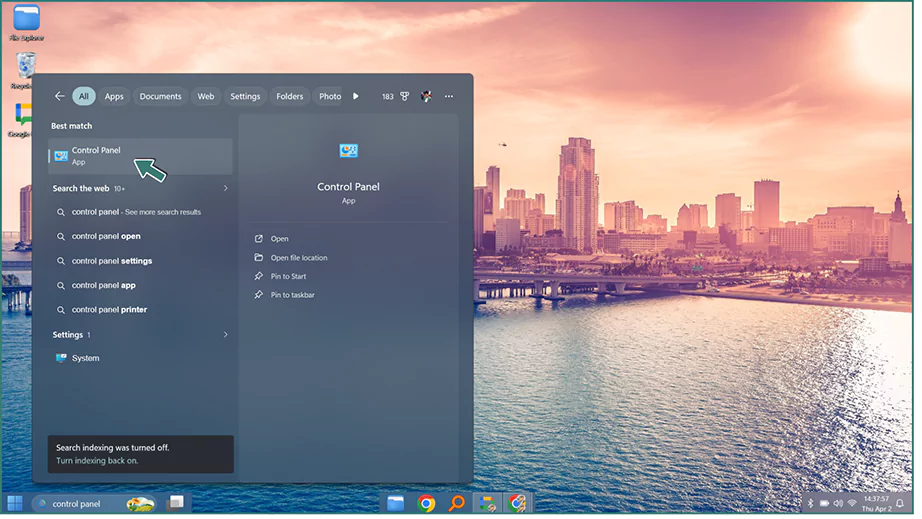
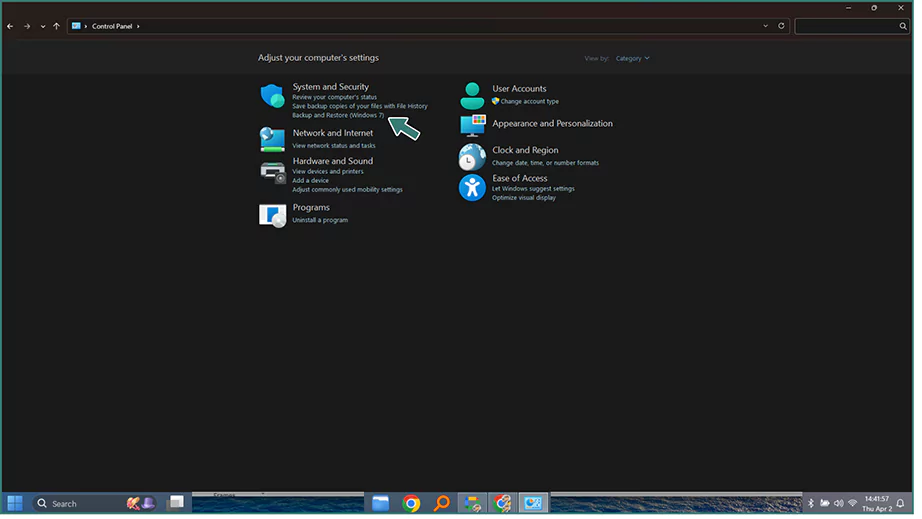
Ans: Go to Control Panel> System and Security > File History > Restore Personal Files.
In Windows 11, “deleted” doesn’t always mean “gone.”
Windows offers several built-in features and external tools/software that can help to recover deleted files.
Regardless of your location, the moment you realise your file is missing, stop saving new files to the storage. Once the free space is overwritten, the data becomes unrecoverable. This guide will walk you through the top, proven ways to answer: how to recover deleted files on Windows 11 in 2026?
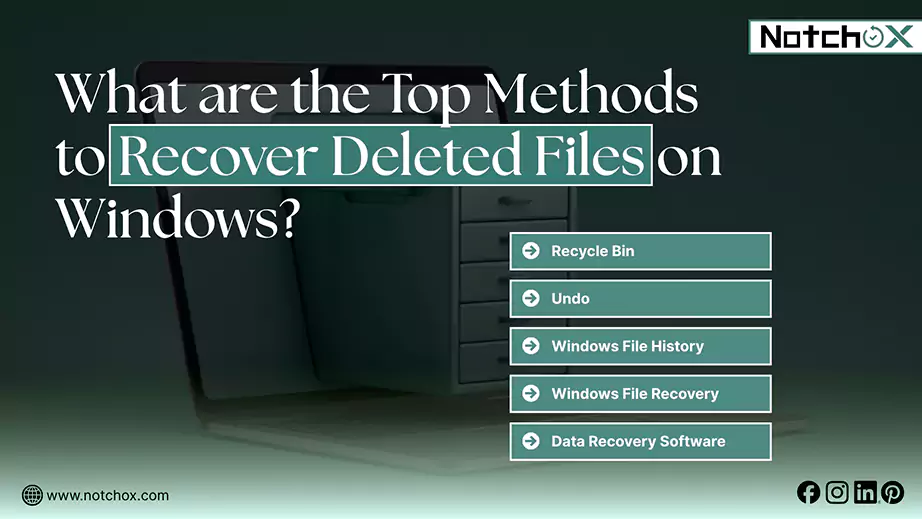
Struggling to recover your deleted files on Windows 11? Here are the top file recover Windows methods, listed from simplest to most advanced.
| Method | Best For | How to Use |
| Recycle Bin | Recently deleted files | Select files from the recycle bin, right-click and click “restore.” |
| Undo | Instant undo | Press Ctrl + Z or right-click on the same folder and click Undo |
| Windows File History | Previously backed up files | Type “Restore your files with file history” in the search bar, browse for versions and click restore |
| Windows File Recovery | Formatted Drives | Use the Command Line winfr command |
| Older Backup/ After Upgrade | System crash/ post upgrade loss | Use File History, Restore Points, or Cloud Backups (OneDrive) |
| Data Recovery Software | Permanently deleted | Install software (e.g., Notchox), scan and recover |
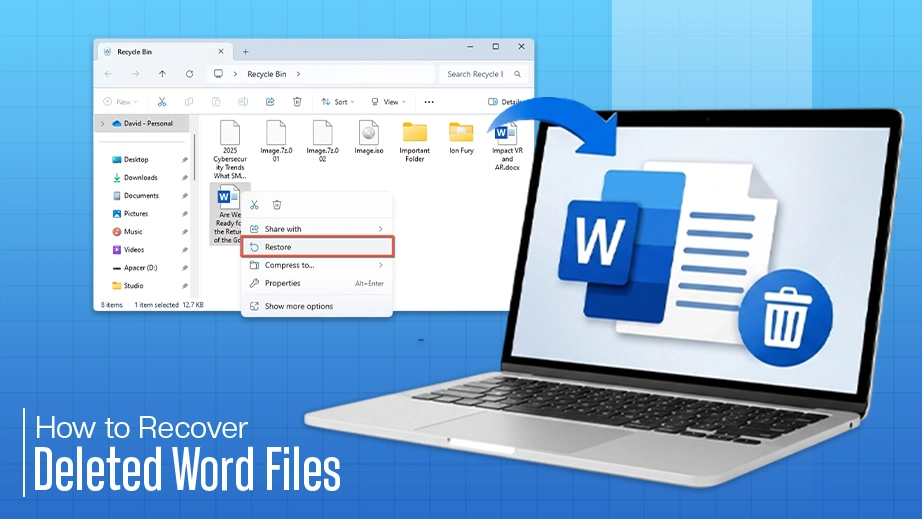
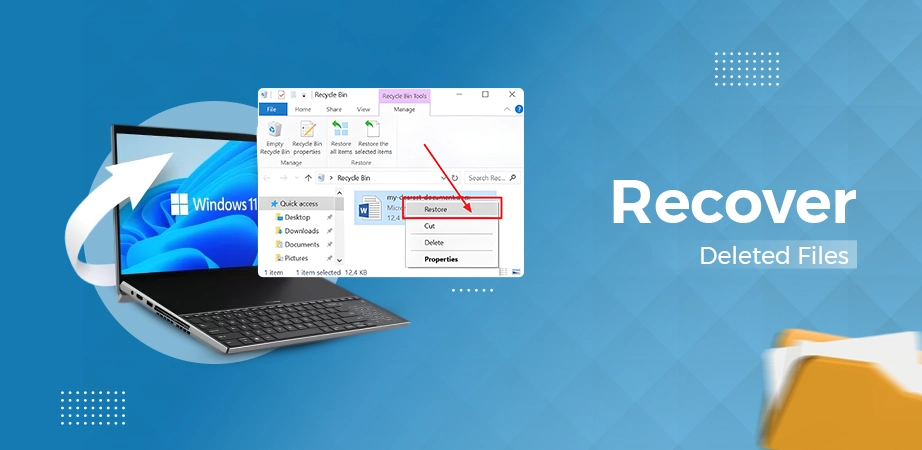
Recycle bin is a special space (temporary storage) in your computer that stores all the deleted files. It remains there, taking up space, until you empty the recycle bin. Here’s how to recover recently deleted files on Windows from the recycle bin:
Step 1: Open the Recycle Bin from the desktop on your computer.

Step 2: Search for the file you want to restore from the Recycle Bin.
Step 3: Right-click and click “Restore.”
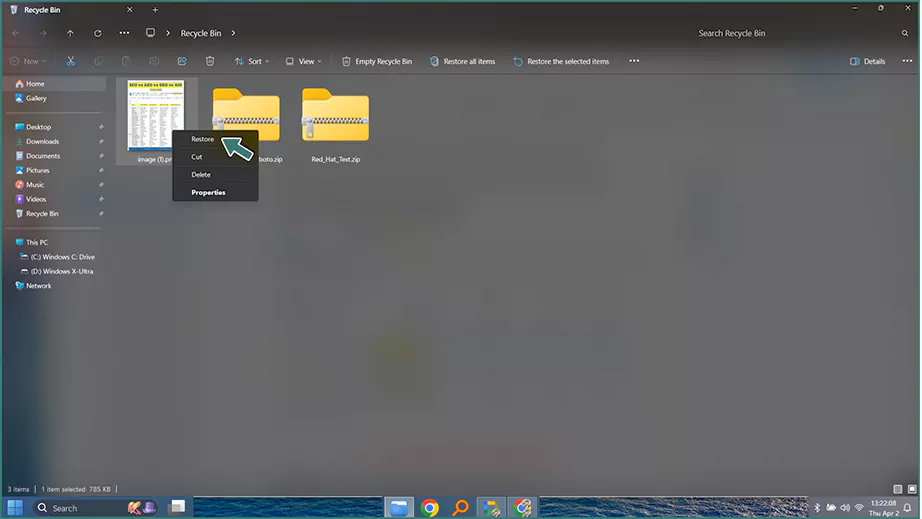
Step 4: The file will be restored to its original location.
Note: Files removed from external drives or network locations often bypass the Recycle Bin and are permanently deleted immediately.
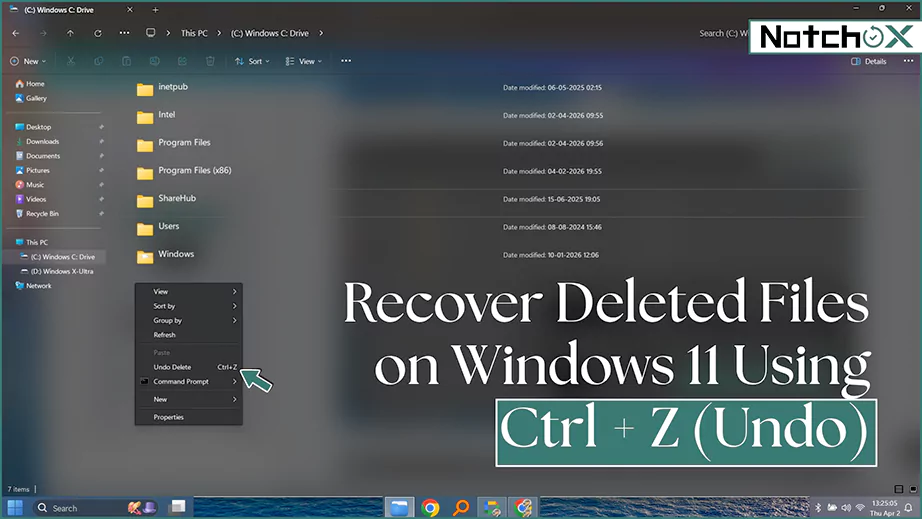
If you accidentally recently deleted the file, and are wondering how to restore files, “Undo Delete” is the best way to recover your file, provided you haven’t done any operation (moving, copying, pasting, etc) after the file deletion. Simply, press Ctrl + Z in the folder, or follow these steps to Undo Delete:
Step 1: Go to the folder from which the file has been deleted.
Step 2: Right-click and select “Undo Delete.”
Step 3: The deleted file is restored in the same folder.
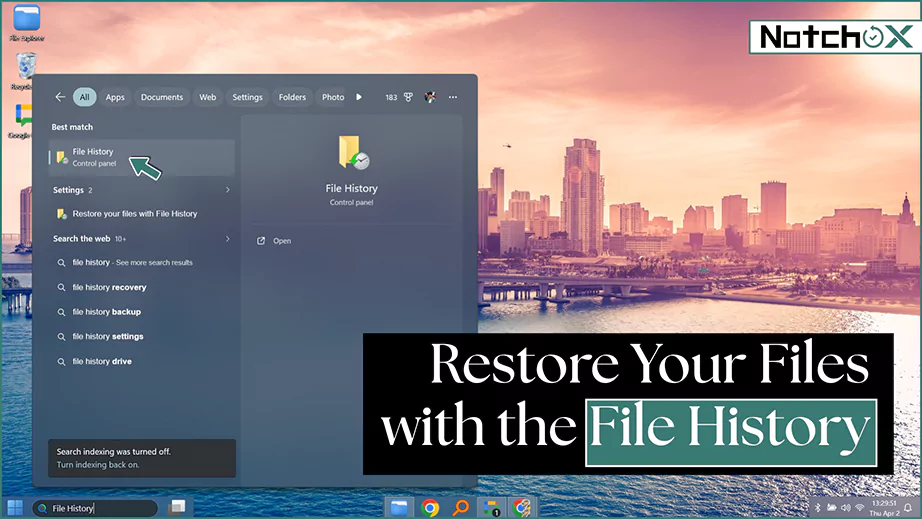
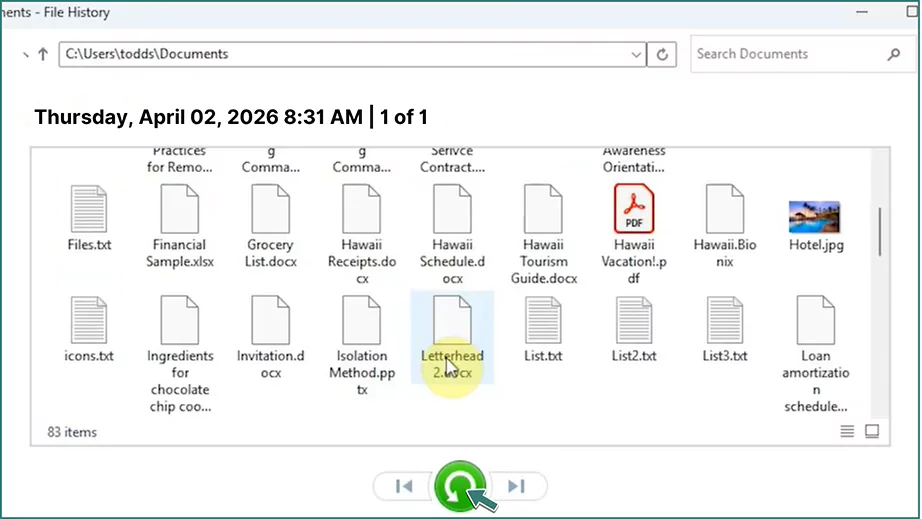
File History is an integrated backup system offered by Windows. It came with Windows 8, designed to replace previous backup models. The File History automatically backs up all your libraries, including default and custom libraries that you created, allowing you to restore previous versions.
Let’s see how to recover deleted files on Windows using File History.
Step 1: Type “File History” in the search bar and press Enter.
Step 2: On the left side panel, choose “Restore personal files.”
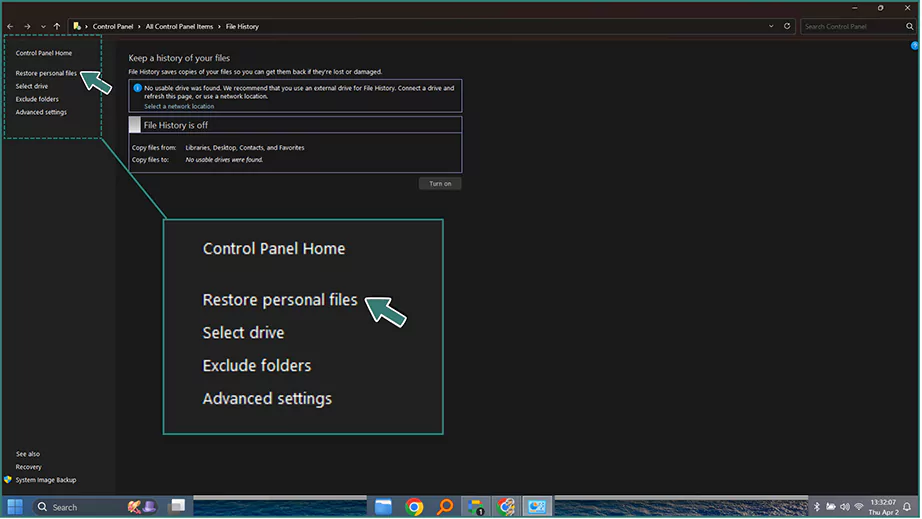
Step 3: Go to the folder that once stored deleted files. You can navigate to different versions using the left and right navigation buttons.

Step 4: Select the files you want to recover. Click on the green Restore button. The files will be restored to the original location.
Tip: If you want to restore to a different location, right-click on the restore button and click Restore to. Then choose the desired location.
Windows File Recovery is the free official command-line recovery tool developed by Microsoft. It can be downloaded from the Microsoft Store. This is used to restore files that are no longer present in the local storage device and cannot be restored from the recycle bin.
Note: Windows does not allow restoring to the same partition, as it poses a risk of corrupting your data.
Here are the steps on how to recover deleted files on Windows using the Windows File Recovery tool:
Step 1: Install the Windows File Recovery from the Microsoft Store.

Step 2: When opened, a command-line interface opens. Enter the prompt in the following format: winfr source-drive: destination-drive: [/mode] [/switches] and press Enter.
(for example, Winfr C: E: /regular /n \Users\Public\Project1 to recover all files in the folder.)
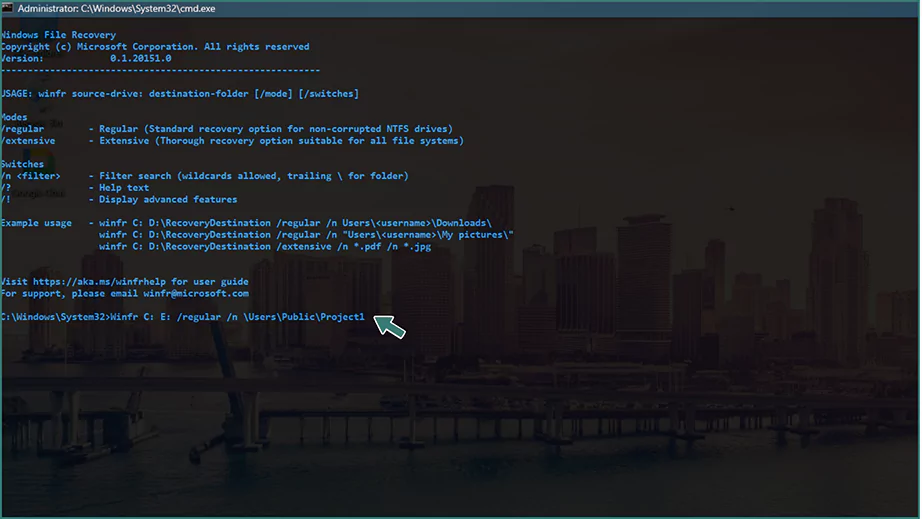
Step 3: If prompted to confirm, press Y.

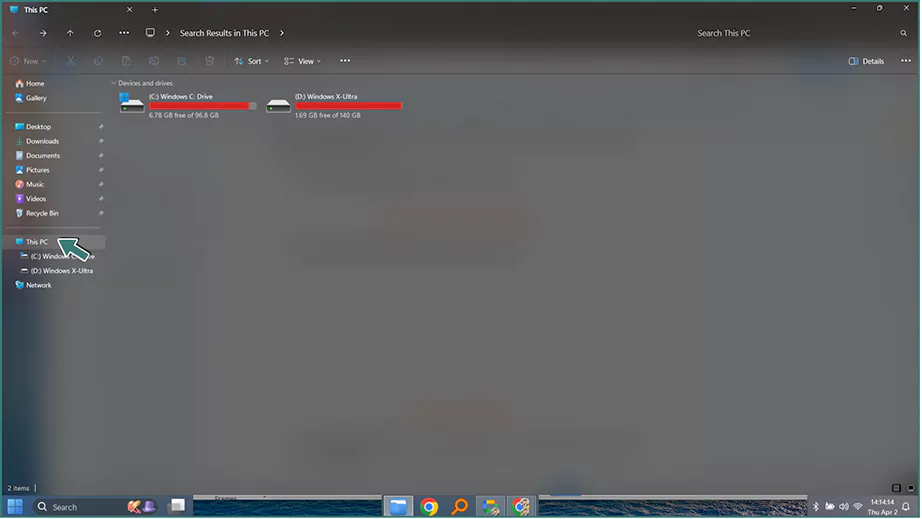
Updating Windows is required to access new features and maintain compatibility with modern hardware. If files can’t be discovered after upgrading Windows, here are the steps to locate the files:
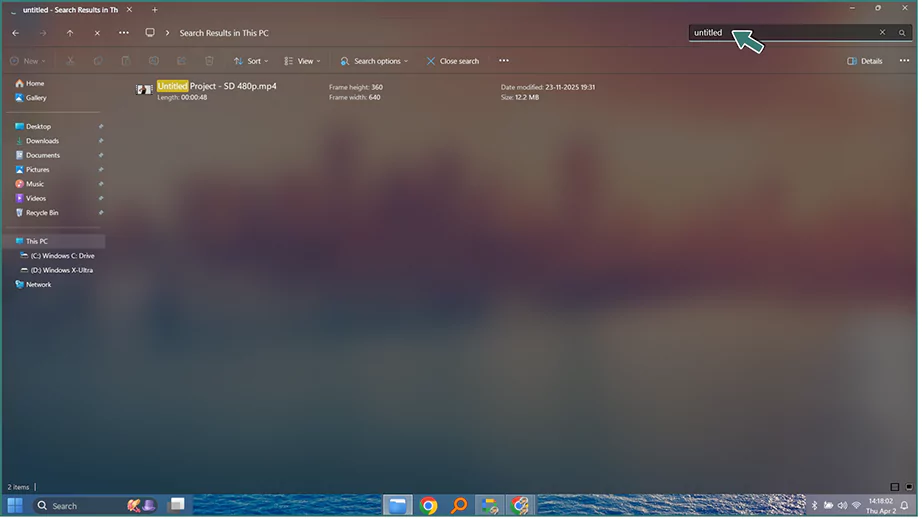
Here’s how to find deleted files on Windows. Follow the steps to search for the file on the device:
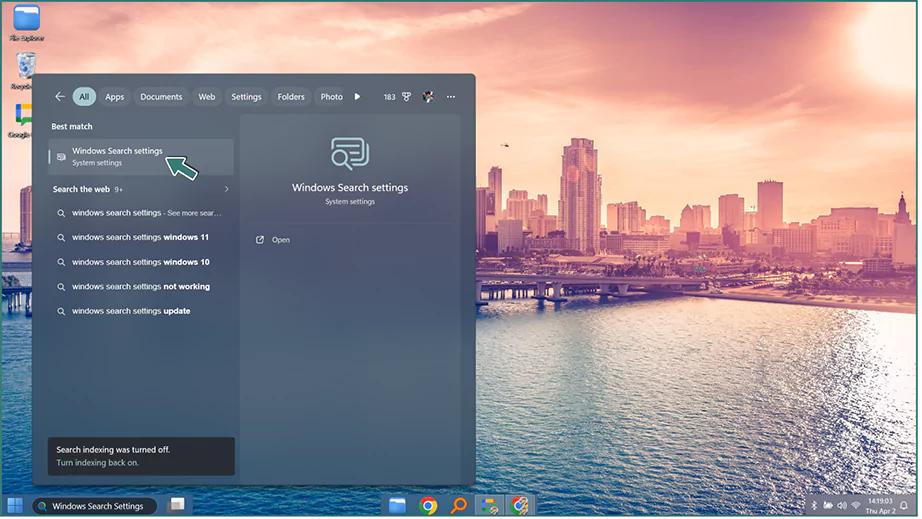
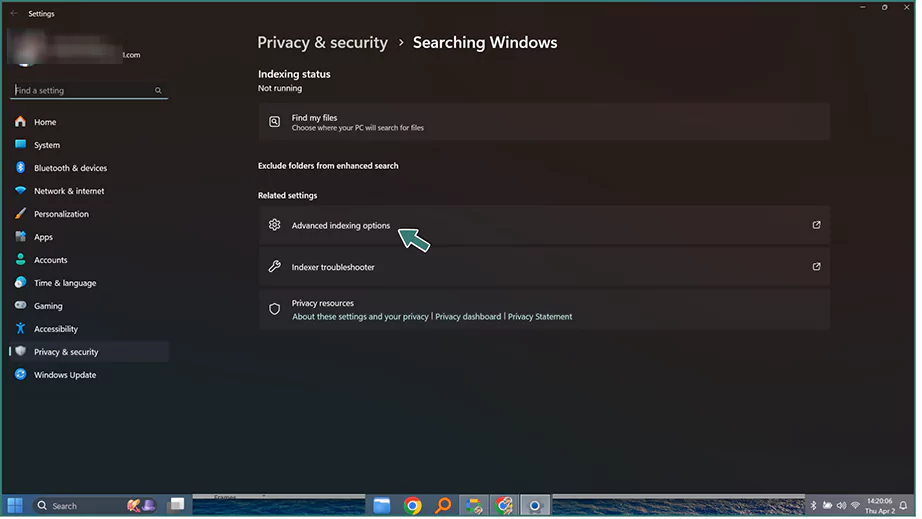
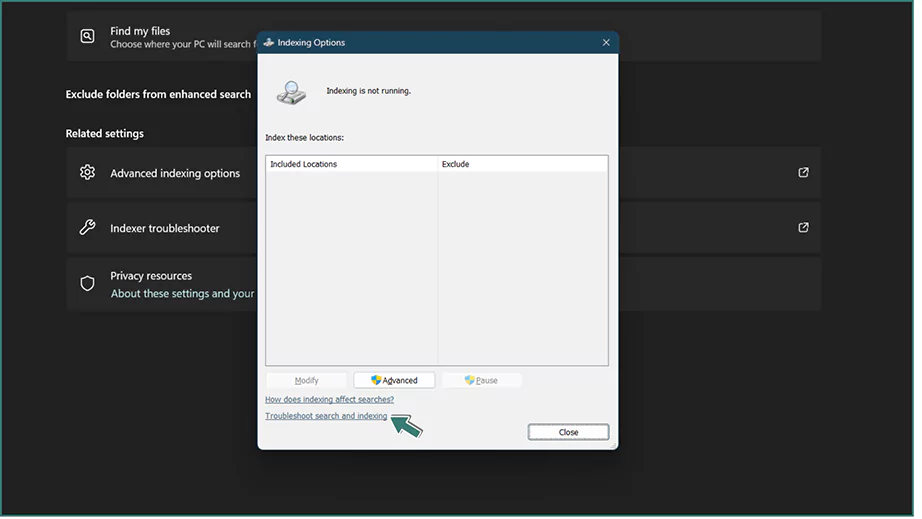
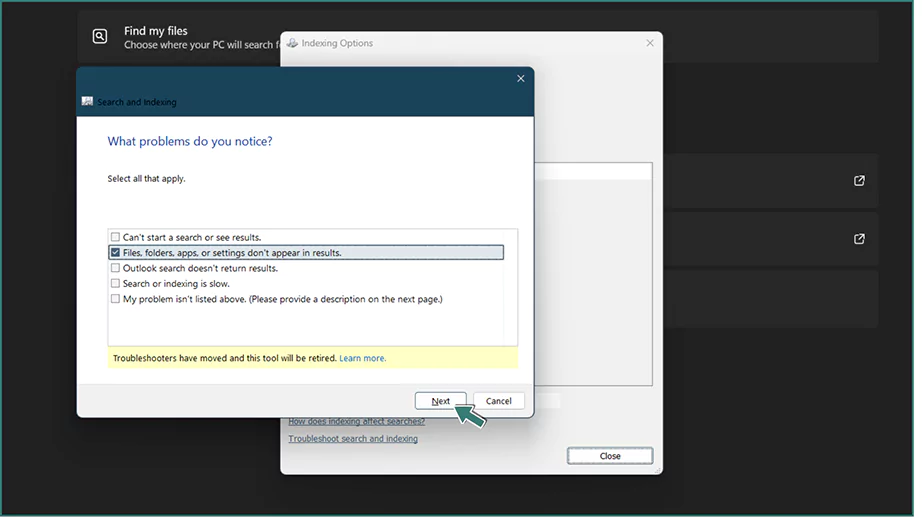
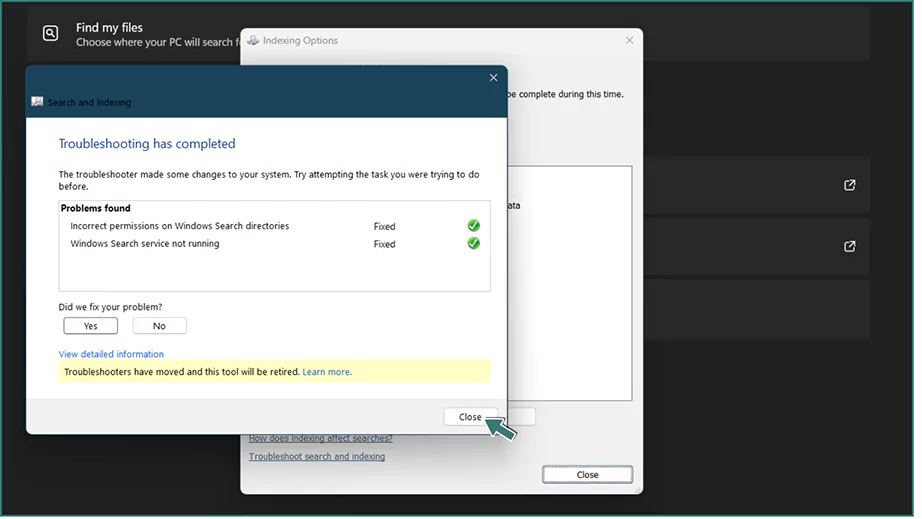
Search Toubleshooter
If the file can’t be accessed by searching, there might be a problem with the search. Use the search troubleshooter to fix it.
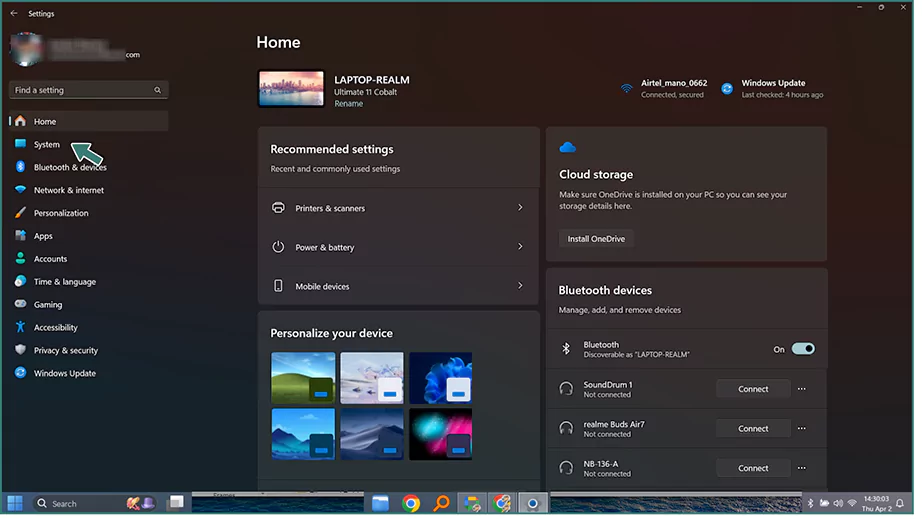
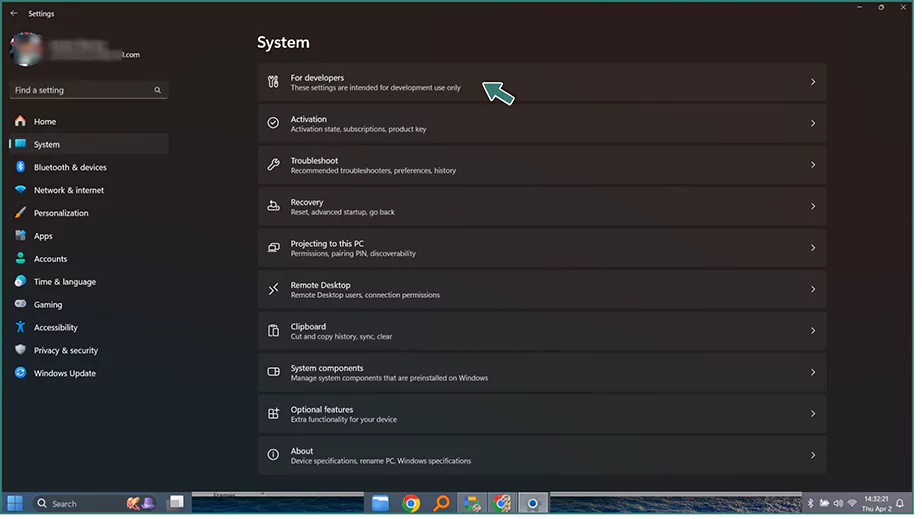
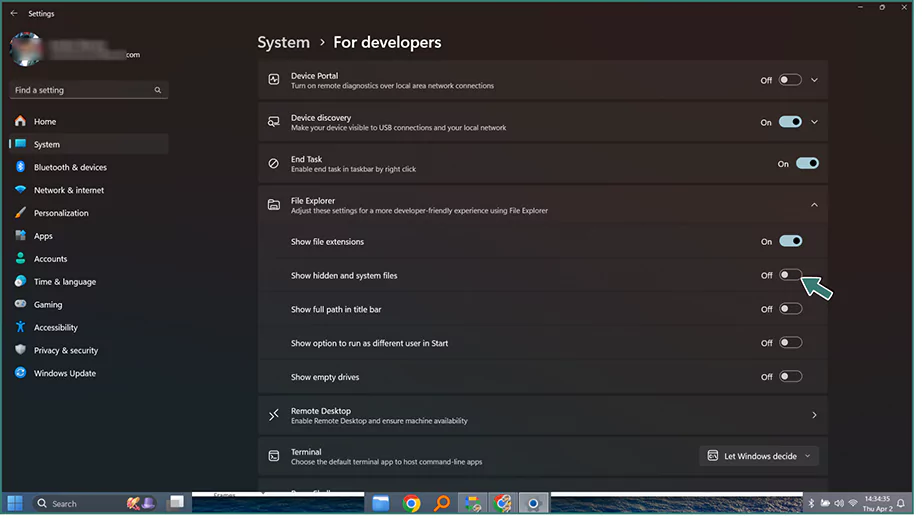
Hidden Files
Hidden Files in Windows are intentionally hidden files from view in the File Explorer to prevent accidental deletion/modification of critical data. They include files that are not needed daily by the user, such as system files, configuration files, temporary files, etc., but are essential for the operating system. Users can also set the files as hidden using the “hidden” attribute if needed. To show those hidden files:
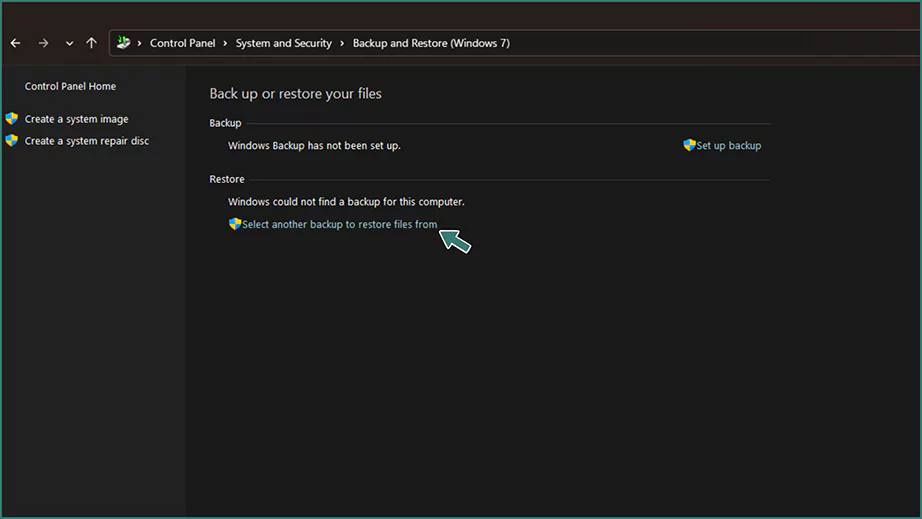
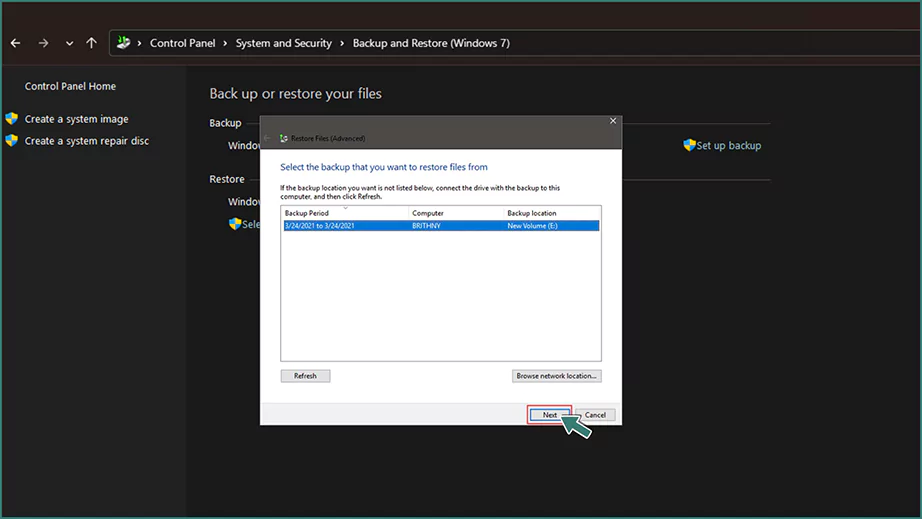
To restore files from a pre-Windows 11 backup created on an external storage device, follow:
Note: The files can be recovered from OneDrive if previously saved on OneDrive.
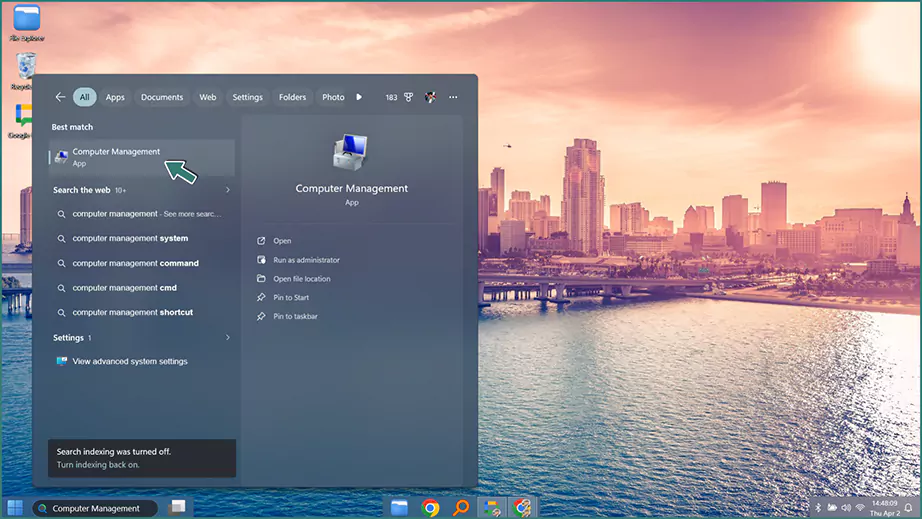
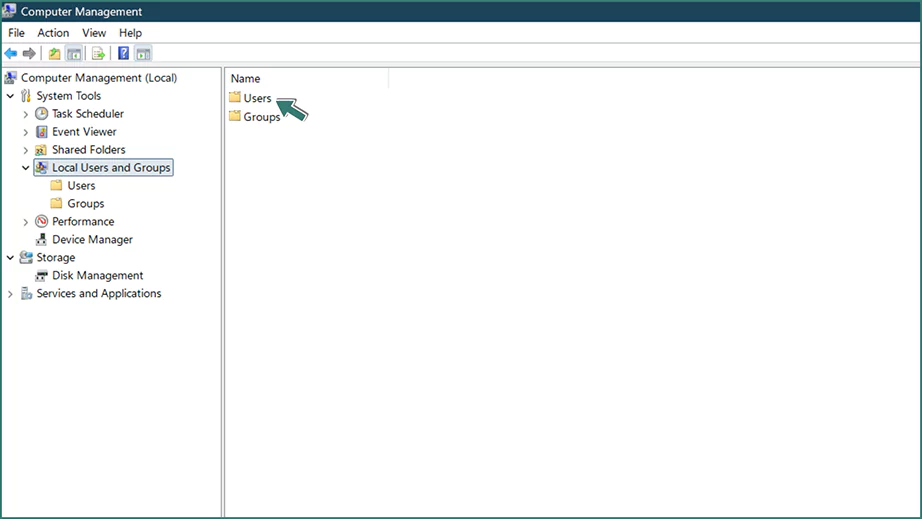
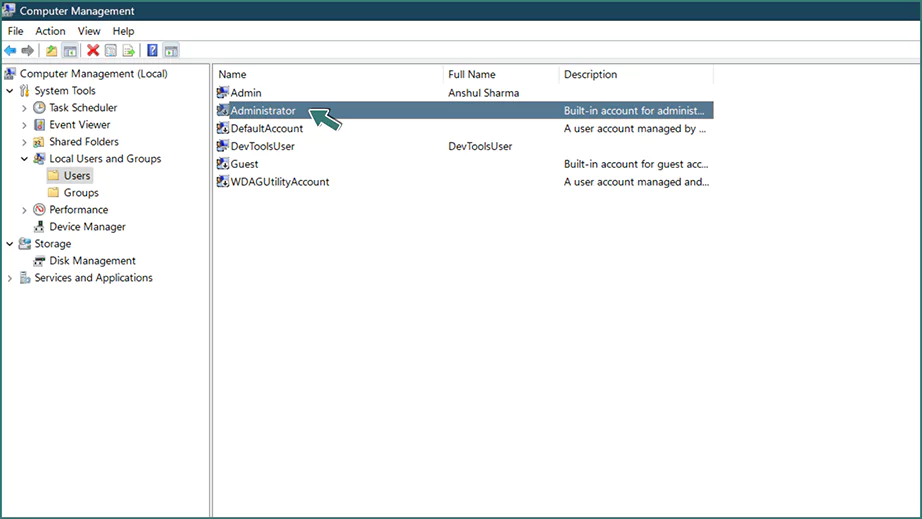
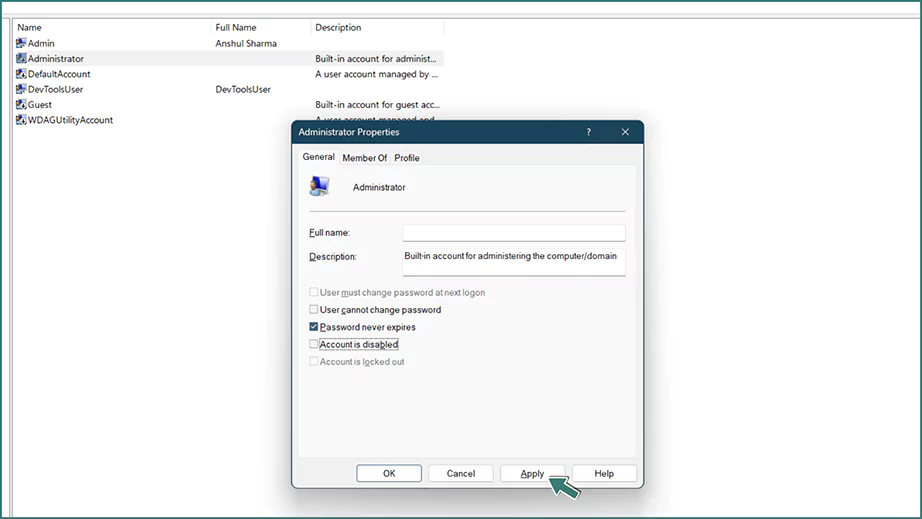
The administrator account has elevated permissions, giving full control over the operating system. If you created a new administrator account when upgrading to Windows 11, the files might still be there in the previous administrator account. To regain access, activate the old administrator account.

To recover permanently deleted files on Windows 11, when you don’t have a backup to recover from, use data recovery software such as Notchox.
Notchox is a top data recovery software recognised for super efficiency, designed to restore files from system crashes, accidental deletion, and technical glitches. It has 99% success rate with an intuitive interface for Windows 11.
| Full support for all modern Windows versions | |
| Operating System | Windows 7, 8, 10, or 11 |
| Architecture | 32-bit or 64-bit |
| Processor | 1 GHz |
| RAM | 1GB minimum |
| Storage | 250MB free space |
Notchox is the best data recovery software, outshining its high success rate and Comprehensive Storage and Extension Support. Here are the steps on how can we restore permanently deleted files using Notchox data recovery software:
Download the Notchox software and install it on your Windows 11. Make sure not to install the software on the same drive to prevent overwriting the data.
To download Notchox software, visit the official site www.notchox.com. Now follow the steps and install the software.
Locate the drive or partition from where the data was deleted. For example, Local Disk C, USB Drive, etc.
If restoring from an external device, make sure it is properly connected. Data recovery software will list all connected storage devices.
Apply a filter before the scan to narrow down the search. The filters include:
Execute the recovery process of the tool to scan and extract files. Click Start Scan to allow the software to scan the drive and start analyzing the file system, directory structures and data signatures.
The scan will take from 15 to 30 minutes to complete.
Check the interim results. Notchox profiles preview before recovery to ensure integrity. Select the desired files and click Recover to finalise it to complete data recovery.
Have data recovery queries? This section lists common Windows 11 users’ queries regarding accidental data loss, corrupted files recovery, partition recovery and more. Let’s have a look.
Been trying every method to recover a deleted folder on Windows 11, you must get help from data recovery software, as it deep scans the digital storage, looks for partitions or any residual data and rebuilds the data to the original file.
Query Overview: How to find out what I just shift- deleted? The user accidentally deleted files using Shift + Delete and wants to recover them.
Query Overview: The user accidentally deleted all files in the downloads and now wants to recover them. This is a common mistake that many users try to undo.
Query Overview: A Windows 11 user mistakenly deleted the logical partition of a 1TB hard drive and has tried tools like Minitool and EaseUS, but can’t recover. The user suggested DMDE, but doesn’t know how to do it.
Recovering deleted files on Windows 11 is highly achievable by acting quickly to prevent overwriting. This blog discusses all the ways to recover deleted files/folders on Windows 11.
Start by checking the Recycle Bin or using undo (Ctrl + Z). For permanent losses, use File History or the Windows File Recovery Tool. Regular backups remain the best defence against permanent data deletion.
For cases where these methods fail, using data recovery software is the best approach.
Ans: Go to Control Panel> System and Security > File History > Restore Personal Files.
Ans: Use reliable data recovery software that provides successful partition recovery to restore the drive partition and its data.
Ans: Check C:\Windows.old folder. Use File Explorer to research or run the search and indexing troubleshooter in the settings if the search fails.
Ans: Yes, third-party data recovery tools are reliable for logical data loss and not for physical drive damage. Choose a reliable data recovery software with a high success rate and data preview to verify files before purchasing.
Ans: Yes, a permanently deleted file can be recovered with the help of File History.
Kajal Singh is a Data Recovery Writer at Notchox, specializing in data recovery, storage systems, RAID, and digital forensics. She writes technical processes, tools, and cases into clear, engaging articles, blogs, and guides. Kajal does thorough research, deep analysis, and collaborates with experts to produce high-quality and engaging content that is easy to understand for every reader.