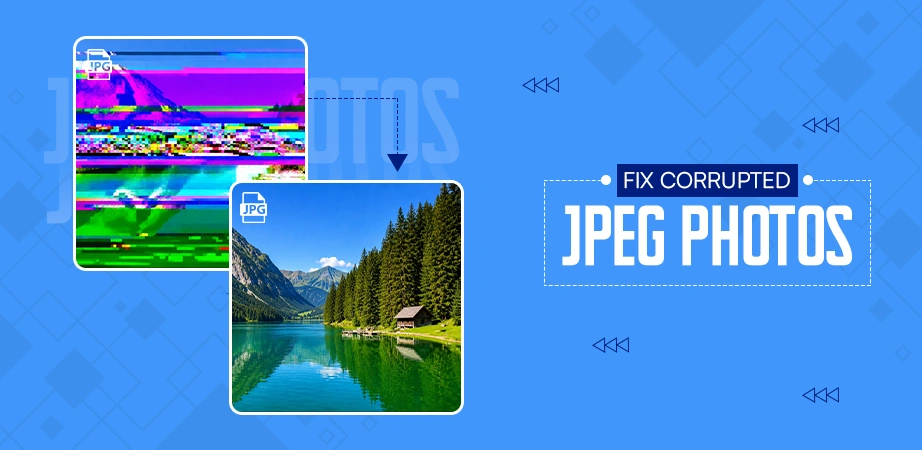
Opened an image and saw “Invalid JPEG Marker”? We all have been there at least once, seeing images grayed out, pixelated, or just refusing to open. If you are here, it’s likely because your JPEG broke and you want to rescue it from the void.
Corruption happens, but it doesn’t mean you lose your image permanently. While there are plenty of ways to fix this, sometimes you need a quick, heavy-duty solution using professional photo/ JPEG recovery software like Notchox that can save hours of frustrating image fixing in a few minutes.
In this article, we look at 8 super-easy, actionable ways to fix corrupted JPEG files on any device (phone, PC, or SD Card).
Quick Answer: The most effective ways to fix corrupted JPEGs are:
Use an online image editor
Fix corrupted JPEG photos using the Professional Tool
Yes, you can fix corrupted JPEG files, whether due to abrupt transfer interruptions, malware, or storage media failure. Corrupted JPEG files can seem lost forever. Fortunately, there are numerous ways to recover your corrupted JPEG. But first, let’s see how to know that your photos are corrupted.
Common error messages you’ll see when JPEG corruption occurs:
“It looks like we don’t support this file format.”
“Invalid JPEG marker.”
“File appears to be damaged, corrupted, or too large.”
“Invalid image file header.”
“JPEG error #53”
To fix corrupted JPEGs, we have listed detailed solutions and steps. And by the end, you will have fixed your JPEGs.
How to Fix Corrupted JPEG? 4 Effective Methods to Recover Corrupted Files
There are 4 primary methods that work to restore corrupted JPEG files to their original quality. It can be done using an image editor, utilising a professional recovery tool, a Hex Editor and Microsoft Paint. Take a look at the detailed process below:
Method 1: Using Image Editor
The first method that comes to mind when a JPEG is corrupted is using image editors to fix it. But can they actually fix it?
Simply uploading images to Pixlr, Canva, or specialised sites like JPEG.repair can force a re-encoding process that fixes header errors and restores image accessibility. Making minor changes and saving files with a new extension may fix corrupted JPEG.
Steps to take with an online image editor:
Step 1: Upload the broken image to an online editor (here, OIE).
Step 2: Attempt to apply minor adjustments like adjusting brightness or contrast to recover any lost visual detail.
Step 3: Click the Save button and save the image with a new filename.
If the file fails to open, try a professional photo recovery tool.
Method 2: Utilize a Professional Recovery Tool
Manual fixes fall short against severe corruption. While you waste hours trying a manual fix, here’s a smarter choice: using professional photo recovery software, Notchox, that fixes your JPEG in no time. These tools are fast and reliable, designed to rescue corrupted images back to their original high-resolution form.
Let’s see how you can use Notchox to fix corrupted JPEG.
Step 2: Select the corrupted file recovery module and the drive where the corrupted JPEG is.
Step 3: Apply filters if needed.
Step 5: Click Start Scan. The tool scans the file to locate the specific corrupted sectors or data fragments. It attempts to fix the file’s internal structure, such as file headers.
Step 6: When the scan is complete, the recovered files are ready for preview. Click the Preview button to check the files.
Step 7: Select the files to restore and click Save to Vault.
Method 3: Fix Corrupted JPEG Headers Using a Hex Editor (e.g., HxD)
An image is corrupted; the most common reason will be a corrupted JPEG header. While the actual image might be intact, corruption in the first few bytes of the header prevents the computer from interpreting the file correctly. Luckily, if the core data is unharmed, this issue is often reversible.
Using a Hex Editor to fix corrupted JPEG Headers:
Step 1: Download and Install the Hex Editor
Visit the Freeware Hex Editor HxD’s official website and download the Editor compatible with your system.
Select the Save File and click OK button to download the Hex Editor.
Right-click on the downloaded file and select Extract All.
Double-click on HxdSetup.exe to install. Follow the guided steps to complete the installation. Once done, click the Finish button.
Step 2: Open the Hex Editor
Open HxD Editor. Drag and drop both corrupt and working files in the HxD Editor.
You will see the binary information of the image file.
Step 2: Copy the Hex Code from the Working file.
Select Search and click on Find.
Go to the Hex-values tab, check All, type “FF DA”, and click Search All.
From the results, double-click the last FF DA.
Select the byte that appears before FF DA. Click Edit and Select Block.
Set the start-offset to 0 and click ok.
Go to Edit and click Copy.
Step 3: Fixing the Corrupted JPEG
Go to the corrupted file and do the same steps as Step 2. Then click Edit and select Delete.
Go to Edit and select Paste insert.
Now, click the Save button to save the recovered corrupted file.
Step 4: Check the Fixed JPEG
Go back and open the file to check. Your corrupted JPEG is fixed.
Method 4: Recover Corrupted JPEG using Microsoft Paint
Sometimes the image may not open in the default image viewer due to an app malfunction or if the image format/metadata was slightly corrupted. You can try opening it in Microsoft Paint because it uses different methods to display images, bypassing the broken Microsoft Photos app.
Follow these simple steps to open images in Microsoft Paint.
Step 1: Select the corrupted JPEG that you are unable to open.
Step 2: Right-click on the image and select Open with > Paint.
Step 3: The image will open in Paint. Now save the image.
Click File on the menu bar.
Click Save As and select JPEG picture.
When “Fix” Fails: Restoring and Accessing Corrupted JPEG
When the repair tools fail to recover the corrupted images, it may feel that the pictures are not recoverable. However, “fixing is not the only way to recover data. Often the photo’s data is intact, but the container (header) is broken, or your image viewer can’t interpret it. In such cases, you can use the following ways to fix corrupted JPEGs.
Method 1: Run Windows Check Disk (CHKDSK) to Repair Drive Errors
Running Windows chkdsk (Check Disk) fixes JPEG corruption caused by improper shutdown or file system errors. It fixes the directory structure and logical file system metadata, but does not repair the internal data structure of the image itself.
How to chkdsk to fix Drive errors and repair bad sectors to fix JPEG?
Step 1: Go to the Start Menu and search for “cmd”. Right-click on Command Prompt and click Run as Administrator.
Step 2: Run the command to scan the disk.
chkdsk [drive letter]: /f /x /r
Step 3: Let chkdsk scan the drive to fix errors. If the drive is in use, you will be asked to schedule the scan on the next restart.
Step 4: Type “Y” and press Enter to continue.
Step 5: Close the command prompt and restart your computer to begin the scan during the next boot.
Step 6: chkdsk will scan and automatically repair the file system.
Step 7: Check to verify, see if your issues have been resolved.
Method 2: How can downloading the Image Again Solve Partial Data Loss?
If an image transfer or download stops early or if the file was corrupted during saving, re-downloading the image can solve partial data loss. This replaces the partial or corrupted data packets with the original by providing a complete signature of the file, thus reconstructing the full image.
Also, an outdated browser cache can corrupt the image. When a browser fetches an updated image but mistakenly downloads the previous, old, or partial version from its cache, the resulting file is corrupted.
Steps to re-download and fix images:
Step 1: Delete the corrupted file by right-clicking on the image and selecting Delete.
Step 2: Clear your browser or app’s cache to ensure it does not download the same cached, broken file again.
In Google Chrome, click on Options (⋮) on the top right corner.
Click Delete browsing data.
Check the cached image and files and click on Delete Data.
Step 4: Go back to the original source and re-download the image.
Step 5: Open the image to check if it is restored.
Method 3: Use Command Prompt (SFC Scan) for System File Issues
SFC Scan acts as a diagnostic tool that scans the file system and replaces corrupted or lost files with a good copy cached at %windir%/WinSxS.
It checks the integrity of system files, and if it finds any corrupted files, it replaces them with non-corrupted versions. Windows keeps a cached copy of all of its system files at %windir%/WinSxS.
This method may or may not work as the system images may not be up to date, and sometimes the cached copies of system files might be corrupted themselves.
Step 1: Go to the Start Menu and search for “cmd”. Adjacent to Command Prompt, click on Run as Administrator.
Step 2: Click Yes to run the command prompt as administrator.
Step 3: Before running SFC, it is recommended to run the following command to make sure the system image is healthy.
DISM.exe /Online /Cleanup-image /Restorehealth
Step 4: Once the operation is completed successfully, run this command to start the process of scanning the system files:
sfc /scannow
Step 5: After the scan completion, type exit and press Enter.
Method 4: Rename the JPEG Files
Often, renaming JPEG files can fix it, forcing the operating system to refresh its metadata and re-index it. Renaming JPEG files improves organization without altering the image data. You can rename files individually by selecting them and pressing F2 (Windows) or clicking the filename (Mac).
Steps to attempt repair by renaming:
Step 1: Right-click the file and select Rename icon from the streamlined context menu.
Step 2: Enter a new name and change the extension to “.png” or “.bmp” and press Enter.
Step 3: Try opening the file. If it opens, change the extension back to “.JPEG.” Your file is recovered.
How to Prevent Future JPEG Corruption?
Now that you are aware of how to fix corrupted JPEGs in any scenario, let’s check what to do to prevent JPEG corruption in future.
Stable Network: A stable network is very important when downloading or uploading an image. Interrupted networks can lead to incomplete files, causing JPEG corruption.
Backup: Implementing a regular backup strategy is the best protection against data loss, so if your storage media or files are corrupted, you can immediately download from the backup.
Regular Scan: Storage media scans can help detect bad sectors over time. Therefore, regular scans can help troubleshoot the issue and prevent JPEG corruption.
Avoid Repetitive Editing: JPEG is a lossy format. Opening, editing, and resaving the same PEG files repeatedly can cause “generational loss”, where the image degrades with each save.
Safe Device Removal: Always eject the SD card or USB properly before pulling it out. This prevents files from being cut off during writing.
Stable Power and Transfer: An abrupt system shutdown or power loss will cause file corruption. Work with stable power and high-quality storage devices.
At a Glance
Most JPEG corruption is reversible using the various methods discussed in this blog. Whether the issue is simple header damage or serious transfer failure, solutions like image editors, quick header repairs, and hex editing can restore your JPEG.
For deeper issues, advanced SFC commands and photo recovery software can help you successfully recover your image.
If none of the system methods work, go for Notchox, the best JPEG repair software that provides a high recovery rate with image fixing.
Frequently Asked Questions (FAQs)
Q1: How to repair a corrupt JPEG file?
Ans. Corrupted images can be repaired using:
Use an online image editor
Fix corrupted JPEG using the Professional Tool
Use a Hex Editor
Open JPEG in Paint
Repair drive errors using chkdsk
Re-download the image
Run SFC Scan
Rename the JPEG files
Q2: How to know if my JPEG is corrupted?
Ans. When JPEG is corrupted, you get the following indicators:
“It looks like we don’t support this file format.”
“Invalid JPEG marker.”
“File appears to be damaged, corrupted, or too large.”
“Invalid image file header.”
“JPEG error #53”
Q3: How to fix a corrupted JPEG header?
Ans. Use a Hex Editor like HxD or Cygnus to fix the corrupted JPEG header.
Q4: How do I uncorrupt an image?
Ans. Corrupted images can often be restored using specialized repair software, changing file formats, or checking storage media for errors. To uncorrupt a JPEG, try opening it in Paint and resaving it, or using tools like Notchox.
Q5: Can corrupted pictures be restored?
Ans. Yes, corrupted images can be restored. Data is still present; the file header or structure is just damaged. You can use paint to open the picture, convert file format, run chkdsk to repair drive errors, or use specialised corrupted file repair software.
Q6: How to avoid JPEG corruption?
Ans. To avoid JPEG corruption:
Safely eject media
Use a stable network
Backup and scan regularly
Avoid repetitive editing
Stable power and transfer
Q7: How to recover corrupted photos in Android?
Ans. To recover corrupted photos on Android, use specialized JPEG repair software like Notchox on a computer. Connect your Android device via USB, scan for corrupted files, and restore them. Alternatively, you can try changing the file extension (e.g., .jpg to .png) and clearing app caches. If the photo is missing altogether rather than damaged, you can recover deleted photos from Android and iPhone as well.
Q8: How to recover corrupted JPEG files from SD card?
Ans. Recovering corrupted photos on SD cards requires specialized software to fix damaged file structures. Use JPEG repair tools like Notchox to successfully fix corrupted JPEG.
Deeksha Arora is a Data Protection & Recovery Writer focusing on writing accurate, informative, and easy-to-understand technical articles for Notchox’s readers. Her content on the prevention of data loss, understanding risks of device failures, and guides to fix problems helps readers make the right decisions and understand the technical terms easily. She works closely with Subject Matter Experts to ensure high usability and accuracy of her writing.